Телевизоры кинескопные Sony KV-29FX66K - инструкция пользователя по применению, эксплуатации и установке на русском языке. Мы надеемся, она поможет вам решить возникшие у вас вопросы при эксплуатации техники.
Если остались вопросы, задайте их в комментариях после инструкции.
"Загружаем инструкцию", означает, что нужно подождать пока файл загрузится и можно будет его читать онлайн. Некоторые инструкции очень большие и время их появления зависит от вашей скорости интернета.


15
GB
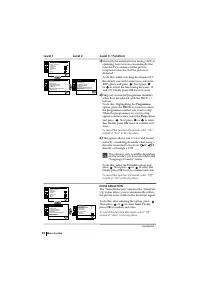
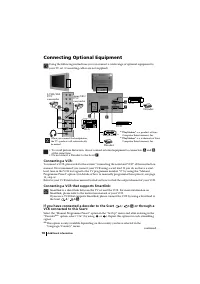
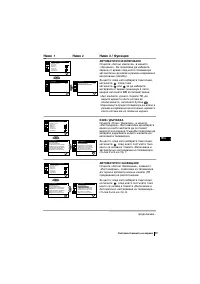
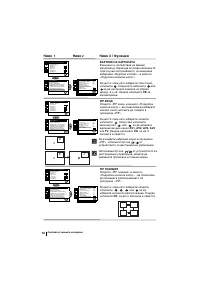
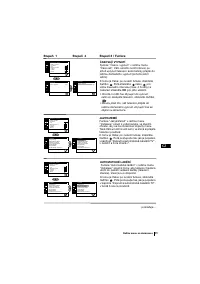
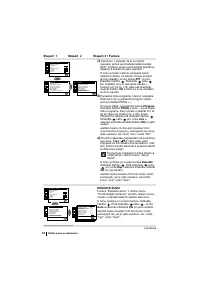
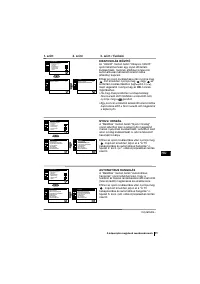
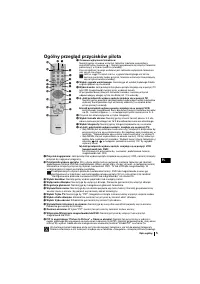
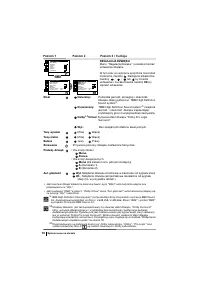
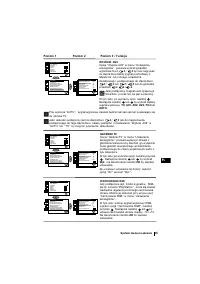
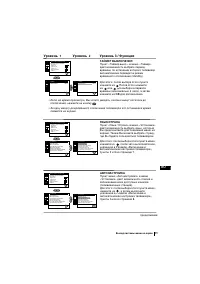
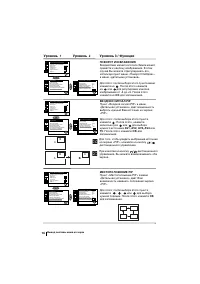
AV3 OUTPUT
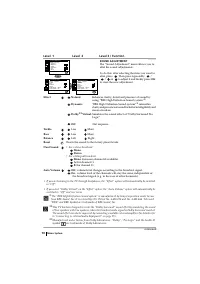
The “AV3 Output” option in the “Detail Set
Up” menu allows you to select the source to be
output from the Scart connector
3
/
3
in
order you can record from this Scart any signal
coming from the TV or from an external
equipment connected to the Scart connectors
1
/
1
or
2
/
2
or side connectors
4
or
4
and
4
.
If your VCR supports Smartlink, this
procedure is not necessary.
To do this: after selecting the option, press
.
Then press
or
to select the desired
output signal:
TV, AV1, AV2, AV4, YC4
or
AUTO
.
If you select “AUTO”, the output signal will always be the same one that is displayed on
the screen.
If you have connected a decoder to the Scart
3
/
3
or to a VCR connected to this
Scart, please remember to change back the “AV3 Output” to “AUTO” or “TV” for correct
unscrambling.
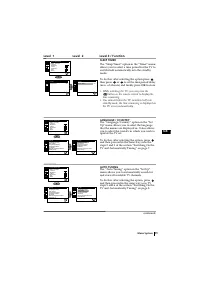
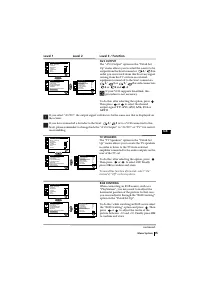
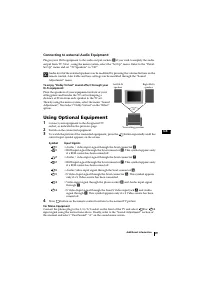
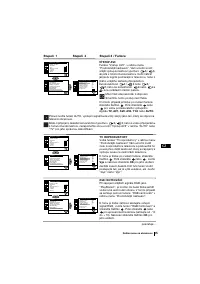
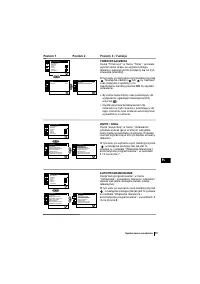
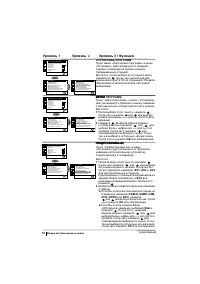
TV SPEAKERS
The “TV Speakers” option in the “Detail Set
Up” menu allows you to mute the TV speakers
in order to listen to the TV from external
amplifier connected to the audio outputs on the
rear of the TV set.
To do this: after selecting the option, press
.
Then press
or
to select
Off
. Finally
press
OK
to confirm and store.
To cancel this function afterwards, select “On”
instead of “Off” in the step above.
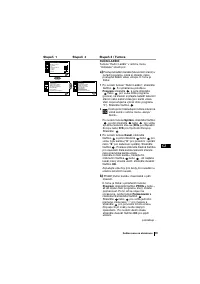
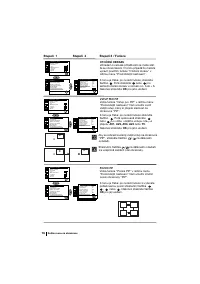
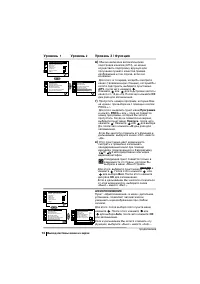
RGB CENTRING
When connecting an RGB source, such as a
“PlayStation”, you may need to readjust the
horizontal position of the picture. In that case,
you can readjust it through the “RGB Centring”
option in the “Detail Set Up”.
To do this: while watching an RGB source select
the “RGB Centring” option and press
. Then
press
or
to adjust the centre of the
picture between –10 and +10. Finally press
OK
to confirm and store.
S
S
S
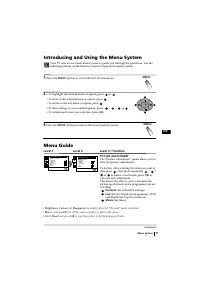
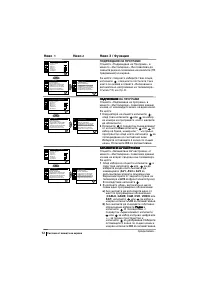
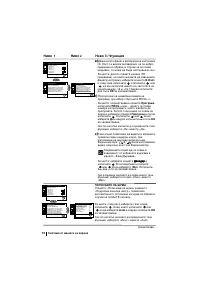
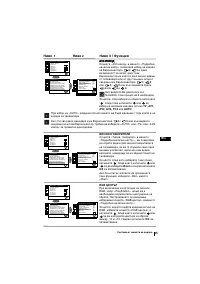
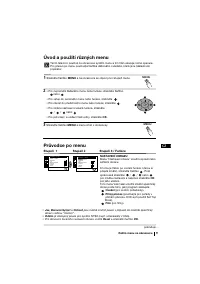
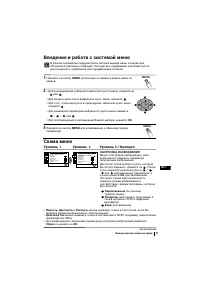
Menu System
Level 1
Level 2
Level 3 / Function
continued...
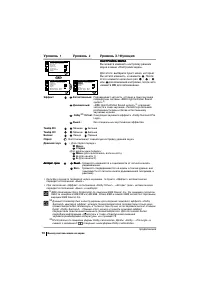
Picture Adjustment
Mode: Personal
Contrast
Brightness
Colour
Sharpness
Hue
Reset
OK
Set Up
Language/Country
Auto Tuning
Programme Sorting
Progamme Labels
AV Preset
Manual Programme Preset
Detail Set Up
OK
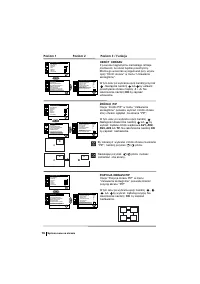
Detail Set Up
Noise Reduction:
AV3 Output:
TV Speakers:
RGB Centring:
Picture Rotation:
PIP Input:
AV1
PIP Position:
Auto
TV
On
0
0
OK
Picture Adjustment
Mode: Personal
Contrast
Brightness
Colour
Sharpness
Hue
Reset
OK
Set Up
Language/Country
Auto Tuning
Programme Sorting
Progamme Labels
AV Preset
Manual Programme Preset
Detail Set Up
OK
Detail Set Up
Noise Reduction:
AV3 Output:
TV Speakers:
RGB Centring:
Picture Rotation:
PIP Input:
AV1
PIP Position:
Auto
TV
On
0
0
OK
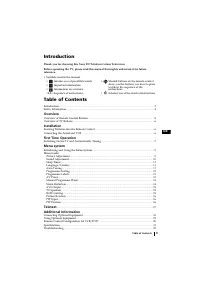
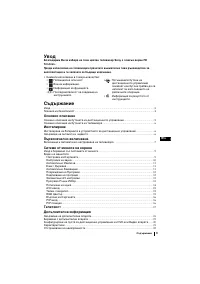
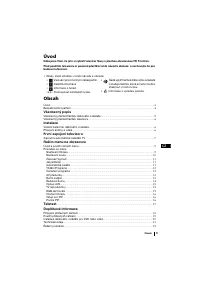
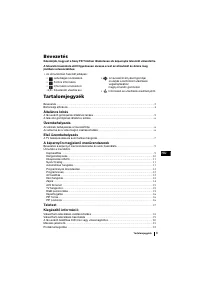
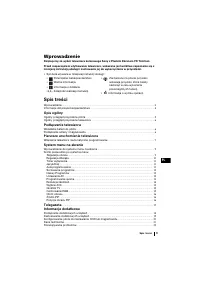
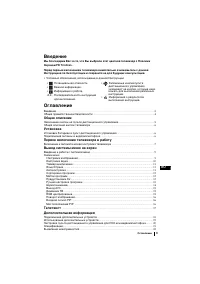
Содержание
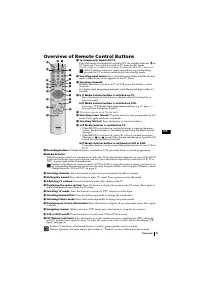
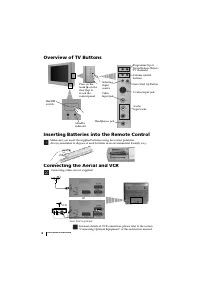
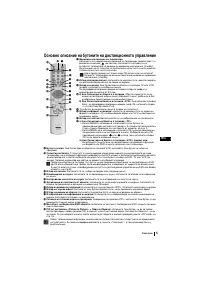
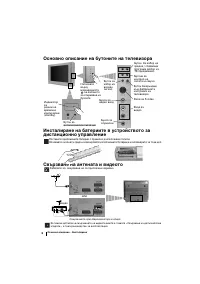
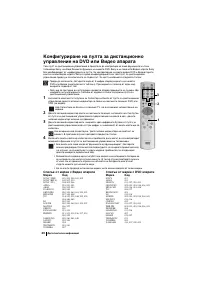
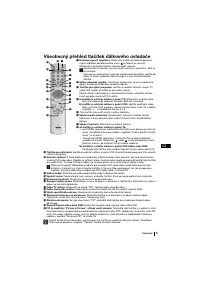
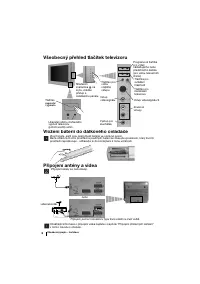
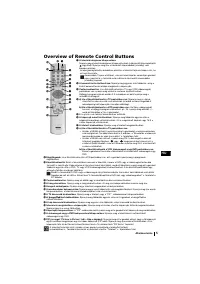
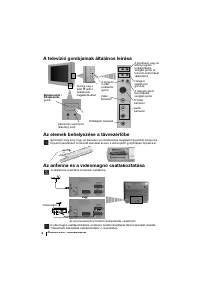
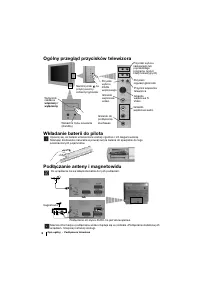
- 104 Назначение кнопок на пульте дистанционного управления; Общее описание
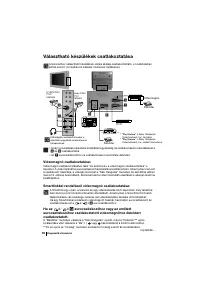
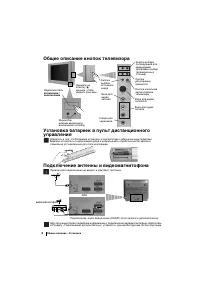
- 105 Подключение антенны и видеомагнитофона; Общее описание - Установка; выключение; выключение; видеомагнитофон; Провода для подключения не входят в комплект поставки.
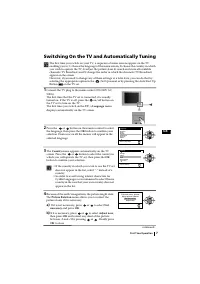
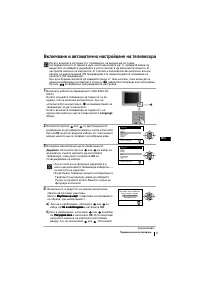
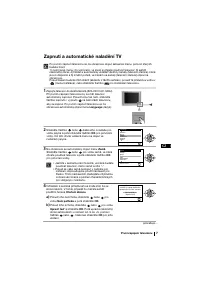
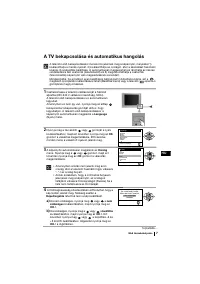
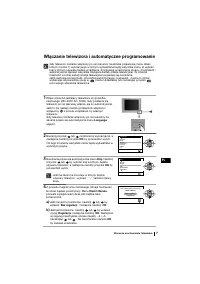
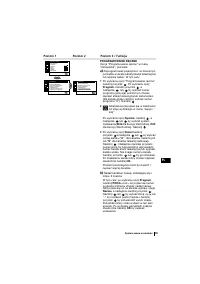
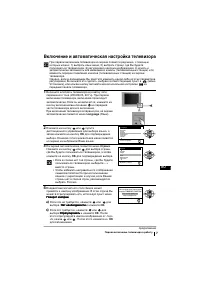
- 106 Включение и автоматическая настройка телевизора; Первое включение телевизора в работу
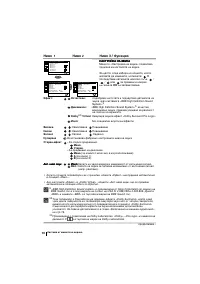
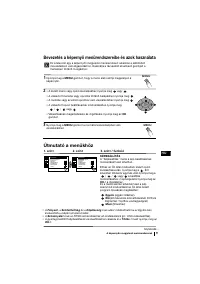
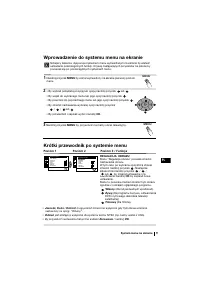
- 108 Введение и работа с системой меню; Вывод системы меню на экран; Схема меню; Уровень; Резкость; можно изменить только в том случае, если Вы; Цветовой Тон; можно изменять только в системе цвета NTSC (например, видеопленки; Сброс; и нажмите на
- 109 Dolby
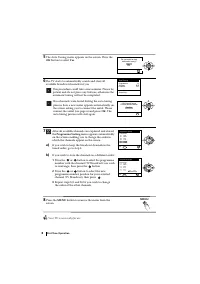
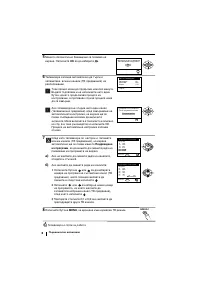
- 110 ТАЙМЕР ВЫКЛЮЧЕНИЯ; После этого нажмите; отключения, нажмите на кнопку; АВТОНАСТРОЙКА; продолжeниe
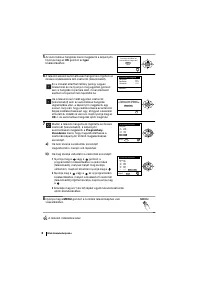
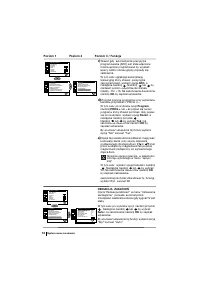
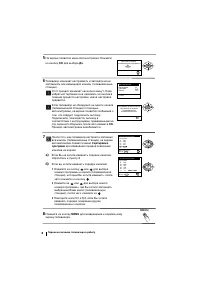
- 112 Повторите все эти шаги для настройки и
- 113 Если Вы захотите отменить эту функцию в
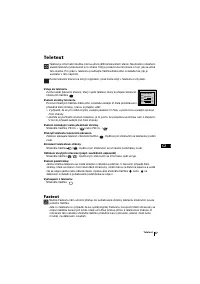
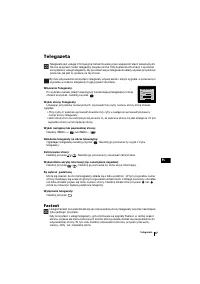
- 116 В этом случае введите другой номер страницы.; Фастекст
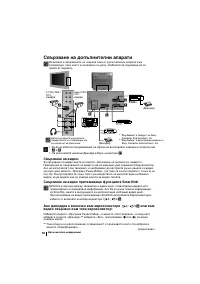
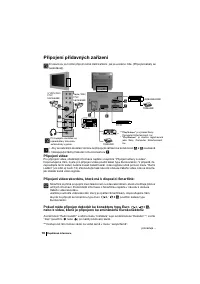
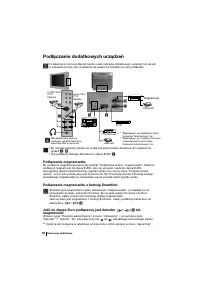
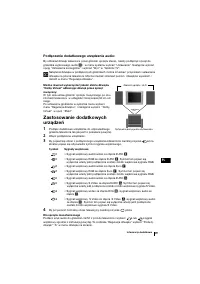
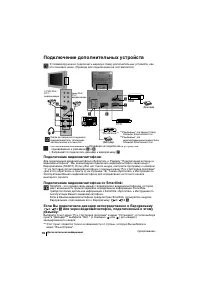
- 117 Подключение дополнительных устройств; Подключение видеомагнитофона:; Дополнительная информация
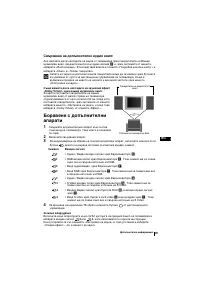
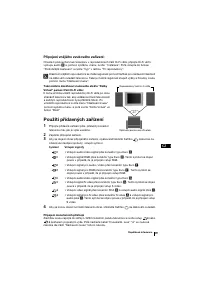
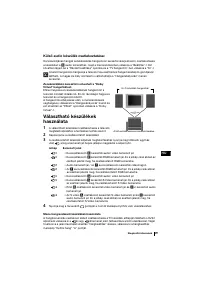
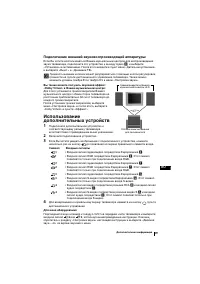
- 118 Подключение внeшнeй звyкoвocпpoизвoдящeй aппapaтypы:; ìcÚaÌoÇÍa; Вы также можете получить звуковой эффект; Использование
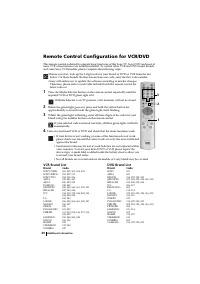
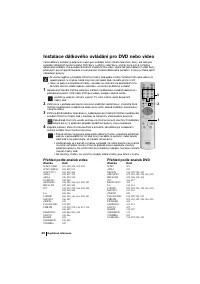
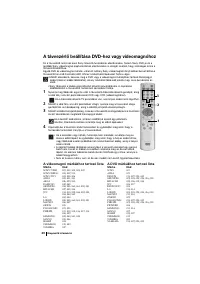
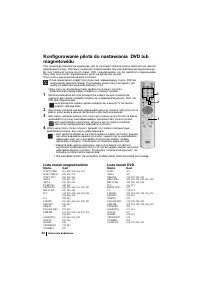
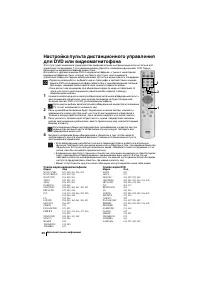
- 119 Cписок марок видеомагнитофонов
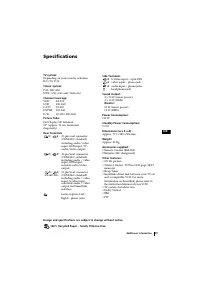
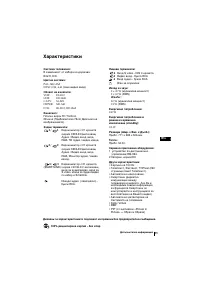
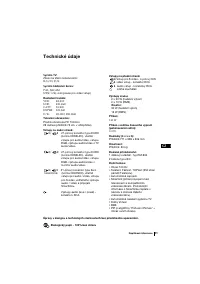
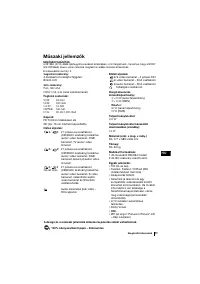
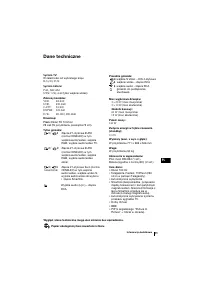
- 120 Спецификации; Otæezataho b Ncæahnn
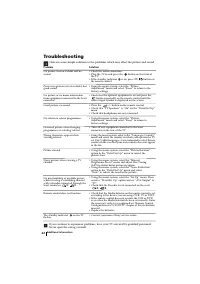
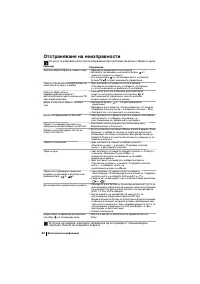
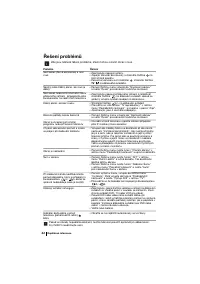
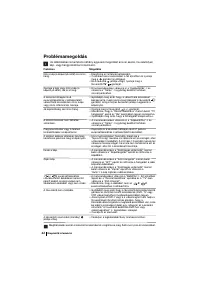
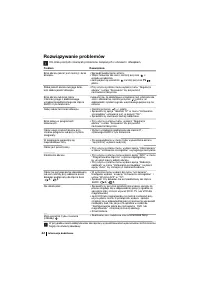
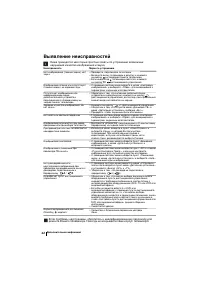
- 121 Выявление неисправностей; нарушений качества изображения и звука.; Неисправность


Не получается настроить в ручную цвет и яркость пульт большой никак у вас на картинке а намоем нет лево право ок. Что делать