Телевизоры кинескопные Sony KV-29FQ75K - инструкция пользователя по применению, эксплуатации и установке на русском языке. Мы надеемся, она поможет вам решить возникшие у вас вопросы при эксплуатации техники.
Если остались вопросы, задайте их в комментариях после инструкции.
"Загружаем инструкцию", означает, что нужно подождать пока файл загрузится и можно будет его читать онлайн. Некоторые инструкции очень большие и время их появления зависит от вашей скорости интернета.


12
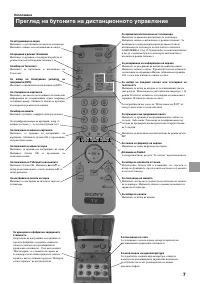
Operation
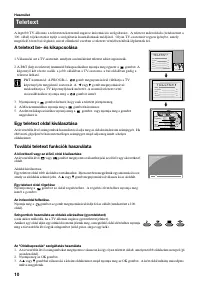
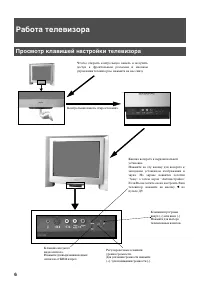
The TV consists of a menu system which is based on a series of user friendly on-screen displays and menus. These displays will
help you get the most from your TV, helping you to change picture and sound settings, to alter the size of the TV picture and to
rearrange the TV channels etc.
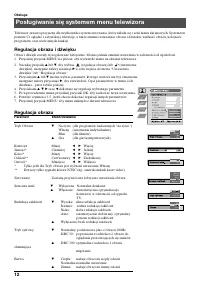
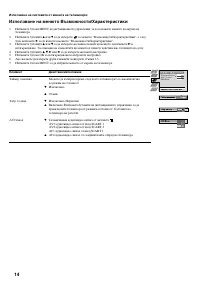
Adjusting the picture and sound
The picture and sound are preset at the factory. You can however adjust them to suit your own taste.
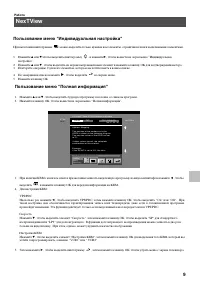
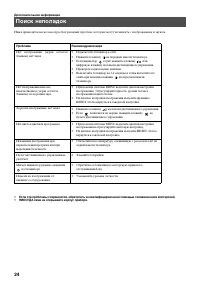
Using the TV menu system
AI
On
Off
Picture Mode
Live
Personal
Movie
Game
Digital Mode
Normal
DRC 50
DRC 100
Contrast
Picture Adjustment
Select:
Enter:
Picture Mode
Contrast
Brightness
Colour
Sharpness
Reset
AI
Noise Reduction
Digital Mode
Colour Tone
Personal
On
On
DRC 100
Normal
Noise Reduction
High
Mid
Low
Auto
Off
Colour Tone
Normal
Cool
Warm
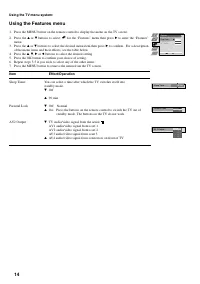
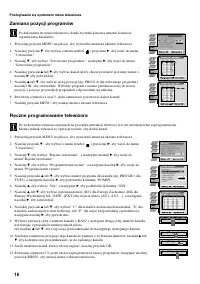
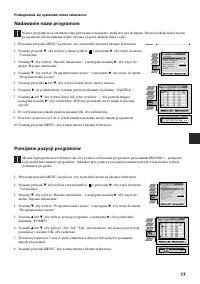
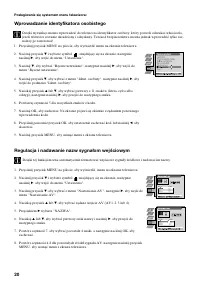
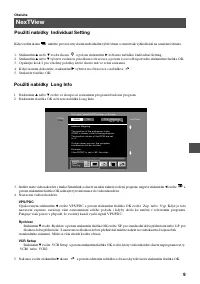
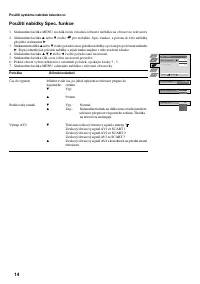
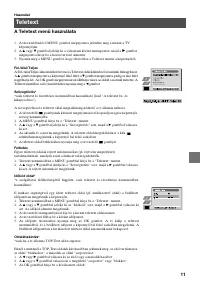
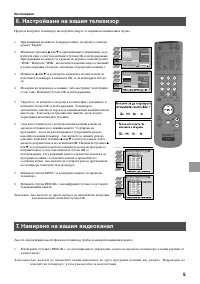
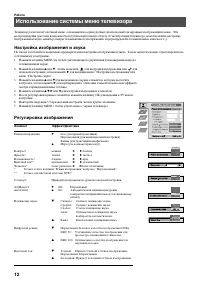
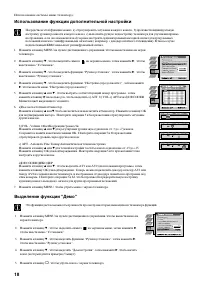
1. Press the MENU button on the remote control to display the menu on the TV screen.
2. Press the
v
or
V
buttons to select
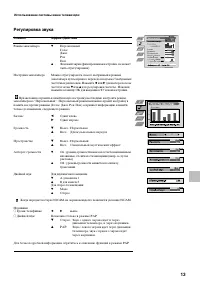
for picture settings or
for sound settings then
press
B
to enter either the ‘Picture Adjustment’ menu or the ‘Audio Adjustment’ menu.
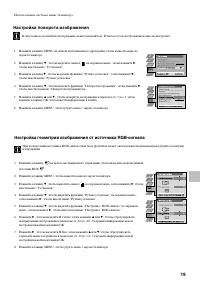
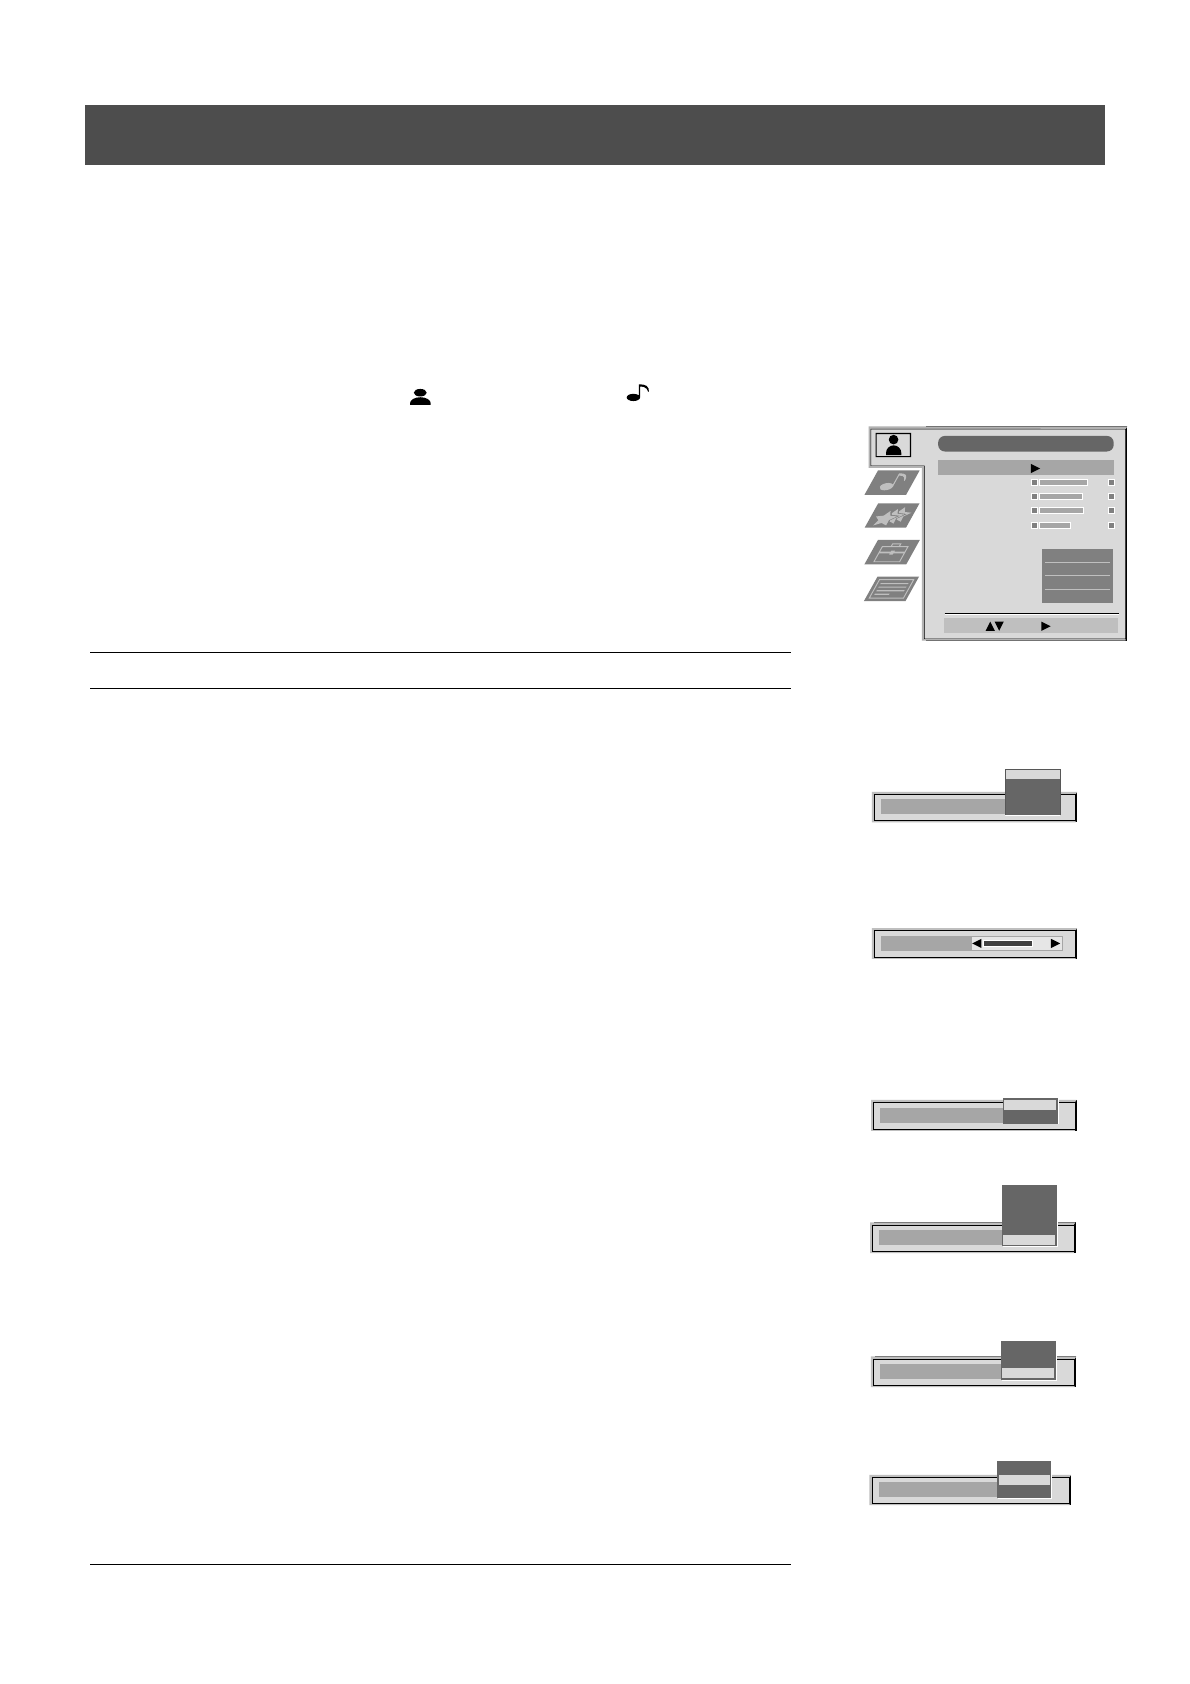
3. Press the
v
or
V
buttons to select the item on the screen you wish to adjust then press
B
to
confirm. For a description of the menu items and their effects, see the table below.
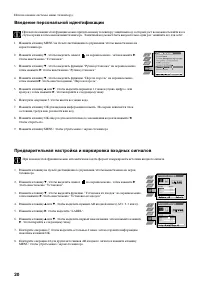
4. Press the
v
,
V
,
B
or
b
buttons to adjust your selected item.
5. As soon as you have adjusted the item, press the OK button to store the new setting.
6. Repeat steps 3-5 if you wish to adjust any of the other items.
7. Press the MENU button to remove the menu from the TV screen.
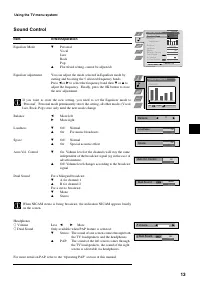
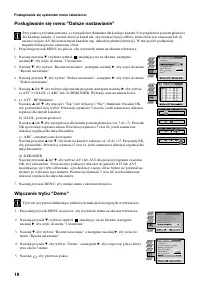
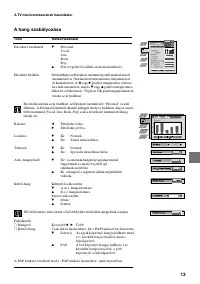
Picture Control
Item
Effect/Operation
Picture Mode
V
Live (for live broadcasts)
Personal (for individual settings)
Movie (for movie broadcasts)
v
Game (for computer games)
Contrast
Less
b B
More
Brightness*
Darker
b B
Brighter
Colour*
Less
b B
More
Hue**
Reddish
b B
Greenish
Sharpness*
Softer
b B
Sharper
*Only available if ’Personal’ is selected in ‘Picture Mode’
**Only available for NTSC colour signal (eg. US video tapes)
Reset
Resets picture to the factory preset levels
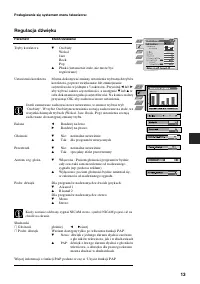
AI
V
Off: Normal
(Artificial Intelligence)
v
On:
Automatic optimization of contrast level
according to the TV signal.
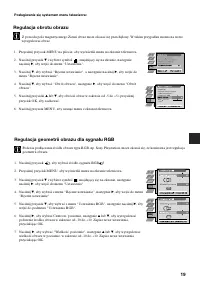
Noise Reduction
V
High: High noise reduction.
Mid:
Medium noise reduction.
Low: Low noise reduction.
Auto: Optimum noise reduction automatically selected.
v
Off:
No noise reduction.
Digital Mode
V
Normal:
Basic 100Hz picture quality
DRC 50: Improved picture resolution for viewing
scrolling characters
v
DRC 100: Optimum picture resolution creating
flicker-free pictures
Colour Tone
V
Warm:
Gives a warm tint to the picture.
Normal:
Normal.
v
Cool:
Gives a cool tint to the picture.


