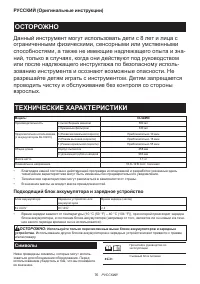
Строительные пылесосы Makita CL114FDWI - инструкция пользователя по применению, эксплуатации и установке на русском языке. Мы надеемся, она поможет вам решить возникшие у вас вопросы при эксплуатации техники.
Если остались вопросы, задайте их в комментариях после инструкции.
"Загружаем инструкцию", означает, что нужно подождать пока файл загрузится и можно будет его читать онлайн. Некоторые инструкции очень большие и время их появления зависит от вашей скорости интернета.


13
ENGLISH
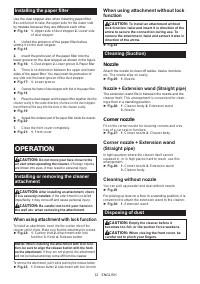
NOTICE:
Never throw away the dust stopper
because it should be used whenever either the
dust bag or the paper filter is used.
NOTICE:
When the dust bag/paper filter is not
inside of the cleaner, the front cover does not close
completely. Do not force to close the front cover. It
may result in deforming or breakage of the cleaner.
NOTICE:
When disposing of dust, also clean the
room for the dust bag/paper filter.
The remaining
dust and dirt in the room may cause the sponge filter
to be clogged or the motor to be damaged.
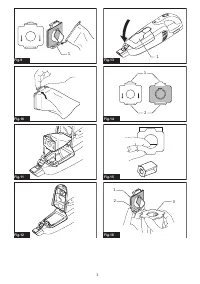
1.
Push the button to open the front cover. Opening it
until a click is heard allows a positive stop at that position.
►
Fig.31:
1.
Front cover
2.
Button
2.
Pull out both the orange-colored dust stopper and
dust bag/paper filter together at the same time.
►
Fig.32:
1.
Dust stopper
3.
Perform the procedures below depending on the
dust container type:
When using the dust bag
Remove the dust stopper and empty the dust bag.
►
Fig.33:
1.
Dust stopper
2.
Dust bag
When using the paper filter
Remove the dust stopper and dispose of the paper filter.
►
Fig.34:
1.
Dust stopper
2.
Paper filter
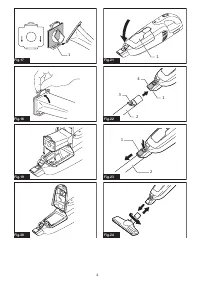
4.
Place the dust bag/new paper filter and dust stop
-
per together into the cleaner and close the front cover.
NOTE:
The cleaner is constructed in such a way that the
front cover comes off when trying to force the front cover
open at the angle of more than 90°. If the front cover
comes off, insert it into the front cover joint in place.
►
Fig.35:
1.
Front cover
2.
Front cover joint
MAINTENANCE
CAUTION:
Always be sure that the appliance
is switched off before attempting to perform
inspection or maintenance.
To maintain product SAFETY and RELIABILITY,
repairs, any other maintenance or adjustment should
be performed by Makita Authorized or Factory Service
Centers, always using Makita replacement parts.
NOTICE:
Never use gasoline, benzine, thinner,
alcohol or the like. Discoloration, deformation or
cracks may result.
After use
When storing or charging the cleaner, lock the nozzle
head, and hang it from a hook available in the market.
►
Fig.36
CAUTION:
Putting the cleaner against the
wall without any other support may cause the
cleaner to fall down and be damaged.
►
Fig.37
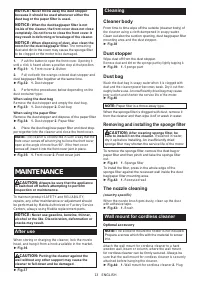
Cleaning
Cleaner body
From time to time wipe off the outside (cleaner body) of
the cleaner using a cloth dampened in soapy water.
Clean out also the suction opening, dust bag/paper filter
mounting area and the dust stopper.
►
Fig.38
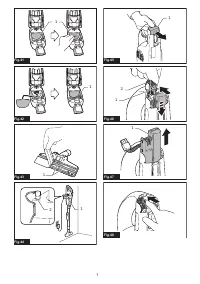
Dust stopper
Wipe dust off from the dust stopper.
Remove dust and dirt on the sponge part by lightly tapping it.
►
Fig.39:
1.
Sponge part
Dust bag
Wash the dust bag in soapy water when it is clogged with
dust and the cleaner power becomes weak. Dry it out thor-
oughly before use. An insufficiently dried bag may cause
poor suction and shorten the service life of the motor.
►
Fig.40
NOTE:
Paper filter is a throw-away type.
When the sponge filter is clogged with dust, remove it
from the cleaner and then wipe it off or wash in water.
Removing and installing the sponge filter
CAUTION:
After cleaning sponge filter, be
sure to install it on the cleaner.
If washed in water,
dry it up before installing. An insufficiently dried
sponge filter may shorten the service life of the motor.
To remove the sponge filter, remove the dust bag or
paper filter and then pinch and take the sponge filter
out.
►
Fig.41:
1.
Sponge filter
To install the filter, press in the whole edge of the
sponge filter against the recessed wall inside the dust
bag/paper filter mounting area.
►
Fig.42:
1.
Recessed wall
The nozzle cleaning
(country specific)
When the nozzle brush gets dusty, clean up the dust
with adhesive tape.
►
Fig.43:
1.
Brush
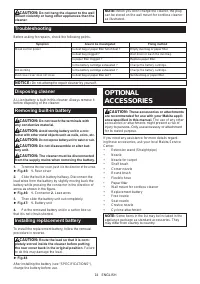
Wall mount for cordless cleaner
Optional accessory
NOTE:
The screw to mount the holder is not included.
Prepare a screw which fits with the material to screw
into.
Attach the wall mount for cordless cleaner to a hard
wooden wall, beam or column, where the wall mount
for cordless cleaner can be firmly secured. Always be
sure that the wall mount for cordless cleaner is securely
attached before hanging the cleaner.
►
Fig.44:
1.
Wall mount for cordless cleaner
2.
Plug
Содержание
- 77 Назначение; МЕРЫ БЕЗОПАСНОСТИ; Правила техники безопасности; СОХРАНИТЕ ДАННЫЕ
- 78 ВАЖНЫЕ ИНСТРУКЦИИ ПО; ДЛЯ ВСТРОЕННОГО; Советы по обеспечению
- 79 ОПИСАНИЕ РАБОТЫ; Зарядка встроенного аккумулятора; СБОРКА
- 80 Пылесборный мешок и бумажный
- 81 ЭКСПЛУАТАЦИЯ; Установка или удаление насадки
- 82 ОБСЛУЖИВАНИЕ; После использования
- 83 Устранение неполадок; Утилизация пылесоса; ДОПОЛНИТЕЛЬНЫЕ
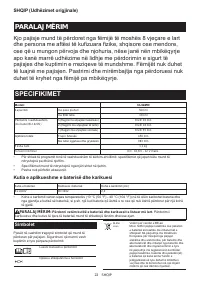
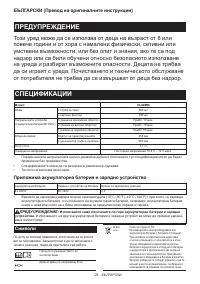
Характеристики

Остались вопросы?Не нашли свой ответ в руководстве или возникли другие проблемы? Задайте свой вопрос в форме ниже с подробным описанием вашей ситуации, чтобы другие люди и специалисты смогли дать на него ответ. Если вы знаете как решить проблему другого человека, пожалуйста, подскажите ему :)


