Стиральная машина Gorenje WTD 63111 - инструкция пользователя по применению, эксплуатации и установке на русском языке. Мы надеемся, она поможет вам решить возникшие у вас вопросы при эксплуатации техники.
Если остались вопросы, задайте их в комментариях после инструкции.
"Загружаем инструкцию", означает, что нужно подождать пока файл загрузится и можно будет его читать онлайн. Некоторые инструкции очень большие и время их появления зависит от вашей скорости интернета.


11
EN
10
EN
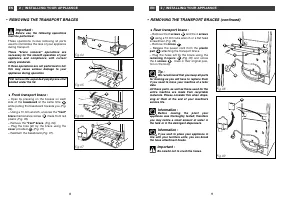
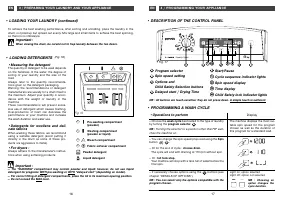
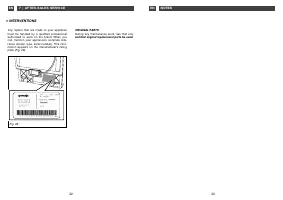
2 / INSTALLING YOUR APPLIANCE
• CONNECTING YOUR APPLIANCE
— Connect the intake hose to a valve with a
threaded end Ø 20x27 (3/4 BSP).
Check presence of the seal.
Water intake :
— Min. water pressure : 0,1 MPa or 1 bar
— Max. water pressure :
1 MPa or 10 bars
•
•
Electrical power supply
(Fig. 13)
:
The electrical installation must comply with
the prevailing standards and the Electricity
Board’s regulations in the country concerned,
in particular for the earth electrode.
We cannot be held liable for any incident cau-
sed by incorrect electrical installation.
Tip :
Tips for electrical installation of your
appliance :
— Do not use an extension cord, adaptor or
multiple plug.
— Never remove the grounding.
— The plug must be easy to access but out of
the reach of children.
In the event of uncertainty, consult your ins-
taller.
•
•
Cold water supply
(Fig. 13)
:
— Connect the emptying hose :
- either temporarily, to a sink or bathtub
- or permanently, to a ventilated siphon.
If your set-up does not have a ventilated
siphon, ensure that the connection is not
watertight.
In fact, to prevent waste water from returning
to the machine, we strongly recommend lea-
ving free space between the machine's emp-
tying hose and the discharge pipe.
In any case, the emptying crosshead must be
placed at a height of 0.80 m to 1.10 m in rela-
tion to the base of the machine.
Important :
Ensure the emptying hose is supported
using an attachment to prevent the cross-
head from coming off during emptying and
causing a flood.
Important :
Your appliance complies with
European directives 2006/95/CE (low vol-
tage directive) and 2004/108/CE (electro-
magnetic compatibility).
•
•
Discharge of waste water
(Fig. 13)
:
2 / INSTALLING YOUR APPLIANCE
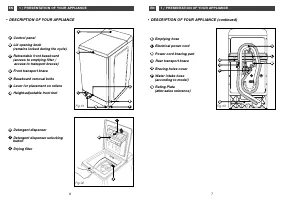
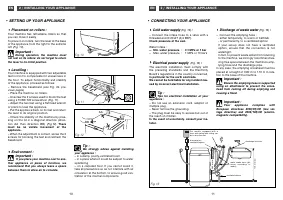
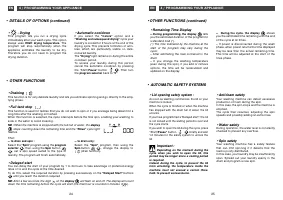
• SETTING UP YOUR APPLIANCE
•
•
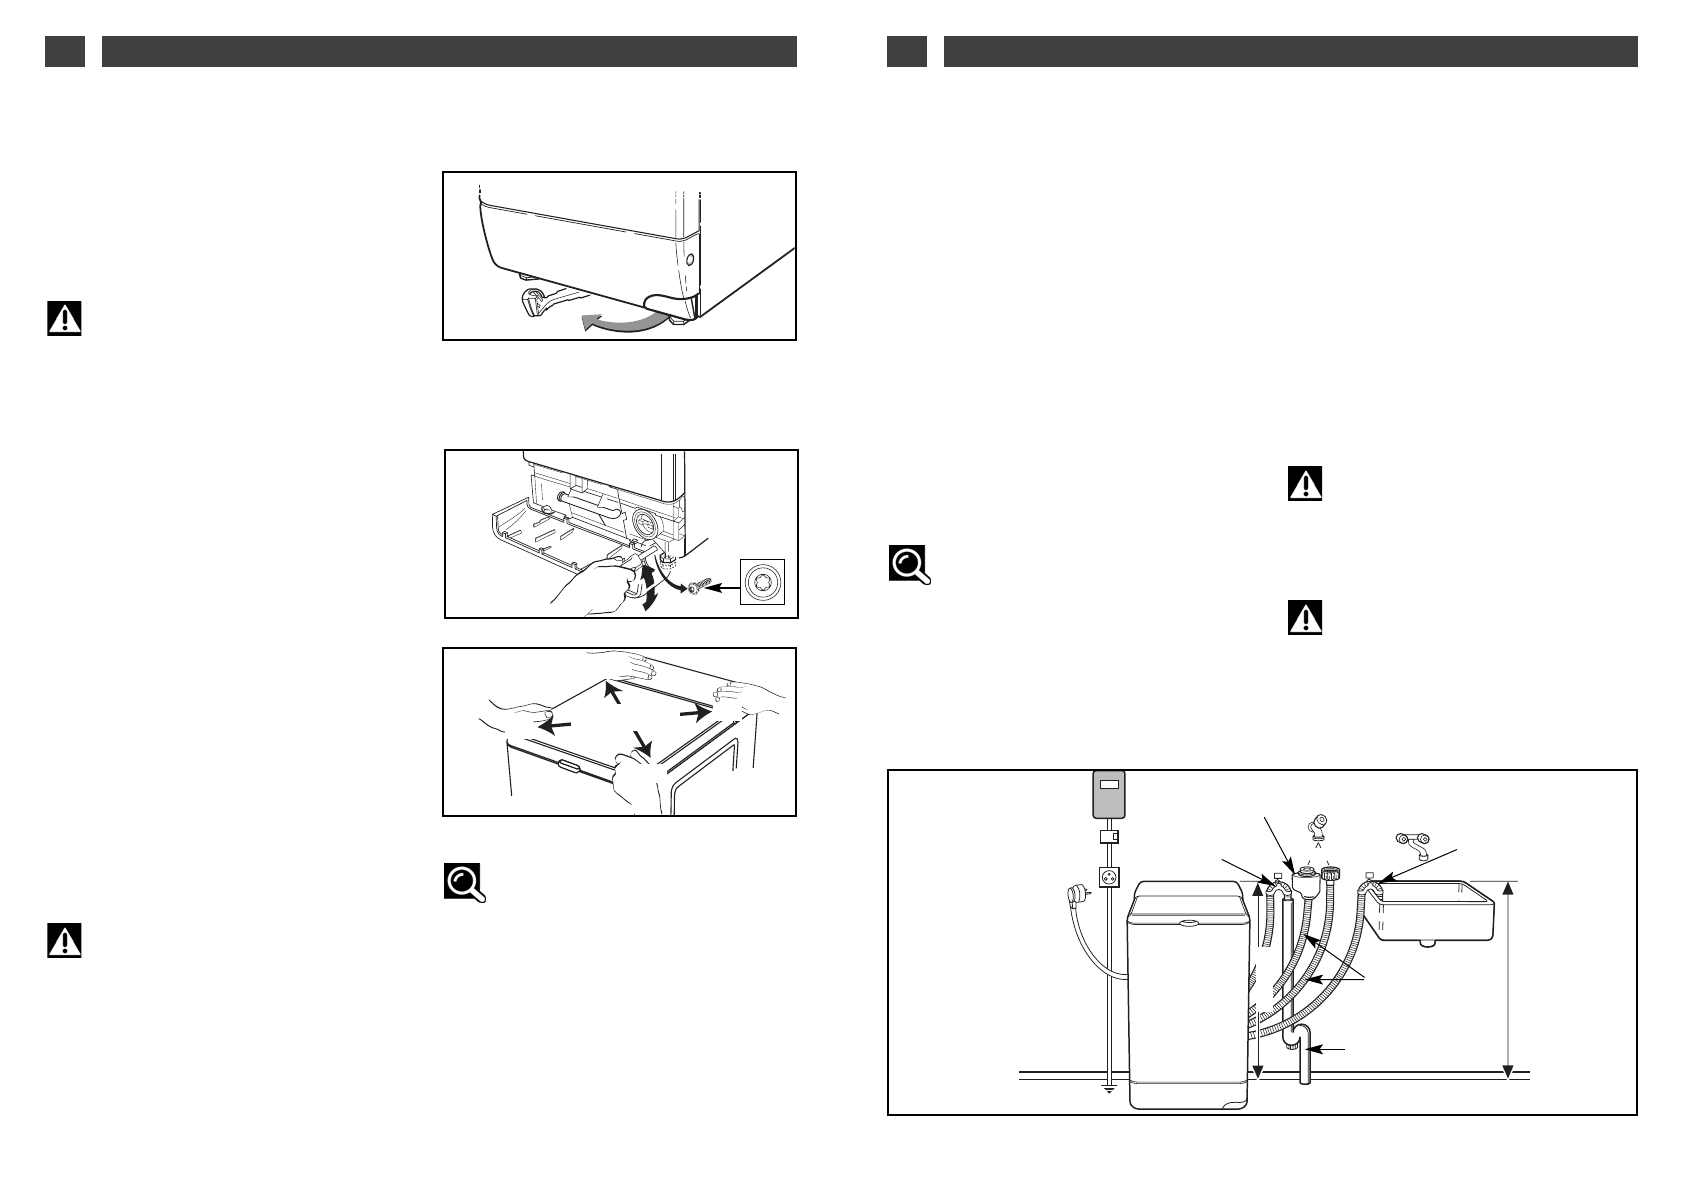
Placement on rollers :
Your machine has retractable rollers so that
you can move it easily.
To place it on rollers, turn the lever at the base
of the appliance from the right to the extreme
left
(Fig. 10).
Important :
During operation, the machine must
not rest on its rollers: do not forget to return
the lever to its initial position.
•
•
Levelling :
Your machine is equipped with two adjustable
feet in front to compensate for unevenness in
the floor. To adjust horizontality and stability
of the appliance, proceed as follows:
— Remove the baseboard
(see Fig. 04, pre-
vious pages).
— Place the machine on rollers.
— Unscrew the 2 screws used to block the feet
using a TORX T20 screwdriver
(Fig. 11).
— Adjust the two feet using a flat head wrench
or pliers to level the appliance.
— Put the appliance back on its feet and return
the lever to its original position.
— Check the stability of the machine by pres-
sing on the lid in a diagonal direction (direc-
tion AA then direction BB)
(Fig.12).
There
must be no visible movement of the
appliance.
— When the adjustment is correct, screw the 2
screws for blocking the feet and reattach the
baseboard.
•
•
Environment :
Important :
If you place your machine next to ano-
ther appliance or piece of furniture, we
recommend that you always leave a space
between them to allow air to circulate.
Fig. 10
Tip :
We strongly advise against installing
your appliance :
— in a damp, poorly-ventilated room.
— in a place where it could be subject to water
splattering.
— on a carpeted floor. If you cannot avoid it,
take all precautions so as not interfere with air
circulation at the bottom, to ensure good ven-
tilation of the internal components.
Fig. 12
AA
AA
BB
BB
Fig. 11
Fig. 13
For models equipped with a
hose with safety box: fitting can
be in any direction
or
discharge into sink
1
,1
0
m maxi
0,80 m mini
ventilated siphon
water intake hose (dif-
ferent according to
model)
discharge on
ventilated siphon


