Швейная машина Singer 4423 - инструкция пользователя по применению, эксплуатации и установке на русском языке. Мы надеемся, она поможет вам решить возникшие у вас вопросы при эксплуатации техники.
Если остались вопросы, задайте их в комментариях после инструкции.
"Загружаем инструкцию", означает, что нужно подождать пока файл загрузится и можно будет его читать онлайн. Некоторые инструкции очень большие и время их появления зависит от вашей скорости интернета.

22
4
3
1
2
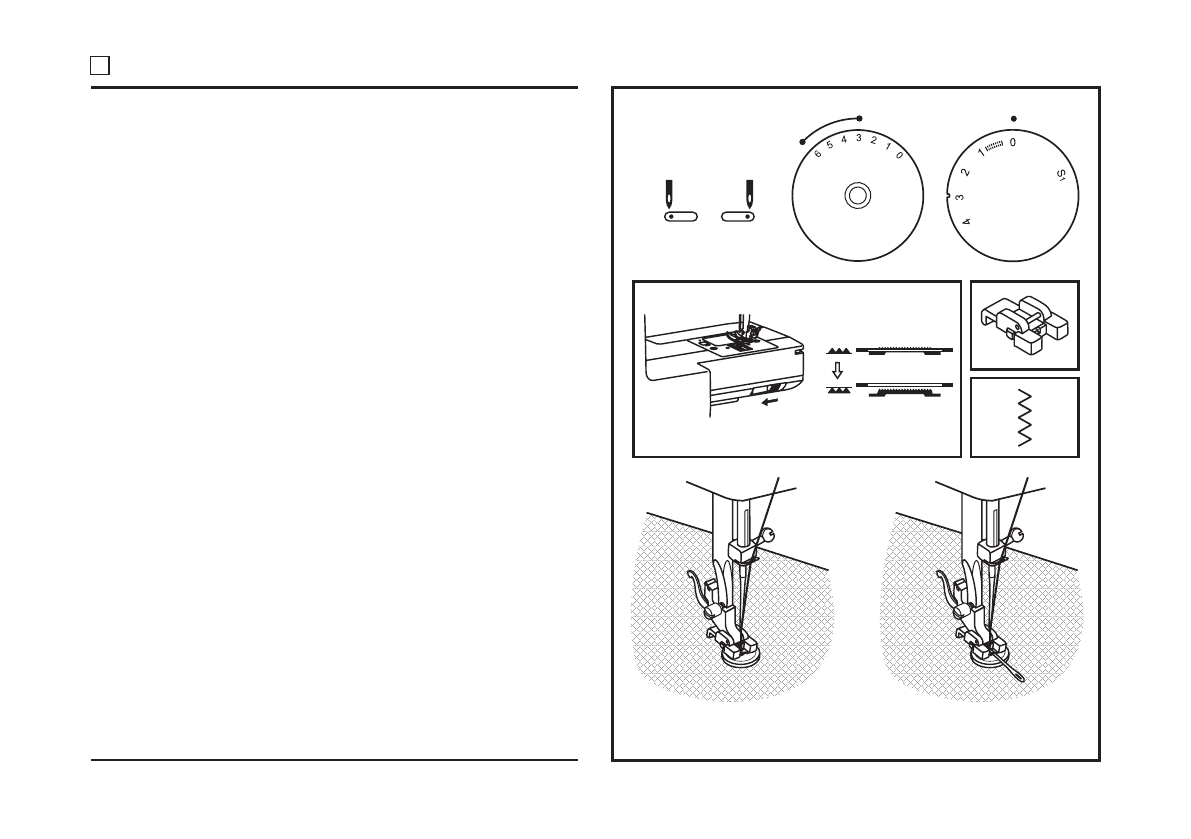
Move the drop feed control to right side to lower the feed
dogs. (1)
Change the all purpose foot to the button sewing foot. (2)
Set the stitch length to "0".
Set the machine for zig-zag stitch, then set the width to
number "3" - "6". Turn the handwheel to check that the
needle goes cleanly into the left and right holes of the button.
Adjust the stitch width, as needed, according to the distance
between the holes of the button. Slowly sew on the button
with about 10 stitches.
Raise the needle out of the fabric. Set the machine for straight
If a shank is required, place a darning needle on top of the
button and sew. For buttons with 4 holes, sew through the
front two holes first, push the work forward and then sew
through the back two holes.
Place the button and fabric under the Button Sewing foot, as
illustrated in (3).
stitch again, then sew a few securing stitches to finish.
L
R
a
b
a
b
Sewing on Buttons
Характеристики
Остались вопросы?Не нашли свой ответ в руководстве или возникли другие проблемы? Задайте свой вопрос в форме ниже с подробным описанием вашей ситуации, чтобы другие люди и специалисты смогли дать на него ответ. Если вы знаете как решить проблему другого человека, пожалуйста, подскажите ему :)


