
Шуруповерты Makita FS4300JX2 - инструкция пользователя по применению, эксплуатации и установке на русском языке. Мы надеемся, она поможет вам решить возникшие у вас вопросы при эксплуатации техники.
Если остались вопросы, задайте их в комментариях после инструкции.
"Загружаем инструкцию", означает, что нужно подождать пока файл загрузится и можно будет его читать онлайн. Некоторые инструкции очень большие и время их появления зависит от вашей скорости интернета.


8 ENGLISH
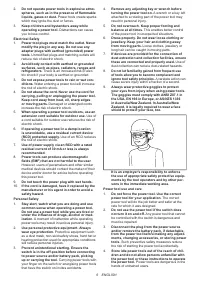
Lighting up the lamps
For model FS4200, FS4300, FS4300X,
FS6200, FS6300, FS6300R, FS6300X
►
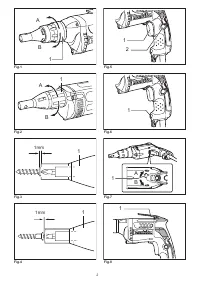
Fig.6:
1.
Lamp
CAUTION:
•
Do not look in the light or see the source of light
directly.
To turn on the lamp, pull the trigger. Release the trigger
to turn it off.
NOTE:
•
Use a dry cloth to wipe the dirt off the lens of
lamp. Be careful not to scratch the lens of lamp,
or it may lower the illumination.
Reversing switch action
►
Fig.7:
1.
Reversing switch lever
CAUTION:
•
Always check the direction of rotation before
operation.
•
Use the reversing switch only after the tool
comes to a complete stop. Changing the direc-
tion of rotation before the tool stops may dam
-
age the tool.
This tool has a reversing switch to change the direc-
tion of rotation. Move the reversing switch lever
to the
position (A side) for clockwise rotation or
the
position (B side) for counterclockwise rotation.
Hook
►
Fig.8:
1.
Hook
The hook is convenient for temporarily hanging the tool.
ASSEMBLY
CAUTION:
•
Always be sure that the tool is switched off and
unplugged before carrying out any work on the tool.
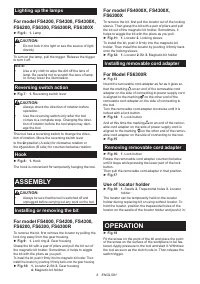
Installing or removing the bit
For model FS4000, FS4200, FS4300,
FS6200, FS6300, FS6300R
To remove the bit, first remove the locator by pulling the
lock ring away from the gear housing.
►
Fig.9:
1.
Lock ring
2.
Gear housing
Grasp the bit with a pair of pliers and pull the bit out of
the magnetic bit holder. Sometimes, it helps to wiggle
the bit with the pliers as you pull.
To install the bit, push it firmly into the magnetic bit holder. Then
install the locator by pushing it firmly back onto the gear housing.
►
Fig.10:
1.
Locator
2.
Bit
3.
Gear housing
4.
Magnetic bit holder
For model FS4000X, FS4300X,
FS6300X
To remove the bit, first pull the locator out of the locking
sleeve. Then grasp the bit with a pair of pliers and pull
the bit out of the magnetic bit holder. Sometimes, it
helps to wiggle the bit with the pliers as you pull.
►
Fig.11:
1.
Locator
2.
Locking sleeve
To install the bit, push it firmly into the magnetic bit
holder. Then install the locator by pushing it firmly back
onto the locking sleeve.
►
Fig.12:
1.
Locator
2.
Bit
3.
Magnetic bit holder
Installing removable cord adapter
For Model FS6300R
►
Fig.13
Insert the removable cord adapter as far as it goes so
that the marking
on an end of the removable cord
adapter on the side of connecting to power supply cord
is aligned to the marking
on the other end of the
removable cord adapter on the side of connecting to
the tool.
Turn the removable cord adapter clockwise until it is
locked with a lock button.
►
Fig.14:
1.
Lock button
And at this time the marking
on an end of the remov-
able cord adapter on the side of power supply cord is
aligned to the marking
on the other end of the remov-
able cord adapter on the side of connecting to the tool.
►
Fig.15
Removing removable cord adapter
►
Fig.16:
1.
Lock button
Rotate the removable cord adapter counterclockwise
until it stops while pressing the lower part of the lock
button.
Then pull the removable cord adapter in that position.
►
Fig.17
Use of locator holder
►
Fig.18:
1.
Swells
2.
Trapezoidal holes
3.
Locator
holder
The locator can be temporarily held on the locator
holder during replacing bit or using without locator. To
hold the locator, position the trapezoidal holes of the
locator on the swells of the locator holder and push it in.
OPERATION
►
Fig.19
Fit the screw on the point of the bit and place the point
of the screw on the surface of the workpiece to be fas
-
tened. Apply pressure to the tool and start it. Withdraw
the tool as soon as the clutch cuts in. Then release the
switch trigger.


