
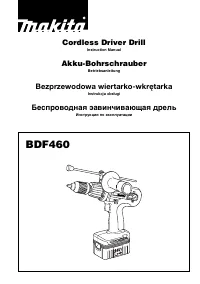
Шуруповерты Makita BDF 460 SJE - инструкция пользователя по применению, эксплуатации и установке на русском языке. Мы надеемся, она поможет вам решить возникшие у вас вопросы при эксплуатации техники.
Если остались вопросы, задайте их в комментариях после инструкции.
"Загружаем инструкцию", означает, что нужно подождать пока файл загрузится и можно будет его читать онлайн. Некоторые инструкции очень большие и время их появления зависит от вашей скорости интернета.


9
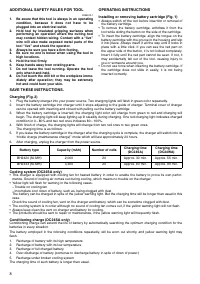
Trickle charge (Maintenance charge)
If you leave the battery car tridge in the charger to prevent spontaneous discharging after full charge, the charger will
switch into its “trickle charge (maintenance charge)” mode and keep the battery car tridge fresh and fully charged.
Tips for maintaining maximum battery life
1.
Charge the battery cartridge before completely discharged.
Always stop tool operation and charge the battery car tridge when you notice less tool power.
2.
Never recharge a fully charged battery cartridge.
Overcharging shor tens the battery service life.
3.
Charge the battery cartridge with room temperature at 10°C – 40°C (50°F – 104°F).
Let a hot battery car tridge cool down before charging it.
4.
Charge the Nickel Metal Hydride batter y car tridge when you do not use it for more than six months.
NOTE:
• The battery charger is for charging Makita-batter y cartridge. Never use it for other purposes or for other manufac-
turer’s batteries.
• When you charge a new battery car tridge or a battery car tridge which has not been used for a long period of time, it
may not accept a full charge. This is a normal condition and does not indicate a problem. You can recharge the bat-
tery cartridge fully after discharging it completely and recharging a couple of times.
• If you charge a battery car tridge from a just-operated tool or battery cartridge which has been left in a location
exposed to direct sunlight for a long time, the charging light may flash in red color. If this occurs, wait for a while.
Charging will begin after the battery car tridge is cooled by the cooling fan installed in the charger (DC24SA only).
When the temperature on battery is more than approx. 70°C, two charging lights may flash in red color, and when
approx. 50°C – 70°C, one charging light in red color.
• If the charging light flashes alternately in green and red color, charging is not possible. The terminals on the charger
or battery cartridge are clogged with dust or the battery car tridge is worn out or damaged.
• Any of the following conditions indicates damage to the charger and/or battery car tridge. Ask your Makita Authorized
or Factory Ser vice Center to check them.
1) The charging light does not flash (green) when the battery charger is plugged into a power source.
2) The charging light does not light up or flash (red) when the battery is inser ted in the charger por t.
3) Charging is not completed at even more than two hours after red light comes ON at start of charging.
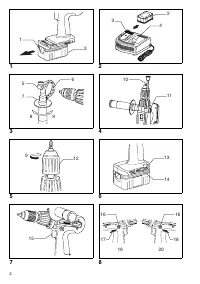
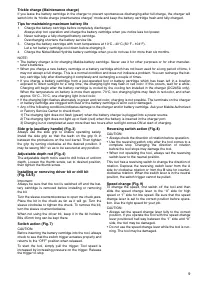
Side grip (auxiliary handle) (Fig. 3)
Always use the side grip to ensure operating safety.
Install the side grip so that the teeth on the grip fit in
between the protrusions on the tool barrel. Then tighten
the grip by turning clockwise at the desired position. It
may be swung 360° so as to be secured at any position.
Adjustable depth rod (Fig. 4)
The adjustable depth rod is used to drill holes of uniform
depth. Loosen the thumb screw, set to desired position,
then tighten the thumb screw.
Installing or removing driver bit or drill bit
(Fig. 5 & 6)
Impor tant:
Always be sure that the tool is switched off and the bat-
ter y car tridge is removed before installing or removing
the bit.
Turn the sleeve counterclockwise to open the chuck jaws.
Place the bit in the chuck as far as it will go. Turn the
sleeve clockwise to tighten the chuck. To remove the bit,
turn the sleeve counterclockwise.
When not using the driver bit, keep it in the bit holders.
Bits 45 mm long can be kept there.
Switch action (Fig. 7)
CAUTION:
Before inserting the battery car tridge into the tool, always
check to see that the switch trigger actuates properly and
returns to the “OFF” position when released.
To star t the tool, simply pull the trigger. Tool speed is
increased by increasing pressure on the trigger. Release
the trigger to stop.
Reversing switch action (Fig. 8)
CAUTION:
• Always check the direction of rotation before operation.
• Use the reversing switch only after the tool comes to a
complete stop. Changing the direction of rotation
before the tool stops may damage the tool.
• When not operating the tool, always set the reversing
switch lever to the neutral position.
This tool has a reversing switch to change the direction of
rotation. Depress the reversing switch lever from the A
side for clockwise rotation or from the B side for counter-
clockwise rotation. When the switch lever is in the neutral
position, the switch trigger cannot be pulled.
Speed change (Fig. 9)
To change the speed, first switch off the tool and then
slide the speed change lever to the “
II
” side for high
speed or “
I
” side for low speed. Be sure that the speed
change lever is set to the correct position before opera-
tion. Use the right speed for your job.
CAUTION:
• Always set the speed change lever fully to the correct
position. If you operate the tool with the speed change
lever positioned half-way between the “
I
” side and “
II
”
side, the tool may be damaged.
• Do not use the speed change lever while the tool is run-
ning. The tool may be damaged.


