
Шуруповерты FERM DIY PMM1010 5010000003 - инструкция пользователя по применению, эксплуатации и установке на русском языке. Мы надеемся, она поможет вам решить возникшие у вас вопросы при эксплуатации техники.
Если остались вопросы, задайте их в комментариях после инструкции.
"Загружаем инструкцию", означает, что нужно подождать пока файл загрузится и можно будет его читать онлайн. Некоторые инструкции очень большие и время их появления зависит от вашей скорости интернета.


6
EN
Technical specifications
Voltage
230-240 V ~
Frequency
50 Hz
Power input
1800 W
No load speed:
Gear 1
180-400/min
Gear 2
300-700/min
Tool mount
M14
Whisk
Ø 140 mm
Weight
4.45 kg
Lpa (sound pressure level)
87.6+3 dB(A)
Lwa (sound power level)
98.6+3 dB(A)
Vibration value
5.187+1,5 m/s
2
Vibration level
The vibration emission level stated in this
instruction manual has been measured in
accordance with a standardised test given in
EN 60745; it may be used to compare one tool
with another and as a preliminary assessment of
exposure to vibration when using the tool for the
applications mentioned:
- using the tool for different applications, or with
different or poorly maintained accessories,
may significantly increase the exposure level.
- the times when the tool is switched off or
when it is running but not actually doing the
job, may significantly reduce the exposure
level.
Protect yourself against the effects of vibration by
maintaining the tool and its accessories, keeping
your hands warm, and organizing your work
patterns
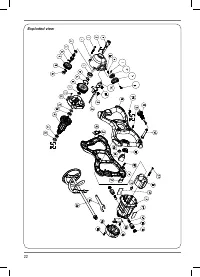
Description
The numbers in the text refer to the diagrams on
page 2.
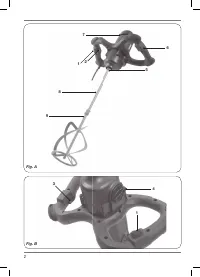
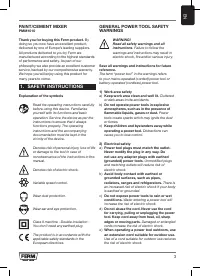
Fig. A
1. On/off switch
2. Lock-on button
3. Speed adjustment wheel
4. Gear selector switch
5. Tool holder
6. Handle
7. Ventilation apertures
8. Whisk shaft
9. Whisk paddle
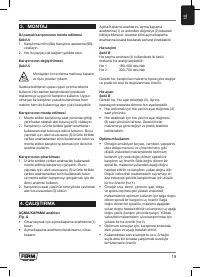
3. ASSEMBLY
Assembling the two-part whisk
Fig. A
1. Screw the Whisk shaft (9A) onto the Whisk
paddle (9B)
2. Tighten both parts securely
Replacing the whisk
Fig. A
Before assembly, always switch off the
machine and remove the mains plug
from the mains.
Use only whisks conform the specified diameter.
Always use a whisk that is suitable for the
material to be mixed/stirred. Using an unsuitable
mixer bar can unnecessarily overload both the
machine and yourself.
Mounting the whisk
1. Screw the assembled whisk into the tool holder
(5) in clockwise direction as far as possible.
2. Tighten the whisk into the tool holder using
the supplied spanners. To do so, hold the tool
holder (5) using one of the supplied spanners,
and use the second spanner to tighten the
assembled whisk.
Removing the whisk
1. Loosen the assembled whisk using the
supplied spanners. To do so, hold the tool
holder (5) using one of the supplied spanners,
and use the second spanner to loosen the
assembled whisk.
2. Unscrew the whisk from the tool holder (5) in
anti-clockwise direction.
4. OPERATION
Switching on and off
Fig. A
• To switch on the tool, press and hold the on/
off switch (1).
• If you release the on/off switch, the tool will be
switched off.
You can lock the on/off switch by pressing the on/off
switch (1) and then button (3). The switch lock can
be released by briefly pressing the on/off switch.
Содержание
- 9 Прочтитевсепредупреждения
- 12 ИНФОРМАЦИЯ О МАШИНЕ
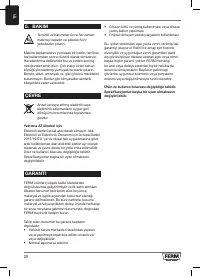
- 14 Оптимальное использование; ОКРУЖАЮЩАЯ СРЕДА; Только для стран ЕС; ГАРАНТИЯ
- 15 В изделие и руководство пользователя; Boya/Çimento Karıştırıcı; Bu sayede artık Avrupa’nın önde gelen; GÜVENLIK TALIMATLARI; Sembollerin açıklaması; Bu kılavuzdaki talimatlara uymama


