
Шуруповерты Bosch GSR 18V-60 FC 0.601.9G7.100 - инструкция пользователя по применению, эксплуатации и установке на русском языке. Мы надеемся, она поможет вам решить возникшие у вас вопросы при эксплуатации техники.
Если остались вопросы, задайте их в комментариях после инструкции.
"Загружаем инструкцию", означает, что нужно подождать пока файл загрузится и можно будет его читать онлайн. Некоторые инструкции очень большие и время их появления зависит от вашей скорости интернета.


18
| English
1 609 92A 3Y7 | (15.12.17)
Bosch Power Tools
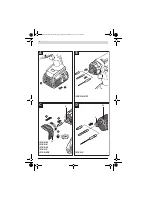
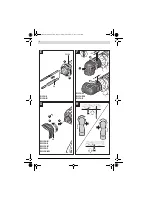
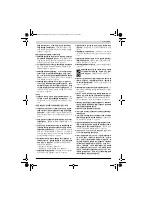
Removing the Adapter (see figure G)
Remove the application tool.
Unlock the adapter in the
direction and pull it off the
mounting
1
.
Dust/Chip Extraction
Dust from materials such as lead-containing coatings,
some wood types, minerals and metal can be harmful to
one’s health. Touching or breathing-in the dust can cause
allergic reactions and/or lead to respiratory infections of
the user or bystanders.
Certain dust, such as oak or beech dust, is considered car-
cinogenic, especially in connection with wood-treatment
additives (chromate, wood preservative). Materials con-
taining asbestos may only be worked by specialists.
–
Provide for good ventilation of the working place.
–
It is recommended to wear a P2 filter-class respirator.
Observe the relevant regulations in your country for the
materials to be worked.
Prevent dust accumulation at the workplace.
Dust can
easily ignite.
Operation
Starting Operation
Inserting the battery
Note:
Use of batteries not suitable for the machine can lead to
malfunctions of or cause damage to the power tool.
Set the rotational direction switch
8
to the centre position in
order to avoid unintentional starting. Insert the charged bat-
tery
5
into the handle so that it can be felt to engage and faces
flush against the handle.
Reversing the rotational direction (see figure H)
The rotational direction switch
8
is used to reverse the rota-
tional direction of the machine. However, this is not possible
with the On/Off switch
9
actuated.
Right Rotation:
For drilling and driving in screws, push the
rotational direction switch
8
left to the stop.
Left Rotation:
For loosening and unscrewing screws and
nuts, press the rotational direction switch
8
through to the
right stop.
Setting the torque
With the torque presetting ring
2
the required torque setting
can be preselected in 15 steps. With the correct setting, the
insert tool is stopped as soon as the screw is screwed flush in-
to the material or when the adjusted torque is reached. The
safety clutch is deactivated in the “
” position, e. g. for
drilling.
Select a higher setting or switch to the “
” symbol when un-
screwing screws.
Gear selection, mechanical
Actuate the gear selector 3 only when the machine is at
a standstill.
Two speed ranges can be preselected with the gear selector
3
.
Gear 1:
Low speed range; for screwdriving or for working with a large
drilling diameter.
Gear 2:
High speed range; for working with a small drilling diameter.
Always push the gear selector through to the stop.
Oth-
erwise, the machine can become damaged.
Switching On and Off
To
start
the machine, press the On/Off switch
9
and keep it
pressed.
The work light
7
illuminates when the On/Off switch
9
is lightly
or fully pressed and allows the illumination of the work area in
poor lighting conditions.
The worklight
7
will remain lit for approx. 10 seconds when
the On/Off switch
9
has been released.
To save energy, only switch the power tool on when using it.
Adjusting the Speed
The speed of the switched-on power tool can be variably ad-
justed, depending on how far the On/Off switch
9
is pressed.
Light pressure on the On/Off switch
9
results in a low rotation-
al speed. Further pressure on the switch results in an increase
in speed.
Fully automatic spindle locking (Auto-lock)
The drill spindle and therefore the mounting are locked when
the On/Off switch
9
is not pressed.
This enables screws to be screwed in, even when the battery
is empty and allows for the machine to be used as a screwdriv-
er.
Temperature Dependent Overload Protection
In normal conditions of use, the power tool cannot be over-
loaded. If the power tool is overloaded or not kept within the
permitted operating temperature range, the power output is
reduced or the power tool is switched off. The power tool will
not run at full power output again until the permitted operat-
ing temperature has been reached.
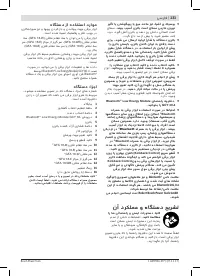
Connectivity functions
In conjunction with the
Bluetooth
®
Low Energy Module
GCY 30-4 (accessory), the following connectivity functions
are available for the power tool:
–
Registration and personalisation
–
Status check, output of warning messages
–
General information and settings
–
Management
Read the corresponding operating instructions for informa-
tion about the
Bluetooth
®
Low Energy Module GCY 30-4.
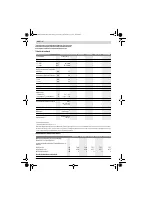
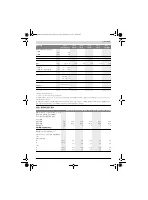
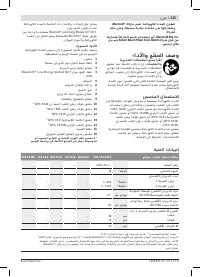
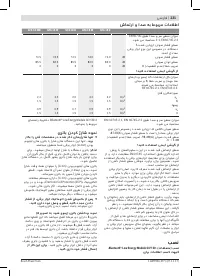
Battery Charge-control Indication
The battery charge-control indicator
8
consists of three green
LEDs, and indicates the charge condition of the battery for a
few seconds when the On/Off switch
9
is pressed halfway or
fully.
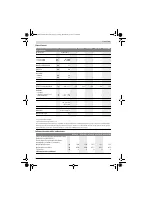
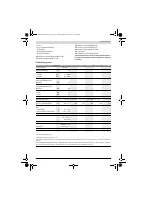
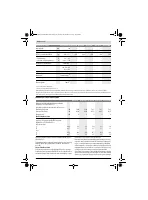
LED
Capacity
Continuous lighting 3 x green
≥ 2/3
Continuous lighting 2 x green
≥1/3
OBJ_BUCH-3249-001.book Page 18 Friday, December 15, 2017 12:04 PM
Содержание
- 126 Указания по безопасности; Безопасность рабочего места
- 128 Описание продукта и услуг; Применение по назначению; Изображенные составные части
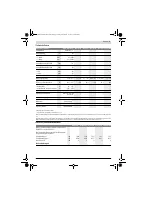
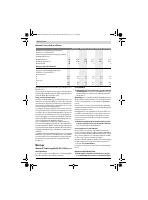
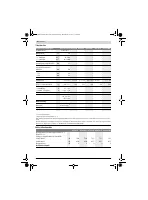
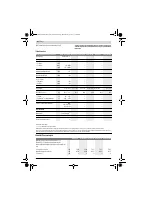
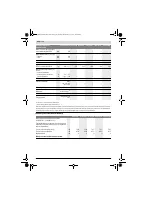
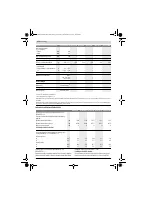
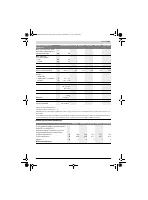
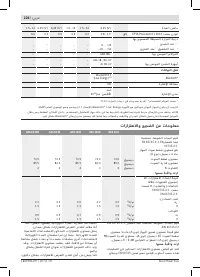
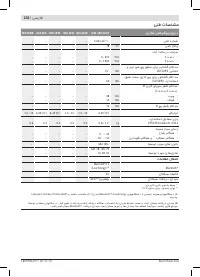
- 129 Технические данные; Передача данных
- 130 Данные по шуму и вибрации; Сборка; Монтаж; Зарядка аккумулятора; Применяйте средства защиты органов слуха!
- 131 Замена рабочего инструмента; Работа с инструментом; Включение электроинструмента
- 132 Указания по применению; Техобслуживание и сервис; Техобслуживание и очистка; СИД
- 133 Россия; Транспортировка


