
Шуруповерты Bosch GDR 180-LI 06019G5123 - инструкция пользователя по применению, эксплуатации и установке на русском языке. Мы надеемся, она поможет вам решить возникшие у вас вопросы при эксплуатации техники.
Если остались вопросы, задайте их в комментариях после инструкции.
"Загружаем инструкцию", означает, что нужно подождать пока файл загрузится и можно будет его читать онлайн. Некоторые инструкции очень большие и время их появления зависит от вашей скорости интернета.


English |
17
Starting Operation
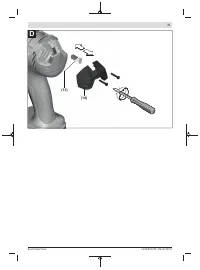
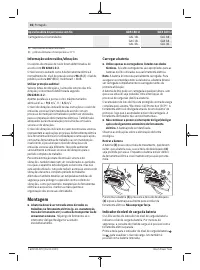
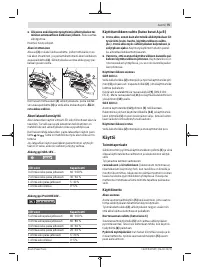
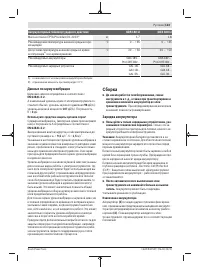
Inserting the Battery
Set the rotational direction switch
(5)
to the centre position
to protect the power tool from being switched on accident-
ally.
Push the charged battery
(3)
into the base of the power tool
from the front until the battery is securely locked.
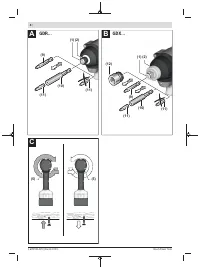
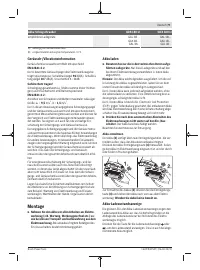
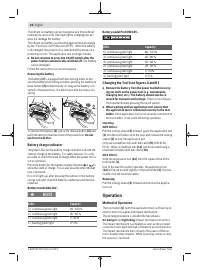
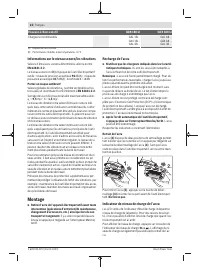
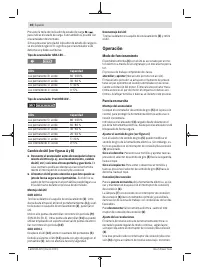
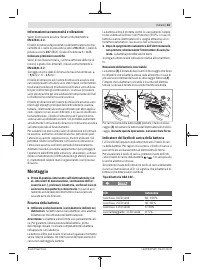
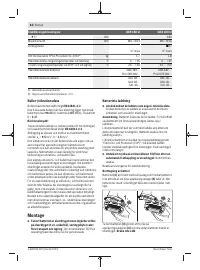
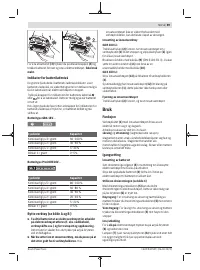
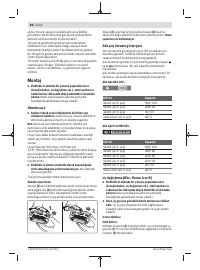
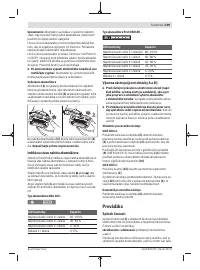
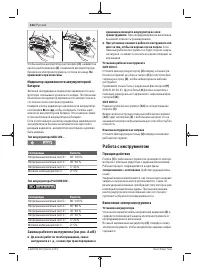
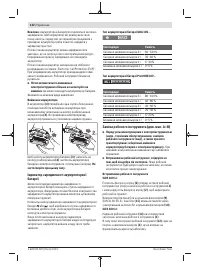
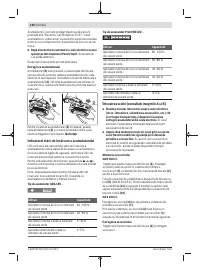
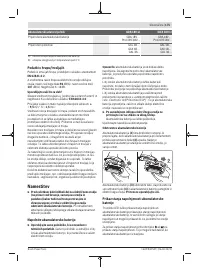
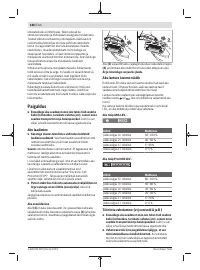
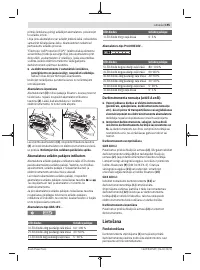
Set the rotational direction (see figure C)
The rotational direction switch
(5)
is used to change the ro-
tational direction of the power tool. However, this is not pos-
sible while the on/off switch
(6)
is being pressed.
Right rotation:
To drive in screws and tighten nuts, press
the rotational direction switch
(5)
through to the left stop.
Left Rotation:
To loosen and unscrew screws and nuts,
press the rotational direction switch
(5)
through to the right
stop.
Switching on/off
To
start
the power tool, press and hold the on/off switch
(6)
.
The lamp
(7)
lights up when the on/off switch
(6)
is lightly or
fully pressed, meaning that the work area is illuminated in
poor lighting conditions.
To
switch off
the power tool, release the on/off switch
(6)
.
Adjusting the Speed
You can adjust the speed of the power tool when it is on by
pressing in the on/off switch
(6)
to varying extents.
A light pressure on the on/off switch
(6)
results in a low rota-
tional speed. Increased pressure on the switch causes an in-
crease in speed.
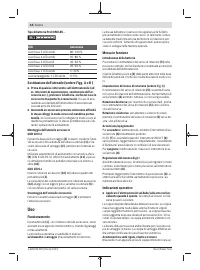
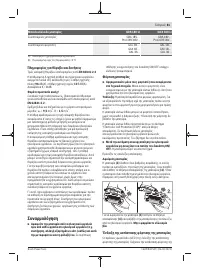
Practical advice
u
Only apply the power tool to the screw/nut when the
tool is switched off.
Rotating tool inserts can slip off.
The torque depends on the impact duration. The maximum
achieved torque results from the sum of all individual
torques achieved through impact. Maximum torque is
achieved after an impact duration of 6–10 seconds. After
this duration, the tightening torque increases only minimally.
The impact duration is to be determined for each required
tightening torque. The tightening torque actually achieved
should always be checked with a torque wrench.
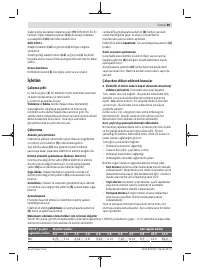
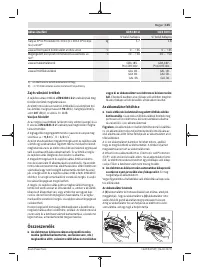
Screw applications with hard, spring-loaded or soft seats
When the achieved torques in an impact series are measured
during a test and transferred onto a diagram, the result is the
curve of a torque characteristic. The height of the curve cor-
responds to the maximum achievable torque, and the steep-
ness indicates the duration in which this is achieved.
A torque characteristic depends on the following factors:
– Strength properties of the screws/nuts
– Type of backing (washer, disc spring, seal)
– Strength properties of the material being screwed/bolted
together
– Lubrication conditions at the screw/bolt connection
Consequently, the following applies in each case:
– A
hard seat
is used for metal-to-metal screw applications
that use washers. After a relatively short impact duration,
the maximum torque is achieved (steep characteristic
curve). An unnecessarily long impact duration only
causes damage to the machine.
– A
spring-loaded seat
is used for metal-to-metal screw
applications that use spring washers, disc springs, studs
or screws/nuts with conical seats. It is also called a
spring-loaded seat when extensions are used.
– A
soft seat
is used for screw applications of e.g. metal on
wood or screw applications that use lead washers or fibre
washers as backing.
For a spring-loaded seat, as well as for a soft seat, the max-
imum tightening torque is lower than for a hard seat. A much
longer impact duration is also required.
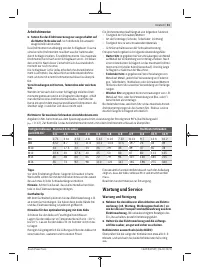
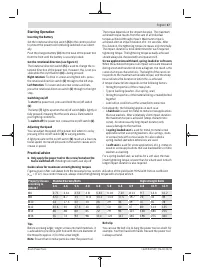
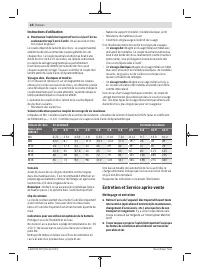
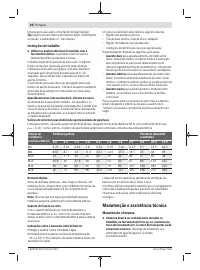
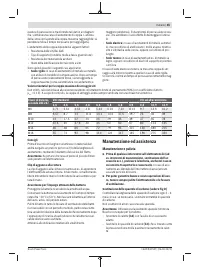
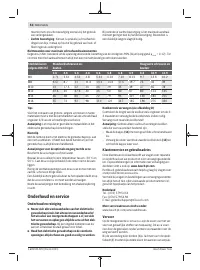
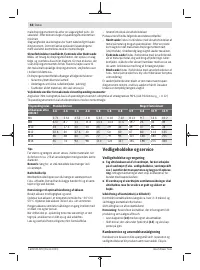
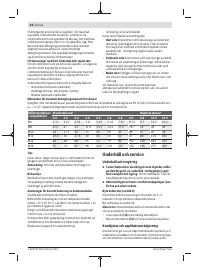
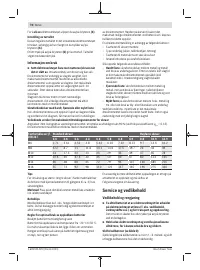
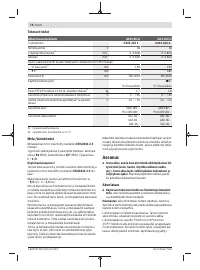
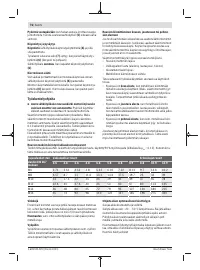
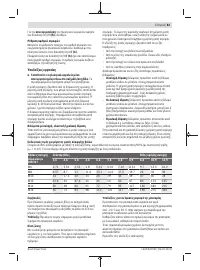
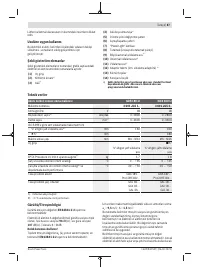
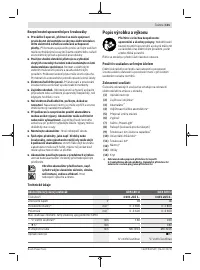
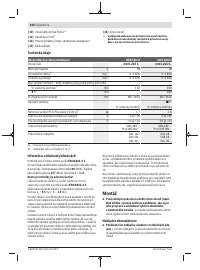
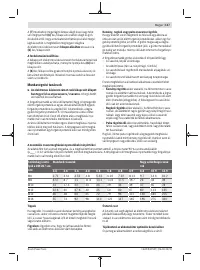
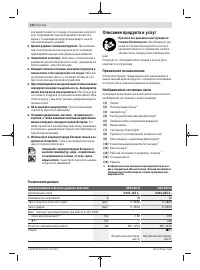
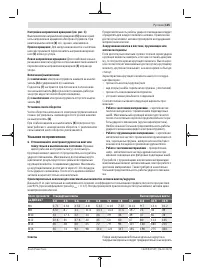
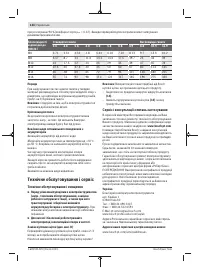
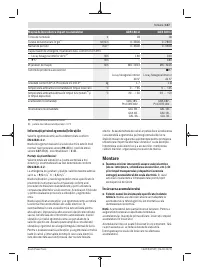
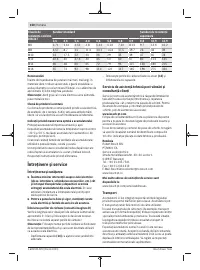
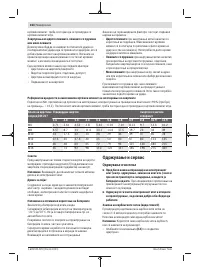
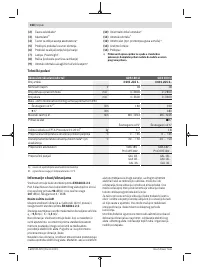
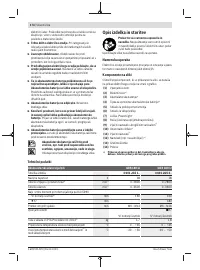
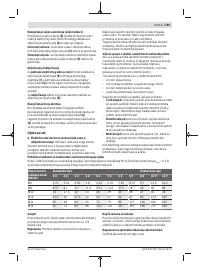
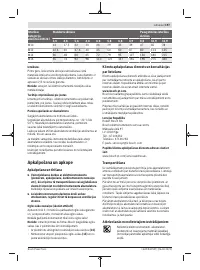
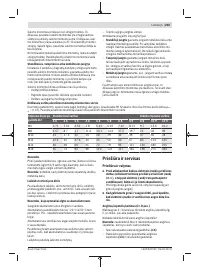
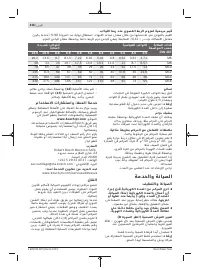
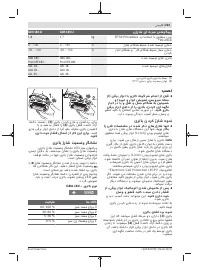
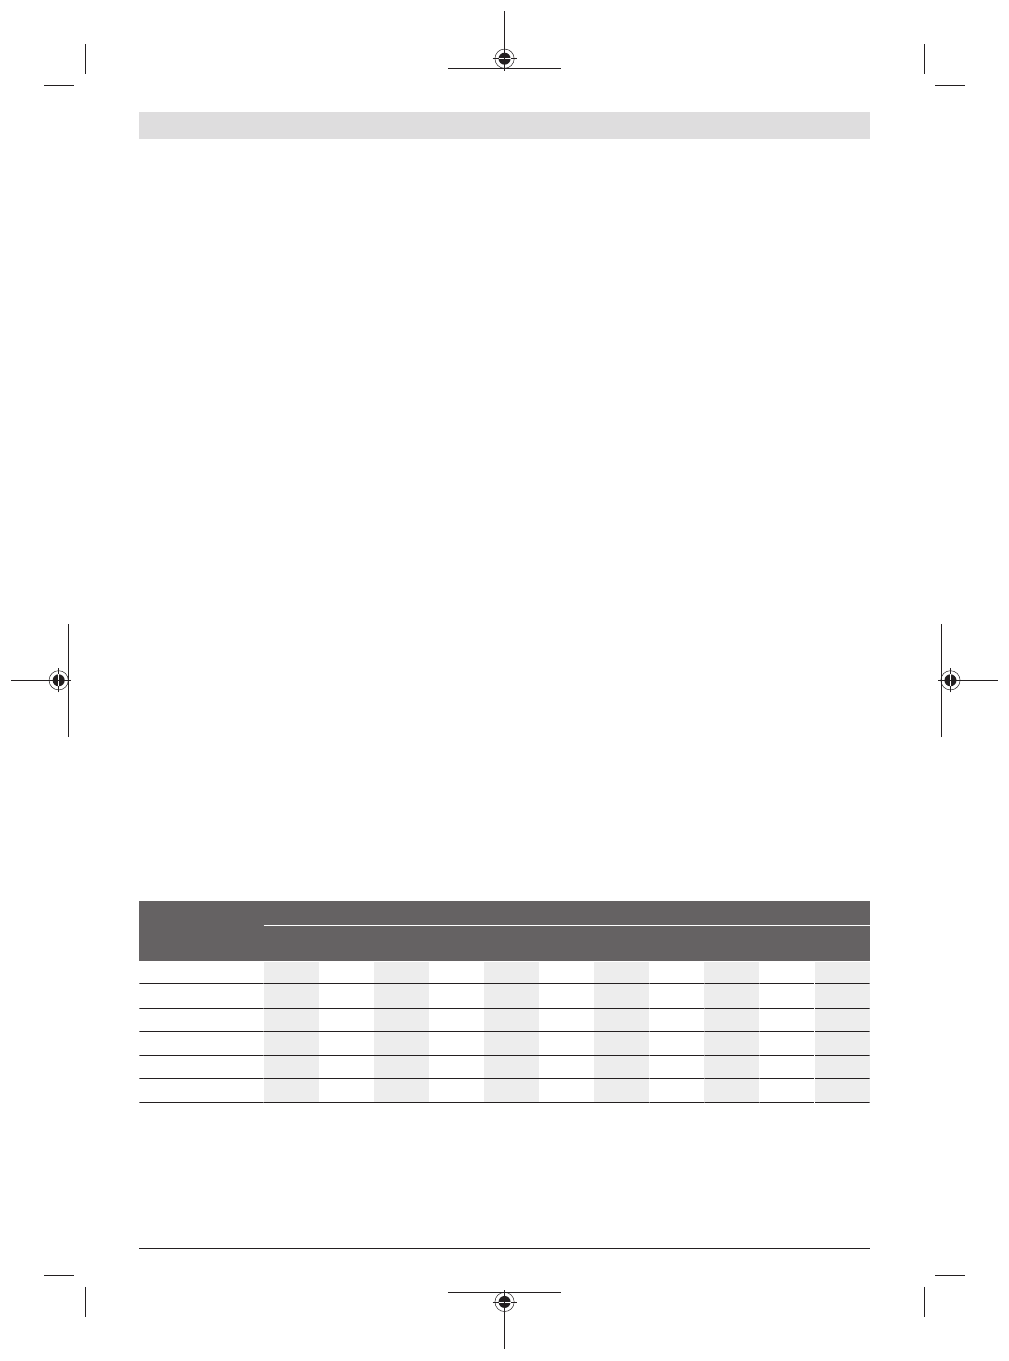
Guide values for maximum screw tightening torques
Figures given in Nm; calculated from the tensional cross-section; utilization of the yield point: 90% (with friction coefficient
µ
total
= 0.12). As a control measure, always check the tightening torque with a torque wrench.
Property Classes
according to
DIN 267
Standard Screws/Bolts
High-strength Bolts
3.6
4.6
5.6
4.8
6.6
5.8
6.8
6.9
8.8
10.9
12.9
M6
2.71
3.61
4.52
4.8
5.42
6.02
7.22
8.13
9.7
13.6
16.2
M8
6.57
8.7
11
11.6
13.1
14.6
17.5
19.7
23
33
39
M10
13
17.5
22
23
26
29
35
39
47
65
78
M12
22.6
30
37.6
40
45
50
60
67
80
113
135
M14
36
48
60
65
72
79
95
107
130
180
215
M16
55
73
92
98
110
122
147
165
196
275
330
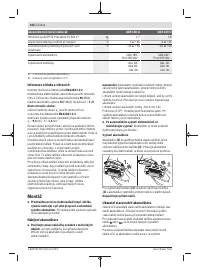
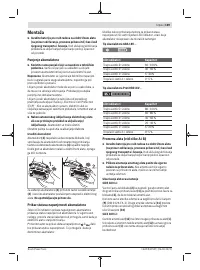
Tips
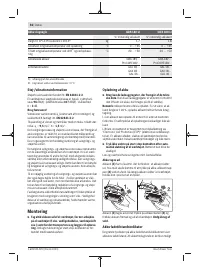
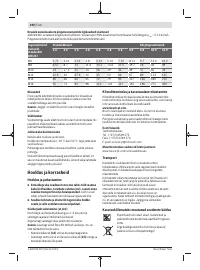
Before screwing larger, longer screws into hard materials, it
is advisable to pre-drill a pilot hole with the core diameter of
the thread to approx. 2/3 of the screw length.
Note:
Ensure that no metal particles enter the power tool.
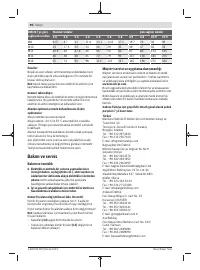
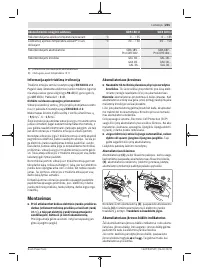
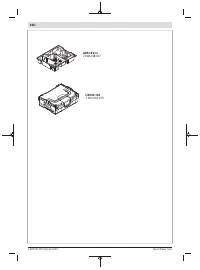
Belt clip
You can use the belt clip to hang the power tool on a belt, for
example. You then have both hands free and the power tool
is always at hand.
Bosch Power Tools
1 609 92A 5XY | (26.04.2021)


