
Шлифмашины Makita BO3711 - инструкция пользователя по применению, эксплуатации и установке на русском языке. Мы надеемся, она поможет вам решить возникшие у вас вопросы при эксплуатации техники.
Если остались вопросы, задайте их в комментариях после инструкции.
"Загружаем инструкцию", означает, что нужно подождать пока файл загрузится и можно будет его читать онлайн. Некоторые инструкции очень большие и время их появления зависит от вашей скорости интернета.

5
aligning the holes in the paper with those in pad. Then
return the clamp lever to the original position to secure it.
Release the other clamp lever by repeating the same
procedure.
While pulling abrasive paper to maintain the proper
tension, insert and secure the other end of abrasive
paper between another clamper and the pad and return
the clamp lever to the original position.
To remove the paper, release the clamper as stated
above.
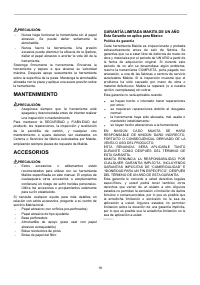
For conventional type of abrasive paper without
pre-punched holes (available on the market):
1
2
010224
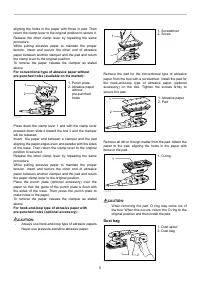
Press down the clamp lever 1 and with the clamp lever
pressed down slide it toward the tool 2 and the clamper
will be released.
Insert the paper end between a clamper and the pad
aligning the paper edges even and parallel with the sides
of the base. Then return the clamp lever to the original
position to secure it.
Release the other clamp lever by repeating the same
procedure.
While pulling abrasive paper to maintain the proper
tension, insert and secure the other end of abrasive
paper between another clamper and the pad and return
the paper clamp lever to the original position.
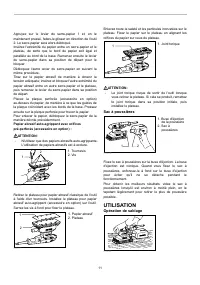
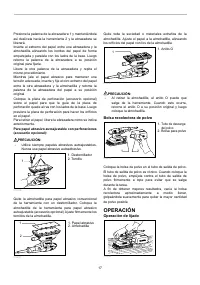
Place the punch plate (optional accessory) over the
paper so that the guide of the punch plate is flush with
the sides of the base. Then press the punch plate to
make holes in the paper.
To remove the paper, release the clamper as stated
above.
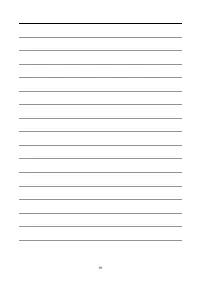
For hook-and-loop type of abrasive paper with
pre-punched holes (optional accessory):
CAUTION:
•
Always use hook-and-loop type of abrasive papers.
Never use pressure-sensitive abrasive paper.
1
2
010218
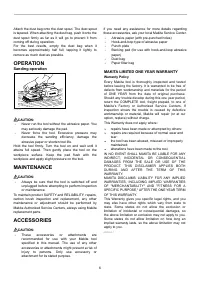
Remove the pad for the conventional type of abrasive
paper from the tool with a screwdriver. Install the pad for
the hook-and-loop type of abrasive paper (optional
accessory) on the tool. Tighten the screws firmly to
secure the pad.
1
2
010217
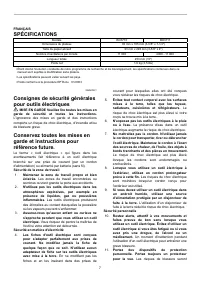
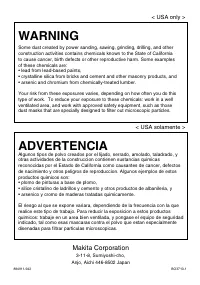
Remove all dirt or foreign matter from the pad. Attach the
paper to the pad, aligning the holes in the paper with
those in the pad.
1
010225
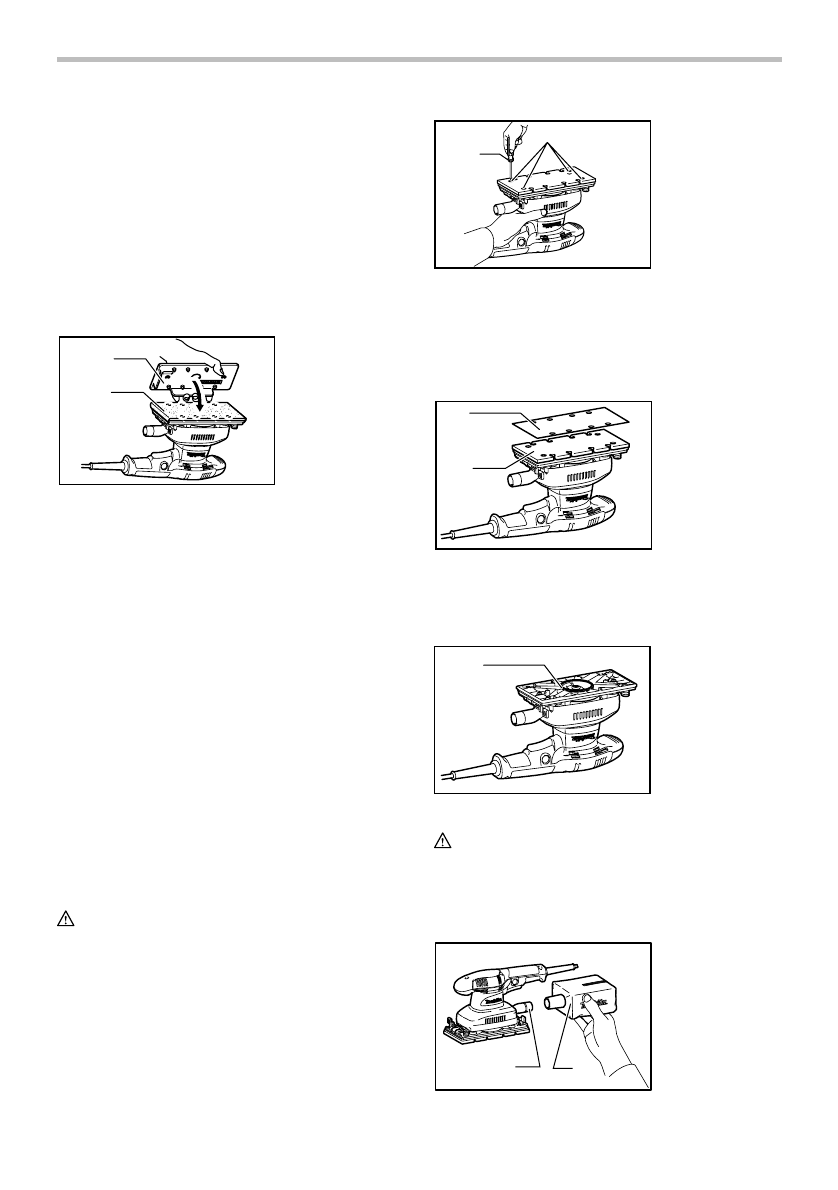
CAUTION:
•
When removing the pad, O ring may come out of
the tool. When this occurs, return the O ring to the
original position and then install the pad.
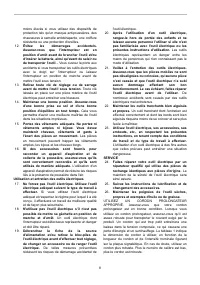
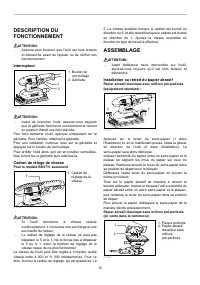
Dust bag
1
2
010219
1. Dust spout
2. Dust bag
1. O-ring
1. Abrasive paper
2. Pad
1. Screwdriver
2. Screw
1. Punch plate
2. Abrasive paper
without
pre-punched
holes
Характеристики

Остались вопросы?Не нашли свой ответ в руководстве или возникли другие проблемы? Задайте свой вопрос в форме ниже с подробным описанием вашей ситуации, чтобы другие люди и специалисты смогли дать на него ответ. Если вы знаете как решить проблему другого человека, пожалуйста, подскажите ему :)


