Шлифмашины Bosch GEX 34-125 (0601372300) - инструкция пользователя по применению, эксплуатации и установке на русском языке. Мы надеемся, она поможет вам решить возникшие у вас вопросы при эксплуатации техники.
Если остались вопросы, задайте их в комментариях после инструкции.
"Загружаем инструкцию", означает, что нужно подождать пока файл загрузится и можно будет его читать онлайн. Некоторые инструкции очень большие и время их появления зависит от вашей скорости интернета.


English |
7
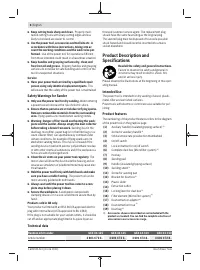
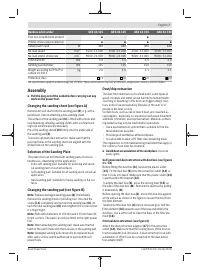
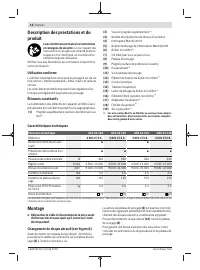
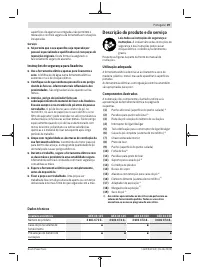
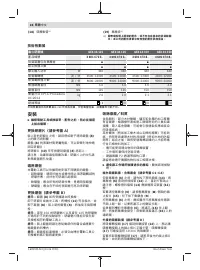
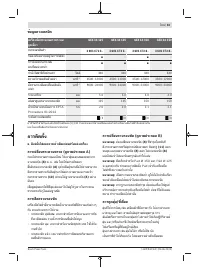
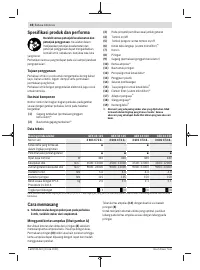
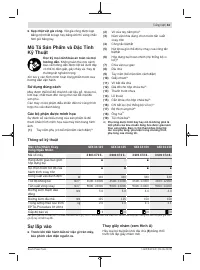
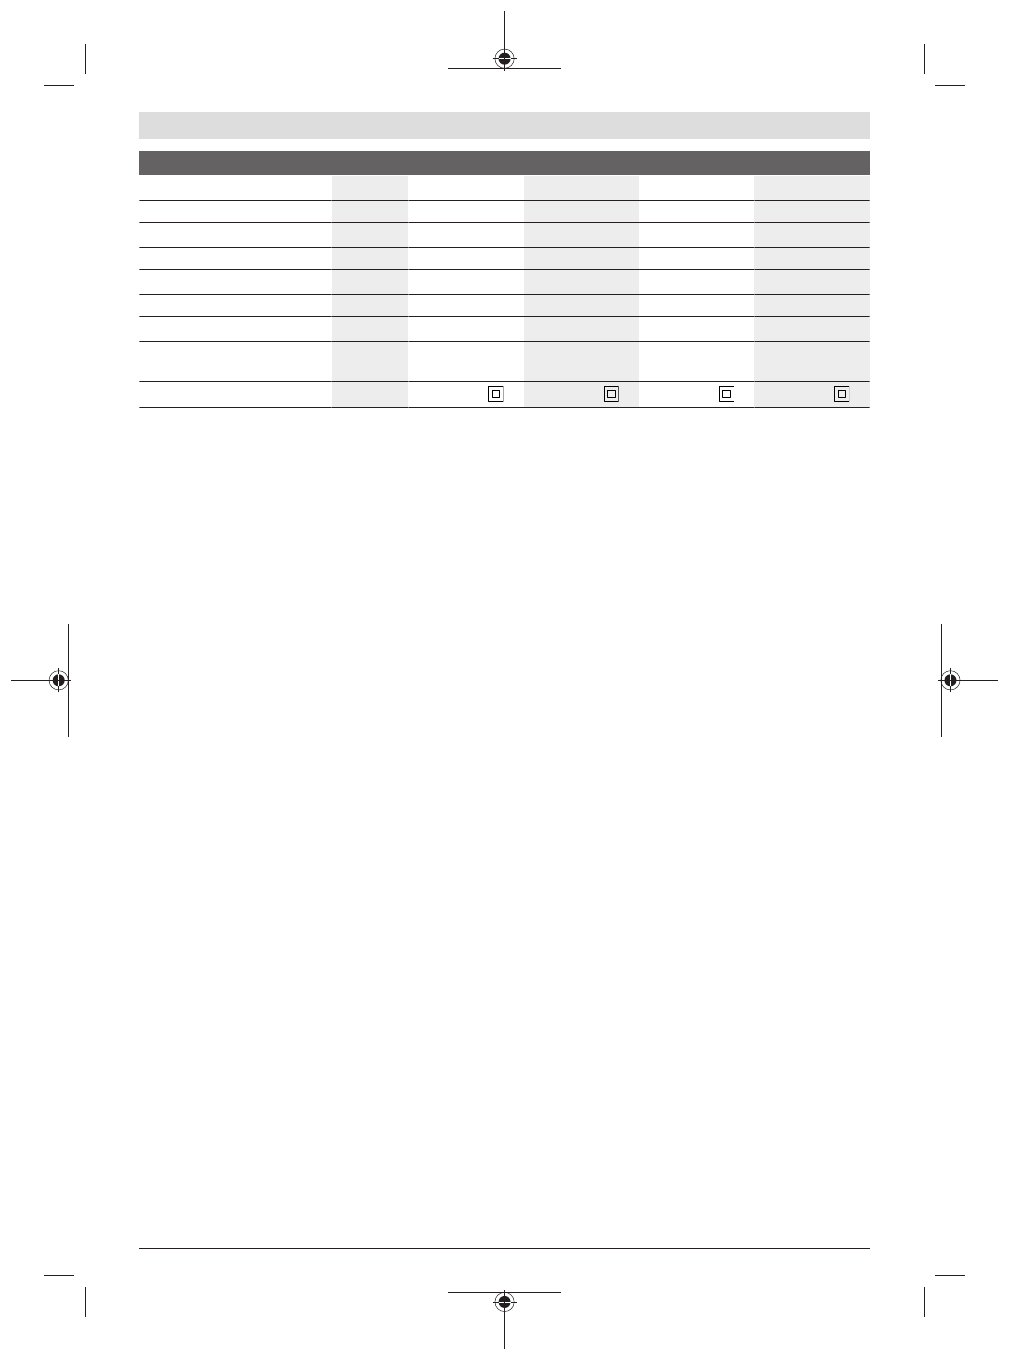
Random orbit sander
GEX 34-125
GEX 34-125
GEX 34-150
GEX 34-150
Dust box included with product
●
–
●
–
Orbital stroke rate preselection
●
●
●
●
Rated power input
W
340
340
340
340
No-load speed
min
-1
4500–12,000
4500–12,000
4500–12,000
4500–12,000
No-load orbital stroke rate
min
-1
9000–24,000
9000–24,000
9000–24,000
9000–24,000
Orbit diameter
mm
5.0
5.0
4.0
4.0
Sanding pad diameter
mm
125
125
150
150
Weight according to EPTA-Pro-
cedure 01:2014
kg
2.0
2.0
2.1
2.1
Protection class
/ II
/ II
/ II
/ II
The specifications apply to a rated voltage [U] of 230 V. These specifications may vary at different voltages and in country-specific models.
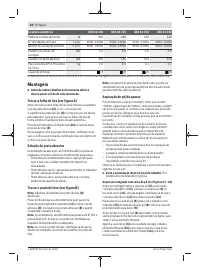
Assembly
u
Pull the plug out of the socket before carrying out any
work on the power tool.
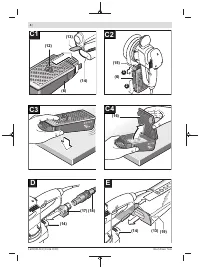
Changing the sanding sheet (see figure A)
Remove dirt and dust from the sanding pad
(8)
, e.g. with a
paintbrush, before attaching a new sanding sheet.
The surface of the sanding pad
(8)
is fitted with a hook-and-
loop fastening, allowing sanding sheets with a similar back-
ing to be secured quickly and easily.
Press the sanding sheet
(10)
firmly onto the underside of
the sanding pad
(8)
.
To ensure optimum dust extraction, make sure that the
punched holes in the sanding sheet are aligned with the
drilled holes in the sanding pad.
Selection of the Sanding Plate
The power tool can be fitted with sanding pads of various
hardnesses, depending on the application:
– Extra soft sanding pad: Suitable for polishing and sensit-
ive sanding even on curved surfaces
– Soft sanding pad: Suitable for all sanding work, universal
application
– Hard sanding pad: Suitable for heavy sanding on flat sur-
faces
Changing the sanding pad (see figure B)
Note:
Replace damaged sanding pads
(8)
immediately.
Remove the sanding sheet or polishing tool. Unscrew the
screw
(11)
completely and remove the sanding pad
(8)
. At-
tach the new sanding pad
(8)
and retighten the screw so that
it is finger-tight.
Note:
Pads with diameters of 150 mm and 125 mm have dif-
ferent carriers. The pads can only be fitted to the right power
tool.
Note:
When attaching the sanding pad, make sure that the
teeth of the catch mate with the recesses in the sanding pad.
Note:
Damaged sanding pads must only be replaced by an
after-sales service centre authorised to work with Bosch
power tools.
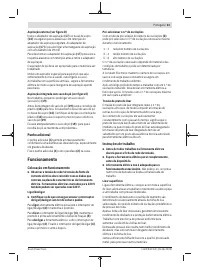
Dust/chip extraction
The dust from materials such as lead paint, some types of
wood, minerals and metal can be harmful to human health.
Touching or breathing in this dust can trigger allergic reac-
tions and/or cause respiratory illnesses in the user or in
people in the near vicinity.
Certain dusts, such as oak or beech dust, are classified as
carcinogenic, especially in conjunction with wood treatment
additives (chromate, wood preservative). Materials contain-
ing asbestos may only be machined by specialists.
– Use a dust extraction system that is suitable for the ma-
terial wherever possible.
– Provide good ventilation at the workplace.
– It is advisable to wear a P2 filter class breathing mask.
The regulations on the material being machined that apply in
the country of use must be observed.
u
Avoid dust accumulation at the workplace.
Dust can
easily ignite.
Self-generated dust extraction with dust box (see figures
C1–C4)
Before fitting the dust box
(6)
, remove the plastic slider
(13)
. Fit the dust box
(6)
onto the extraction outlet
(14)
so
that it clicks into place. Make sure that the plastic slider
(13)
is partly within the bracket
(12)
.
To empty the dust box
(6)
, press the locking lever
(15)
on
the side of the dust box (
➊
). Remove the dust box by pulling
it downwards (
➋
).
Before opening the dust box
(6)
, knock the dust box against
a firm surface as shown in the figure to loosen the dust from
the filter element.
Take hold of the dust box
(6)
by the recessed grip, fold the
filter element
(16)
upwards out of the way and empty the
dust box. Use a soft brush to clean the flaps of the filter ele-
ment
(16)
.
External dust extraction (see figure D)
Attach the dust extraction adapter
(17)
to the extraction
outlet
(14)
. Make sure that the locking levers of the dust ex-
traction adapter lock into place. A dust extraction hose with
a diameter of 19 mm can be connected to the dust extrac-
tion adapter
(17)
.
Bosch Power Tools
1 609 92A 5LX | (23.06.2020)
Характеристики

Остались вопросы?Не нашли свой ответ в руководстве или возникли другие проблемы? Задайте свой вопрос в форме ниже с подробным описанием вашей ситуации, чтобы другие люди и специалисты смогли дать на него ответ. Если вы знаете как решить проблему другого человека, пожалуйста, подскажите ему :)


