Сабельные пилы Makita JR3060T (JR3060T) - инструкция пользователя по применению, эксплуатации и установке на русском языке. Мы надеемся, она поможет вам решить возникшие у вас вопросы при эксплуатации техники.
Если остались вопросы, задайте их в комментариях после инструкции.
"Загружаем инструкцию", означает, что нужно подождать пока файл загрузится и можно будет его читать онлайн. Некоторые инструкции очень большие и время их появления зависит от вашей скорости интернета.


5
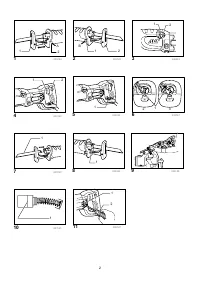
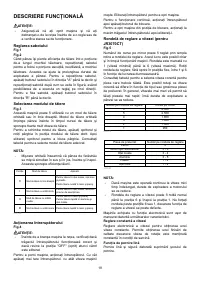
reposition as shown in the figure which allows you to
make five-way adjustment. To secure the shoe, push the
shoe button in the "B" direction with a click.
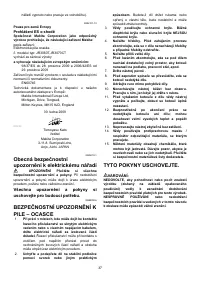
Selecting the cutting action
Fig.3
This tool can be operated with an orbital or a straight line
cutting action. The orbital cutting action thrusts the blade
forward on the cutting stroke and greatly increases
cutting speed.
To change the cutting action, press the stopper and turn
the lever to the desired cutting action position. Then,
release the stopper to lock the lever. Refer to the table to
select the appropriate cutting action.
NOTE:
•
Orbital action means that the saw blade moves up
and down, and back and forth at the same time.
This increases the efficiency of cutting.
Posi
t
io
n
0
I
II
III
C
utt
i
n
g
a
c
t
io
n
S
tra
ig
ht
li
n
e c
utt
i
n
g
a
c
t
io
n
Sm
a
ll o
r
bi
t
c
utt
i
n
g
a
c
t
io
n
Medi
u
m o
r
bi
t
c
utt
i
n
g
a
c
t
io
n
L
ar
ge o
r
bi
t
c
utt
i
n
g
a
c
t
io
n
Applic
at
io
n
s
Fo
r
c
utt
i
n
g mild s
t
eel, s
ta
i
n
less
s
t
eel
an
d pl
a
s
t
ics.
Fo
r
cle
an
c
ut
s i
n
wood
an
d
pl
y
wood.
Fo
r
c
utt
i
n
g mild s
t
eel,
a
l
u
mi
nu
m
an
d
har
d wood.
Fo
r
c
utt
i
n
g wood
an
d pl
y
wood.
Fo
r
f
a
s
t
c
utt
i
n
g i
n
a
l
u
mi
nu
m
an
d
mild s
t
eel.
Fo
r
f
a
s
t
c
utt
i
n
g i
n
wood
an
d
pl
y
wood.
002525
Switch action
Fig.4
CAUTION:
•
Before plugging in the tool, always check to see
that the switch trigger actuates properly and
returns to the "OFF" position when released.
To start the tool, simply pull the switch trigger. Tool
speed is increased by increasing pressure on the switch
trigger. Release the switch trigger to stop.
For continuous operation, pull the switch trigger and
then push in the lock button.
To stop the tool from the locked position, pull the switch
trigger fully, then release it.
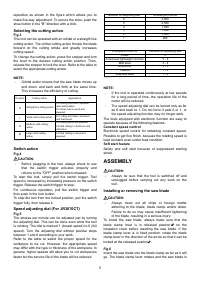
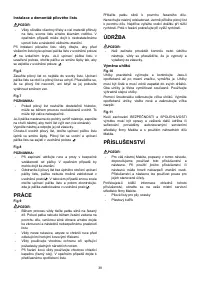
Speed adjusting dial (For JR3070CT)
Fig.5
The strokes per minute can be adjusted just by turning
the adjusting dial. This can be done even while the tool
is running. The dial is marked 1 (lowest speed) to 6 (full
speed). Turn the adjusting dial without positive stops
between 1 and 6 according to your work.
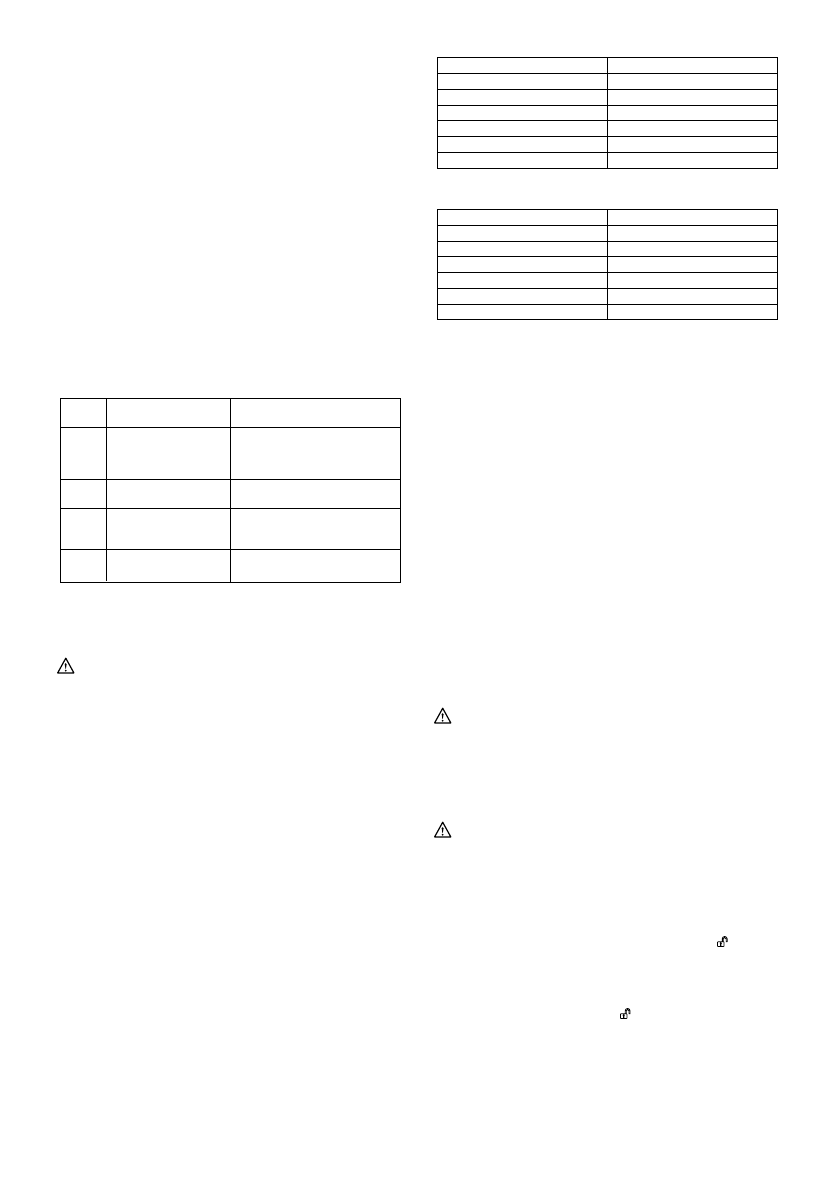
Refer to the table to select the proper speed for the
workpiece to be cut. However, the appropriate speed
may differ with the type or thickness of the workpiece. In
general, higher speeds will allow you to cut workpieces
faster but the service life of the blade will be reduced.
N
u
mbe
r
o
n
a
dj
u
s
t
i
n
g di
a
l
S
tr
okes pe
r
mi
nut
e
6
2
,8
00
5
2
,5
00
4
1,85
0
3
1,4
00
2
1,
000
1
9
5
0
006574
N
u
mbe
r
o
n
a
dj
u
s
t
i
n
g di
a
l
6
A
ut
ocl
a
ved lig
ht
weig
ht
co
n
c
r
e
t
e
5 - 6
Mild s
t
eel
3
- 4
Al
u
mi
nu
m
3
- 5
Pl
a
s
t
ics
1 - 4
S
ta
i
n
less s
t
eel
1 -
2
Wo
r
kpiece
t
o be c
ut
Wood
006584
NOTE:
•
If the tool is operated continuously at low speeds
for a long period of time, the operation life of the
motor will be reduced.
•
The speed adjusting dial can be turned only as far
as 6 and back to 1. Do not force it past 6 or 1, or
the speed adjusting function may no longer work.
The tools equipped with electronic function are easy to
operate because of the following features.
Constant speed control
Electronic speed control for obtaining constant speed.
Possible to get fine finish, because the rotating speed is
kept constant even under load condition.
Soft start feature
Safety and soft start because of suppressed starting
shock.
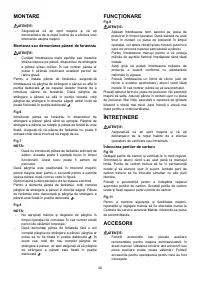
ASSEMBLY
CAUTION:
•
Always be sure that the tool is switched off and
unplugged before carrying out any work on the
tool.
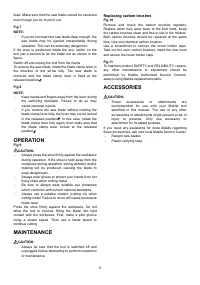
Installing or removing the saw blade
CAUTION:
•
Always clean out all chips or foreign matter
adhering to the blade, blade clamp and/or slider.
Failure to do so may cause insufficient tightening
of the blade, resulting in a serious injury.
To install the saw blade, always make sure that the
blade clamp lever is in released position
on the
insulation cover before inserting the saw blade. If the
blade clamp lever is in fixed position, rotate the blade
clamp lever in the direction of the arrow so that it can be
locked at the released positon .
Fig.6
Insert the saw blade into the blade clamp as far as it will
go. The blade clamp lever rotates and the saw blade is
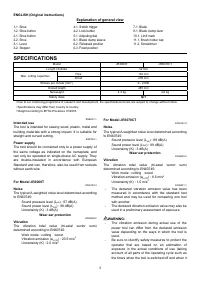
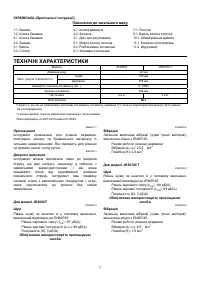
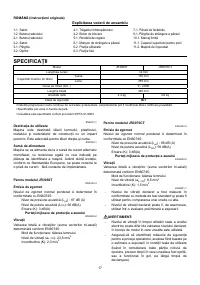
Характеристики

Остались вопросы?Не нашли свой ответ в руководстве или возникли другие проблемы? Задайте свой вопрос в форме ниже с подробным описанием вашей ситуации, чтобы другие люди и специалисты смогли дать на него ответ. Если вы знаете как решить проблему другого человека, пожалуйста, подскажите ему :)


