Роутеры MikroTik wAP 4G Kit (RBwAPR-2nD R11e-4G) - инструкция пользователя по применению, эксплуатации и установке на русском языке. Мы надеемся, она поможет вам решить возникшие у вас вопросы при эксплуатации техники.
Если остались вопросы, задайте их в комментариях после инструкции.
"Загружаем инструкцию", означает, что нужно подождать пока файл загрузится и можно будет его читать онлайн. Некоторые инструкции очень большие и время их появления зависит от вашей скорости интернета.


wAP 4G kit
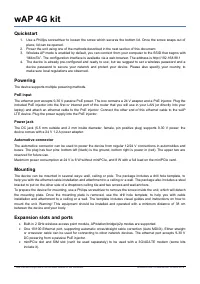
Quickstart
1. Use a Phillips screwdriver to loosen the screw which secures the bottom lid. Once the screw snaps out of
place, lid can be opened.
2. Power the unit using one of the methods described in the next section of this document.
3. Wireless AP mode is enabled by default, you can connect from your computer to the SSID that begins with
“MikroTik”. The configuration interface is available via a web browser. The address is http://192.168.88.1
4. The device is already pre-configured and ready to use, but we suggest to set a wireless password and a
device password to secure your network and protect your device. Please also specify your country, to
make sure local regulations are observed.
Powering
The device supports multiple powering methods.
PoE input
The ethernet port accepts 9-30 V passive PoE power. The box contains a 24 V adapter and a PoE injector. Plug the
included PoE injector into the first or internet port of the router that you will use in your LAN (or directly into your
laptop) and attach an ethernet cable to the PoE injector. Connect the other end of this ethernet cable to the wAP
LTE device. Plug the power supply into the PoE injector.
Power jack
The DC jack (5.5 mm outside and 2 mm inside diameter, female, pin positive plug) supports 9-30 V power, the
device comes with a 24 V 1.2 A power adapter.
Automotive connector
The automotive connector can be used to power the device from regular 12/24 V connections in automobiles and
buses. The plug has four pins: bottom left (black) is the ground, bottom right is power in (red). The upper two are
reserved for future use.
Maximum power consumption at 24 V is 6 W without miniPCIe, and 8 W with a full load on the miniPCIe card.
Mounting
The device can be mounted in several ways: wall, ceiling or pole. The package includes a drill hole template, to
help you with the ethernet cable installation and attachment to a ceiling or a wall. The package also includes a steel
bracket to put on the other side of a dropdown ceiling tile and two screws and wall anchors.
To prepare the device for mounting, use a Philips screwdriver to remove the screw inside the unit, which will detach
the mounting plate. Once the mounting plate is removed, use the drill hole template, to help you with cable
installation and attachment to a ceiling or a wall. The template includes visual guides and instructions on how to
mount the unit. Warning! This equipment should be installed and operated with a minimum distance of 38 cm
between the device and your body.
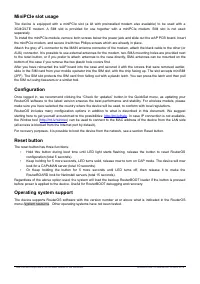
Expansion slots and ports
Built-in 2 GHz wireless access point module, AP/station/bridge/p2p modes are supported.
One 10/100 Ethernet port, supporting automatic cross/straight cable correction (Auto MDI/X). Either straight
or crossover cable can be used for connecting to other network devices. The ethernet port accepts 9-30 V
DC powering from a passive PoE injector.
miniPCIe slot and SIM slot (can’t be used separately) to be used with a 3G/4G/LTE modem (some kits
include it).
See mikrotik.com/products for the latest version of this document.
Document #49115 Modified on: 30.APR.2019
Характеристики

Остались вопросы?Не нашли свой ответ в руководстве или возникли другие проблемы? Задайте свой вопрос в форме ниже с подробным описанием вашей ситуации, чтобы другие люди и специалисты смогли дать на него ответ. Если вы знаете как решить проблему другого человека, пожалуйста, подскажите ему :)
