
Роботы-пылесосы VITEK 1807-VT-04 - инструкция пользователя по применению, эксплуатации и установке на русском языке. Мы надеемся, она поможет вам решить возникшие у вас вопросы при эксплуатации техники.
Если остались вопросы, задайте их в комментариях после инструкции.
"Загружаем инструкцию", означает, что нужно подождать пока файл загрузится и можно будет его читать онлайн. Некоторые инструкции очень большие и время их появления зависит от вашей скорости интернета.
16
ENGLISH
•
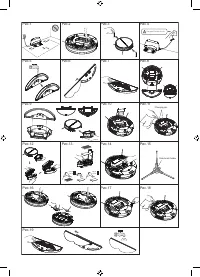
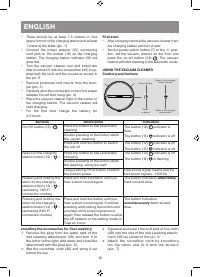
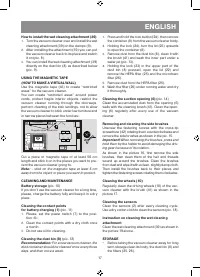
There should be at least 1,5 meters of free
space in front of the charging station and at least
1 meter at the sides (pic. 1).
•
Connect the power adapter (21) connecting
cord jack to the socket (19) on the charging
station. The charging station indicator (19) will
glow red.
•
Turn the vacuum cleaner over and install two
side brushes (5) with the screwdriver (42) (sup-
plied with the unit) and the screws as shown in
the pic. 2.
•
Remove protective soft inserts from the bum-
per (pic. 3).
•
Carefully wind the connection cord of the power
adapter. Do not let it hang (pic. 4).
•
Place the vacuum cleaner right in the center of
the charging station. The vacuum cleaner will
start charging.
•
For the first time charge the battery for
4-5 hours.
First start
•
After charging remove the vacuum cleaner from
the charging station and turn it over;
•
Set the power switch button (7) to the «I» posi-
tion, set the vacuum cleaner on the floor and
press the on/off button (12)
. The vacuum
cleaner will start cleaning in the automatic mode.
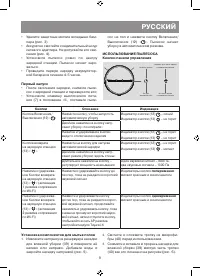
USING THE VACUUM CLEANER
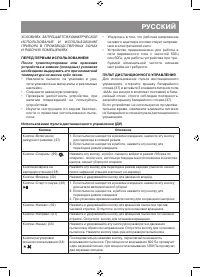
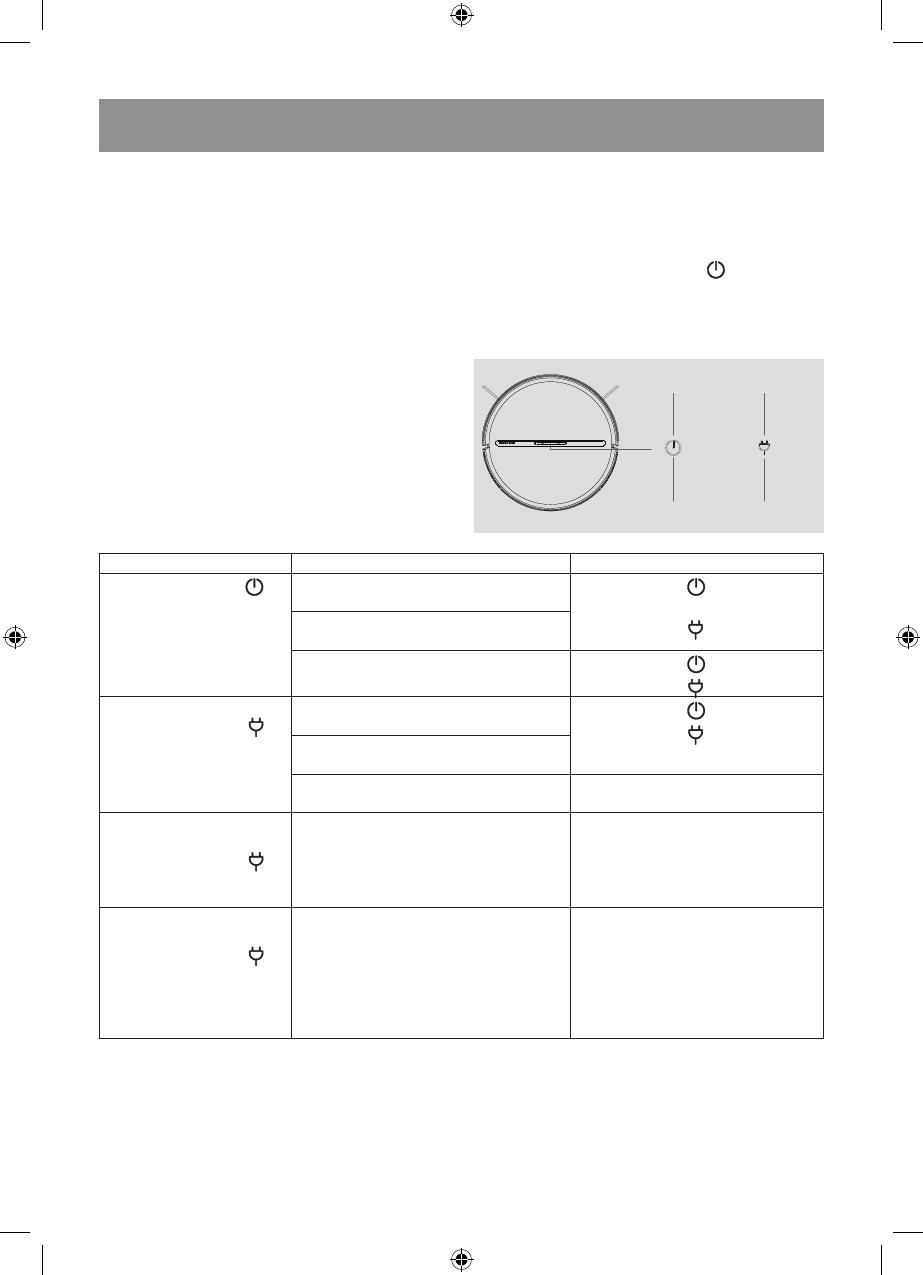
Control panel buttons
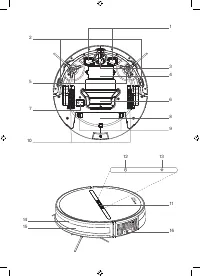
Индикатор сети
Кнопка
включения сети
Индикатор кнопки возврата
на зарядную станцию
Кнопка возврата
на зарядную станцию
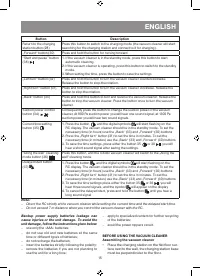
Buttons
Description
Indication
On/Off button (12) «
»
Press the button to start automatic
cleaning
The button (12)
indicator is
blue
The button (13)
indicator is off
Double pressing of the button starts
the „spiral“ cleaning
Press and hold the button to switch
the unit off
The button (12)
indicator is off
The button (13)
indicator is off
Return to the charging
station button (13) «
»
Press the button to start automatic
charging
The button (12)
indicator is off
The button (13)
is flashing
Double pressing of the button starts
the cleaning „along the wall“
Long pressing of the button controls
the suction power
One sound signal means 800 Pa,
two sound signals - 1300 Pa
Pressing and holding the
return to the charging
station button (13) «
»
(activating 1 Wi-Fi
connection modes)
Press and hold the button until you
hear a short sound signal
The button indicators
alternately
flash red and blue.
Pressing and holding the
return to the charging
station button (13) «
»
(activating 2 Wi-Fi
connection modes)
Press and hold the button until you
hear a short sound signal. Continue
pressing and holding the button until
you hear short sound signal once
again, then release the button to enter
the AP network of the setting mode of
Tuya wi-fi unit.
The button indicators
simultaneously flash red and
blue.
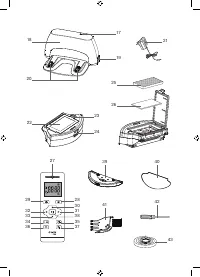
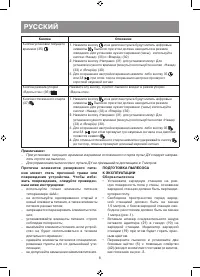
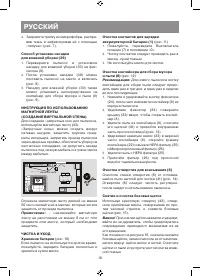
Installing the accessories for floor washing
1.
Remove the plug from the water tank of the
wet cleaning attachment (39) and turn it to
the left or to the right. Add water and close the
attachment with the plug (pic. 5).
2.
Wet the microfiber cloth (40) and wring it out
before the use.
3.
Squeeze and insert the soft part of the cloth
(40) into the slot of the wet cleaning attach-
ment (39) as shown in the pic. 6.
4.
Attach the microfiber cloth by smoothing
out the fabric and fix it with the stickers
(pic. 7).
Power indicator
Return to the charging
station indicator
Return to the charging
station button
Power
on button
Содержание
- 7 Сохраните заводскую упаковку.; Использование пульта дистанционного управления (ДУ); Кнопка
- 9 Первый запуск; уборку в автоматическом режиме.; попеременно; Установка компонентов для мытья полов
- 10 CL; Не используйте масло для чистки.
- 11 ХРАНЕНИЕ; Выходное напряжение: 19 В; УТИЛИЗАЦИЯ
- 12 Срок службы устройства – 3 года


