Пылесос Sencor SVC0741YL-EUE3 - инструкция пользователя по применению, эксплуатации и установке на русском языке. Мы надеемся, она поможет вам решить возникшие у вас вопросы при эксплуатации техники.
Если остались вопросы, задайте их в комментариях после инструкции.
"Загружаем инструкцию", означает, что нужно подождать пока файл загрузится и можно будет его читать онлайн. Некоторые инструкции очень большие и время их появления зависит от вашей скорости интернета.


- 4 -
Revision 01/2022
Copyright © 2022, Fast ČR, a.s.
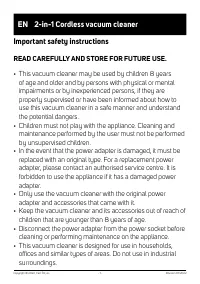
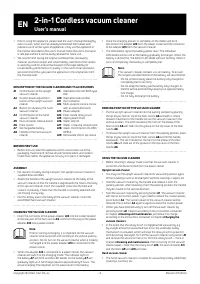
• Prior to using this appliance, please read the user's manual thoroughly,
even in cases, when one has already familiarised themselves with
previous use of similar types of appliances. Only use the appliance in
the manner described in this user’s manual. Keep this user's manual in
a safe place where it can be easily retrieved for future use.
• We recommend saving the original cardboard box, packaging
material, purchase receipt and responsibility statement of the vendor
or warranty card for at least the duration of the legal liability for
unsatisfactory performance or quality. In the event of transportation,
we recommend that you pack the appliance in the original box from
the manufacturer.
. . . . . . . . . . . . . . . . . . . . . . . . . . . . . . . . . . . . . . . . . . . . . . . . . . . . . . . . . . . . . . . . . . . .
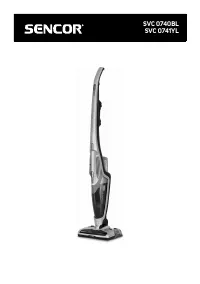
DESCRIPTION OF THE VACUUM CLEANER AND ITS ACCESSORIES
A1
On/Off button of the upright
vacuum cleaner
A2
Suction power adjustment
button of the upright vacuum
cleaner
A3
Button for releasing the hand
vacuum cleaner
A4
On/Off button of the hand
vacuum cleaner
A5
Dust container release button
A6
Floor nozzle
A7
Rechargeable battery
A8
Handle of the hand vacuum
cleaner
A9
Washable internal HEPA type
filter.
A10
Washable external filter
A11
Dust container
A12
Multi-purpose crevice nozzle
with an extensible brush
A13
Power adapter
A14
Floor nozzle rotary brush
A15
Wiping attachment
A16
Water tank lid
A17
Water / cleaning solution tank
A18
Water control button (CLOSE/
OPEN)
A19
Removable Velcro zip sleeve
. . . . . . . . . . . . . . . . . . . . . . . . . . . . . . . . . . . . . . . . . . . . . . . . . . . . . . . . . . . . . . . . . . . .
BEFORE FIRST USE
• Before first use, take the appliance and its accessories out of the
packaging material and remove all promotional labels and stickers.
Check that neither the appliance nor any of its parts is damaged.
. . . . . . . . . . . . . . . . . . . . . . . . . . . . . . . . . . . . . . . . . . . . . . . . . . . . . . . . . . . . . . . . . . . .
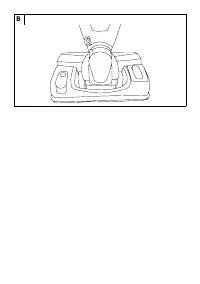
ASSEMBLY
• For reasons of safety during transport, the upright vacuum cleaner is
supplied disassembled.
• Attach the handle of the upright vacuum cleaner to the body of the
vacuum cleaner so that the handle is aligned with the hole in the body
of the vacuum cleaner. Insert the supplied screw into the hole and
screw it in properly. Check than the handle is correctly attached and
not moving in any way.
• Into the empty area in the body of the vacuum cleaner, insert the
assembled hand vacuum cleaner.
. . . . . . . . . . . . . . . . . . . . . . . . . . . . . . . . . . . . . . . . . . . . . . . . . . . . . . . . . . . . . . . . . . . .
CHARGING THE VACUUM CLEANER
• Insert the connector of the power adapter
A13
into the socket located
at the rear part of the floor nozzle
A6
, and insert the plug of the power
adapter
A13
into a power socket.
Note:
Prior to starting recharging, it is important for the vacuum
cleaner to be turned off and standing in the vertical parking
position. Do not turn on the vacuum cleaner when it is being
recharged and the power adapter
A13
is connected to the
power socket.
• When the adapter
A13
is connected to a power socket, the vacuum
cleaner will switch to the charging mode. The indicator light on
the battery
A7
will be lit and the LED diodes on the battery
A7
will
gradually light up. A full charge requires approximately 5 hours. The
actual charging time depends on the power level of the battery.
• Once the charging process is complete, all the diodes will be lit.
Disconnect the adapter
A13
from the power socket and the connector
of the adapter
A13
from the vacuum cleaner.
• The LED diodes signal the battery power level. The individual
LED diodes will turn off as the battery gradually discharges. When the
battery is almost flat, the bottom LED diode will start flashing. When it
turns of completely, the battery is completely flat.
Note:
This vacuum cleaner contains a Li-ion battery. To ensure
the longest possible lifetime of the battery, we recommend:
- Do not unnecessarily leave the battery fully charged or
completely flat for too long.
- Do not keep the battery permanently fully charged. Its
lifetime will be extended by keeping it at approximately
half charge.
- Do not fully discharge the battery.
. . . . . . . . . . . . . . . . . . . . . . . . . . . . . . . . . . . . . . . . . . . . . . . . . . . . . . . . . . . . . . . . . . . .
PARKING POSITION OF THE VACUUM CLEANER
• Put the upright vacuum cleaner into the parking position by placing
the tip of your foot on top of the floor nozzle
A6
and with a simple
forward movement of the handle secure the vacuum cleaner in the
vertical position. The latch located at the front on the elbow of the
floor nozzle
A6
will slide into the groove on the top cover of the floor
nozzle
A6
.
• To release the upright vacuum cleaner from the parking position, place
the tip of your foot on top of the floor nozzle
A6
and tilt the handle
backwards. The latch located at the front on the elbow of the floor
nozzle
A6
will slide out of the groove on the top cover of the floor
nozzle
A6
.
. . . . . . . . . . . . . . . . . . . . . . . . . . . . . . . . . . . . . . . . . . . . . . . . . . . . . . . . . . . . . . . . . . . .
USING THE VACUUM CLEANER
• Before cleaning it, always make sure that the vacuum cleaner is
turned off and disconnected from the power socket.
Upright vacuum cleaner
• You may use the upright vacuum cleaner for vacuuming various types
of floor coverings such as for example hard floor coverings, carpets, etc.
• Hold the vacuum cleaner by the handle and release it from the
parking position. After releasing it from the parking position, the handle
may be moved in the vertical direction.
• Start the vacuum cleaner by pressing button
A1
. The vacuum cleaner
will start at full suction power. If you need to reduce the suction power,
press button
A2
. The suction power of the vacuum cleaner will be
reduced. Press button
A2
again to again increase the suction power.
• When you have finished using it, turn off the vacuum cleaner by
pressing button
A1
. Clean it according to the instructions contained
in chapter
»Cleaning and maintenance«
, and allow it to charge
according to the instructions contained in chapter
»Charging the
vacuum cleaner«
.
• In the event that the rotary brush is clogged while vacuuming, e.g.
by a larger amount of vacuumed hair or fur, the automatic safety
mechanism is activated, which will stop the rotary brush to prevent it
from becoming damaged. Turn off the vacuum cleaner using button
A1
and remove the wound on hair or fur from the rotary brush – more in
chapter
»Cleaning and maintenance«
. Prior to turning on the vacuum
cleaner again, check that the rotary brush
A14
, the dust container
A11
and the filters
A9
and
A10
are clean.
Hand vacuum cleaner
• The hand vacuum cleaner is suitable for vacuuming locally soiled floor
coverings, furniture, etc.
EN 2-in-1 Cordless vacuum cleaner
User’s manual
Характеристики

Остались вопросы?Не нашли свой ответ в руководстве или возникли другие проблемы? Задайте свой вопрос в форме ниже с подробным описанием вашей ситуации, чтобы другие люди и специалисты смогли дать на него ответ. Если вы знаете как решить проблему другого человека, пожалуйста, подскажите ему :)


