Пылесос Ardesto CVC-D0611BB - инструкция пользователя по применению, эксплуатации и установке на русском языке. Мы надеемся, она поможет вам решить возникшие у вас вопросы при эксплуатации техники.
Если остались вопросы, задайте их в комментариях после инструкции.
"Загружаем инструкцию", означает, что нужно подождать пока файл загрузится и можно будет его читать онлайн. Некоторые инструкции очень большие и время их появления зависит от вашей скорости интернета.


UA
7
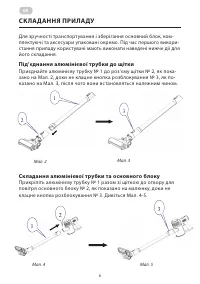
3.
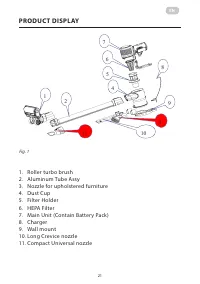
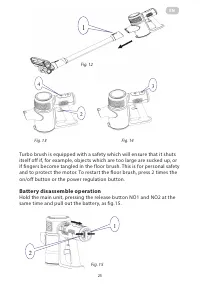
Product Assembly
For the convenience of transportation and storage, main unit, brush, aluminum
tube assy, wall-mount, charger and nozzles packaged respectively on account of
relatively large in size. Users should follow the steps below for assembling when they
use the product for the first time.
3.1
Aluminum tube and brush connection
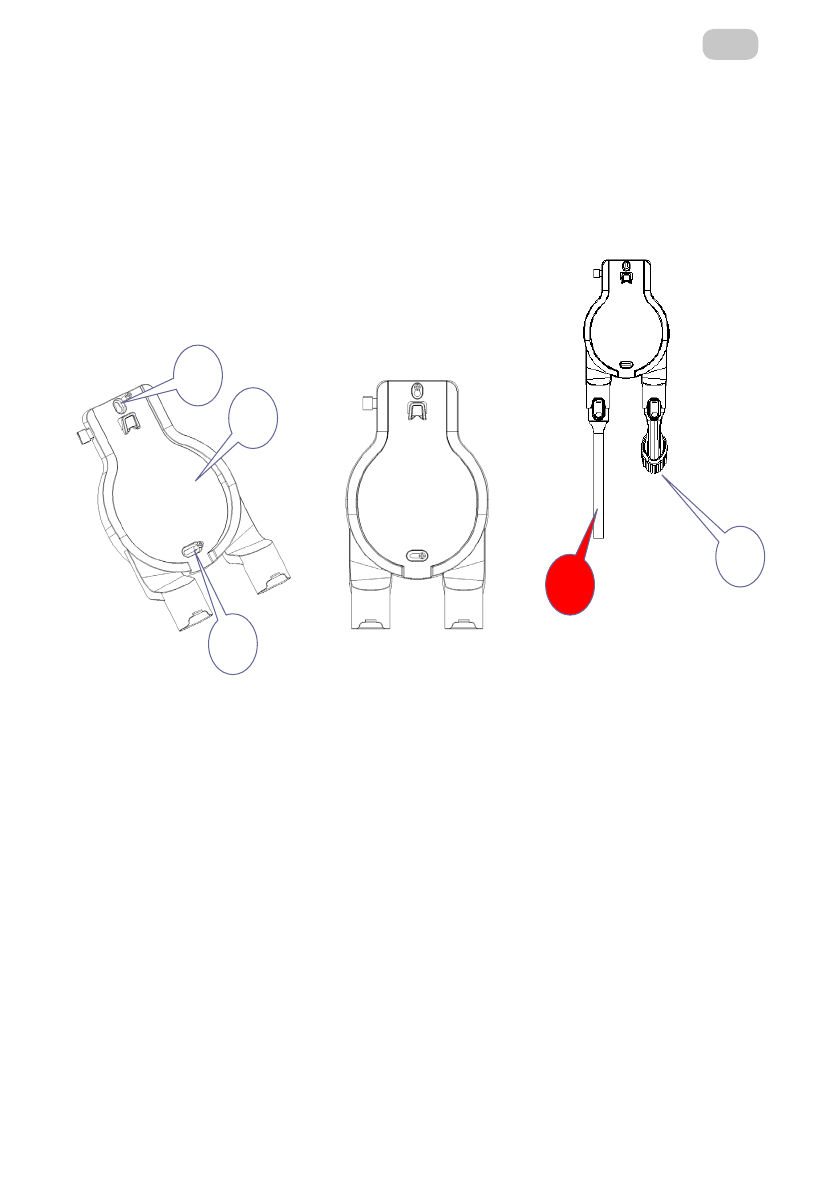
Attach the aluminum tube NO.1 to the brush connector NO.2 as shown on figure 3-1
until the release button NO.3 as figure 3-2 clicks, then they are in place properly.
3.2
Aluminum Tube And Main Unit Assembly
Attached aluminum tube assy NO.1 together with brush to the air inlet of main unit
NO.2 as show until release button NO.3 clicks. See figure 3-3 and 3-4.
Figure 3-1
1
2
Filgre 3-2
Figure 3-3
Figure 3-4
3
1
2
3
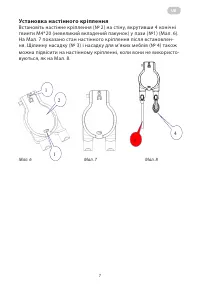
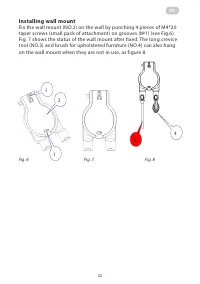
3.3 Installing wall mount
Fix the wall mount (NO.2) on the wall by punching 4 pieces of M4*20 taper screws
(small pack of attachment) on position NO.1 and NO.3. Fig. 3-6 shows the status of the
wall mount after fixed. The long crevice tool (NO.3) and brush for upholstered furniture
(NO.4) can also hang on the wall mount when they are not in use,
as
figure 3-7.
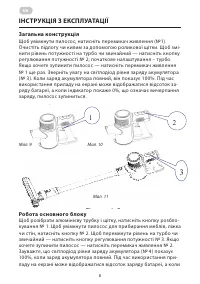
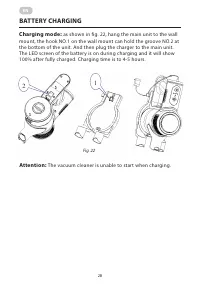
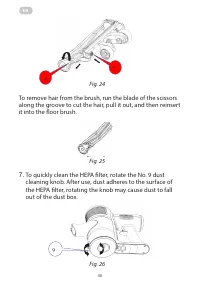
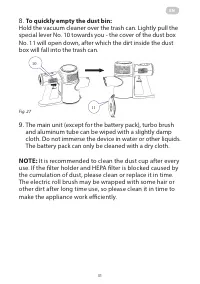
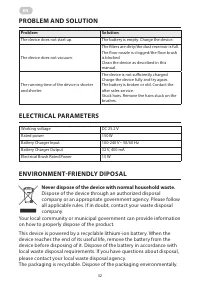
4.
Operating Instruction
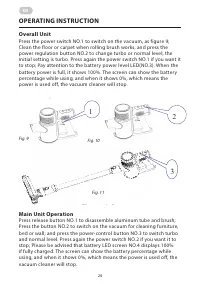
4.1
Overall Unit
Press the power switch NO.1 to switch on the vacuum, as figure 4-1; Clean the
floor or carpet when rolling brush works, and press the power regulation button NO.2 to
change turbo or normal level, the initial setting is turbo. Press again the power switch
NO.1 if you want it to stop; Pay attention to the battery power level LED(NO.3). When
the battery power is full, it shows 100%. The screen can show the battery percentage
while using, and when it shows 0%, which means the power is used off, the vacuum
cleaner will stop.
Figure 3-5
Figure 3-6
Figure 3-7
1
2
1
2
1
3
4
Установка настінного кріплення
Встановіть настінне кріплення (№ 2) на стіну, вкрутивши 4 конічні
гвинти M4*20 (невеликий вкладений пакунок) у пази (№1) (Мал. 6).
На Мал. 7 показано стан настінного кріплення після встановлен-
ня. Щілинну насадку (№ 3) і насадку для м’яких меблів (№ 4) також
можна підвісити на настінному кріпленні, коли вони не використо-
вуються, як на Мал. 8.
Мал. 6
Мал. 7
Мал. 8
Характеристики

Остались вопросы?Не нашли свой ответ в руководстве или возникли другие проблемы? Задайте свой вопрос в форме ниже с подробным описанием вашей ситуации, чтобы другие люди и специалисты смогли дать на него ответ. Если вы знаете как решить проблему другого человека, пожалуйста, подскажите ему :)
