Пылесос Zelmer 450 - инструкция пользователя по применению, эксплуатации и установке на русском языке. Мы надеемся, она поможет вам решить возникшие у вас вопросы при эксплуатации техники.
Если остались вопросы, задайте их в комментариях после инструкции.
"Загружаем инструкцию", означает, что нужно подождать пока файл загрузится и можно будет его читать онлайн. Некоторые инструкции очень большие и время их появления зависит от вашей скорости интернета.


51
B
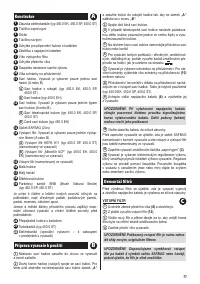
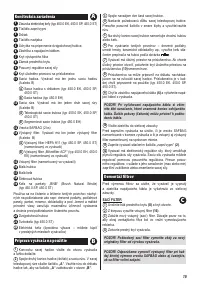
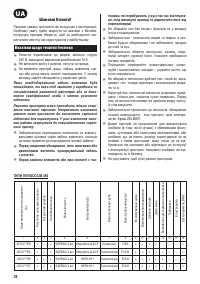
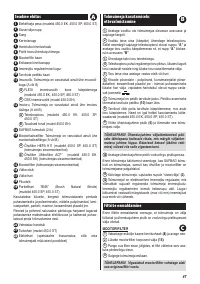
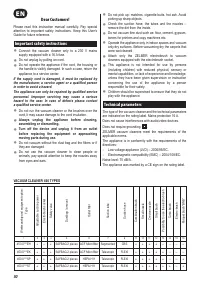
Appliance elements
1
Electrobrush socket (type 450.0 EK, 450.0 SP, 450.0 ST)
2
ON/OFF button
3
Handle
4
Cord rewind button
5
Combination brush fastening
6
Plug and cord
7
Outlet ilter cover
8
Front cover fastening
9
Suction power regulation slider
10
Accessory compartment cover
11
Suction hose. The vacuum cleaner is equipped with one
suction hose (A or B)
A
Suction hose with a handle (type 450.0 EK, 450.0 SP,
450.0 ST)
B
Suction hose (type 450.0 EH)
12
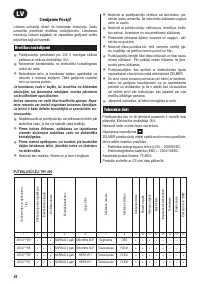
Suction pipe. The vacuum cleaner is equipped with one
kind of suction pipe (A or B)
A
Telescopic suction tube (type 450.0 EK, 450.0 SP,
450.0 ST)
B
Segmented suction tubes (type 450.0 EH)
13
SAFBAG dust bag (2 pieces)
14
Outlet ilter. The vacuum cleaner is equipped with only
one outlet ilter (A or B)
A
Outlet ilter HEPA H11 (type 450.0 SP, 450.0 ST)
(installed in the vacuum cleaner)
B
“ACF Microilter” outlet ilter (type 450.0 EH,
450.0 EK) (installed in the vacuum cleaner)
15
Inlet ilter (installed in the vacuum cleaner)
16
Small nozzle
17
Small brush
18
Crevice nozzle
19
Parquet brush “BNB” (type 450.0 SP, 450.0 ST)
Is used to clean and polish hard, scratch sensitive surfaces
such as wooden loors, loor panels, parquet, marble, tiles, etc.
Delicate and soft natural bristles ensure maximum vacuum
effectiveness and protects against scratching the cleaned
surface.
20
Switchable combination brush
21
Turbobrush (type 450.0 ST)
22
Electrobrush (additional equipment – may be bought in
retail centers)
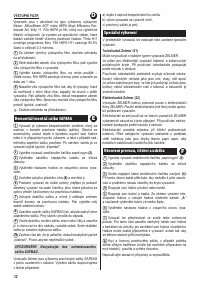
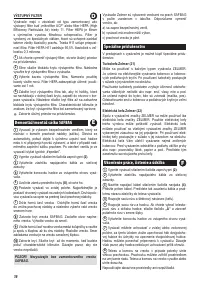
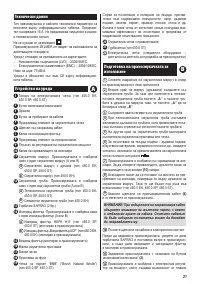
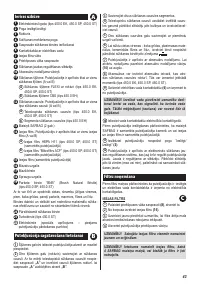
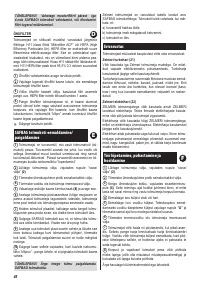
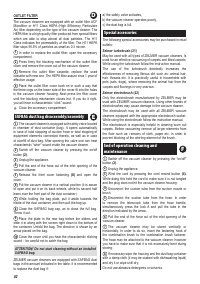
Preparing the vacuum cleaner for
operation
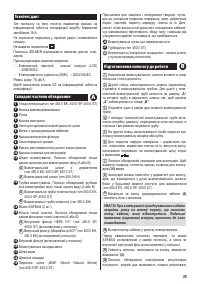
1
Pull the end of the suction hose into the opening and
press lightly.
2
Attach the other end of the hose (the handle) to the
suction tube. In order to do this, press the lock
A
in the
telescopic suction tube and put the tube in the handle, so the
lock
A
is fastened in hole
B
.
3
Join both segments of the suction tube together.
4
In case of the telescopic suction tube adjust the
necessary tube length by moving the slider according to the
slide in/slide out direction arrow.
5
Assemble the appropriate nozzle or brush to the other
end of the suction tube.
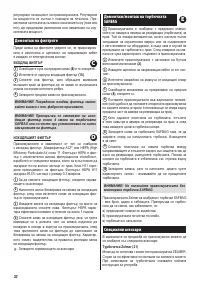
6
To clean hard surfaces – wooden loors, plastic loors,
ceramic tiles etc. pull out the brush by pressing the switch on
the combination brush according to the igure
.
7
The vacuum cleaner is equipped with an accessory
compartment. In order to open it pull the compartment cover
(10)
up.
8
The accessories may be attached to the accessory holder
in the suction hose handle. This way they will be available for
use at any time (type 450.0 EK, 450.0 SP, 450.0 ST).
9
Pull the plug and cord
(6)
out of the vacuum cleaner.
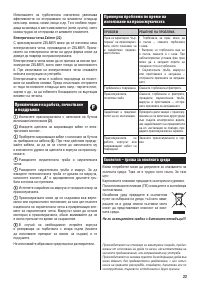
ATTENTION! While pulling out the cord, pay attention
to the yellow stripe which signals the end of the
cord. Further attempts (pulling on cord) may result in
damaging the cord.
10
Plug in the appliance.
Before operation make sure that the SAFBAG bag is installed
in the vacuum cleaner chamber and that inlet ilter and the
outlet ilter is installed in the appliance.
11
Switch on the vacuum cleaner by pressing the “on/off”
button
(2)
.
12
The vacuum cleaner is equipped with electronic power
regulator allowing a stepless regulation of vacuum cleaner
power. The power regulation is performed with a slider.
Moving the slider according to its mark (max or min) will
increase or reduce the suction power.
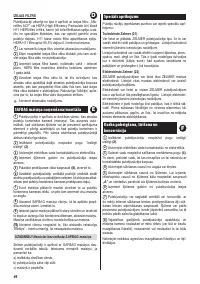
Filter disassembly
Before changing the ilters make sure that the vacuum cleaner
is switched off and unplugged from the mains supply.
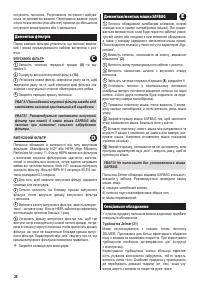
INLET FILTER
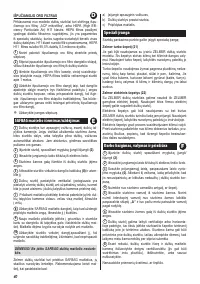
1
Release the catch of front cover
(8)
and open it.
2
Remove the inlet ilter
(15)
out of the housing.
3
Replace it with a new one, paying attention that the outer
edge of the ilter is placed inside the safety rib.
4
Close the front cover of the vacuum cleaner.
ATTENTION! The damaged inlet ilter should be replaced
with a new, genuine manufactured product only.
ATTENTION! It is advised to replace the inlet ilter
every 4 replacements of the SAFBAG dust bag, or
even more often, if necessary.
A
C


