
Пылесос LG CordZero A9-LITE - инструкция пользователя по применению, эксплуатации и установке на русском языке. Мы надеемся, она поможет вам решить возникшие у вас вопросы при эксплуатации техники.
Если остались вопросы, задайте их в комментариях после инструкции.
"Загружаем инструкцию", означает, что нужно подождать пока файл загрузится и можно будет его читать онлайн. Некоторые инструкции очень большие и время их появления зависит от вашей скорости интернета.


25
EN
EN
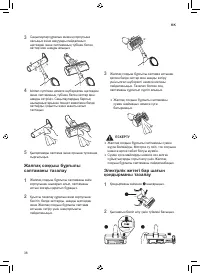
2
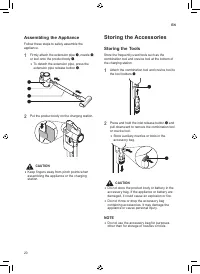
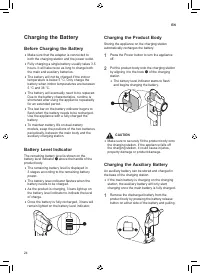
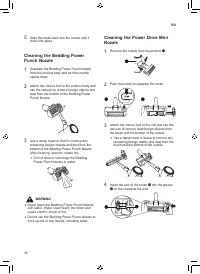
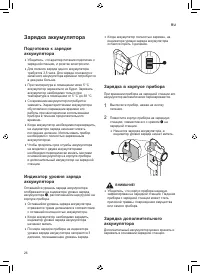
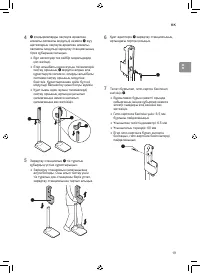
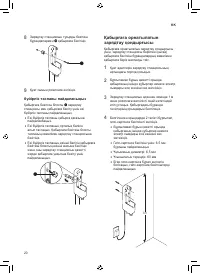
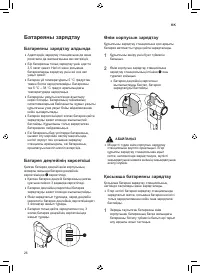
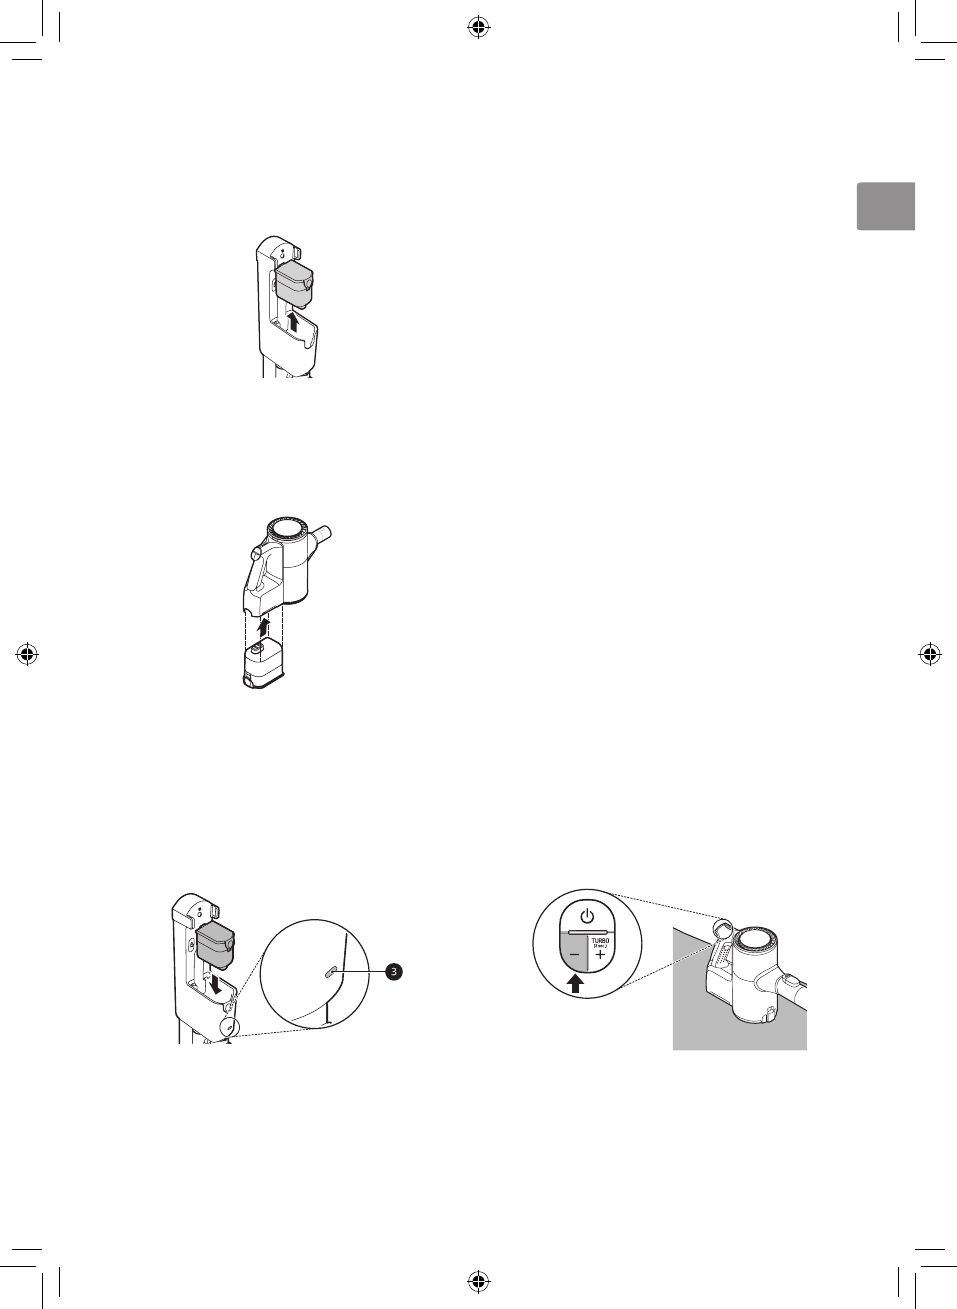
Remove the battery in the charging station by
pressing the button at the rear of the battery
and lifting the battery.
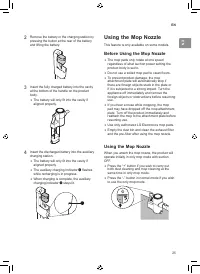
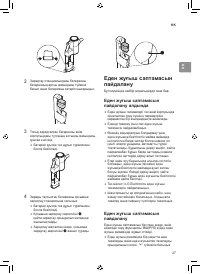
3
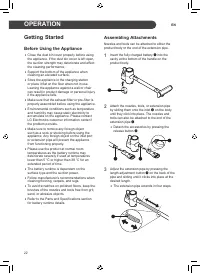
Insert the fully charged battery into the cavity
at the bottom of the handle on the product
body.
•
The battery will only fit into the cavity if
aligned properly.
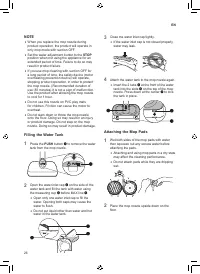
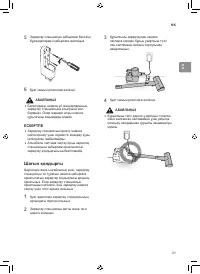
4
Insert the discharged battery into the auxiliary
charging station.
•
The battery will only fit into the cavity if
aligned properly.
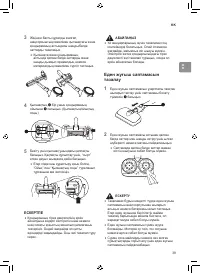
•
The auxiliary charging indicator
c
flashes
while recharging is in progress.
•
When charging is complete, the auxiliary
charging indicator
c
stays lit.
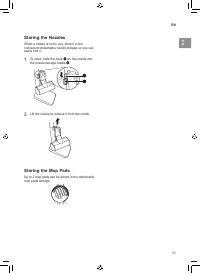
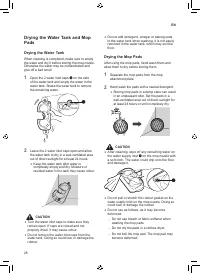
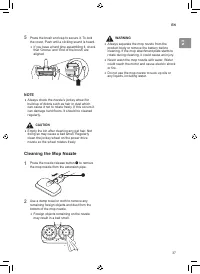
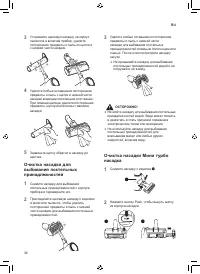
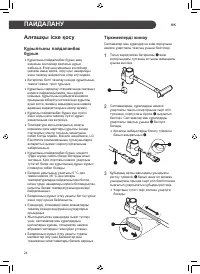
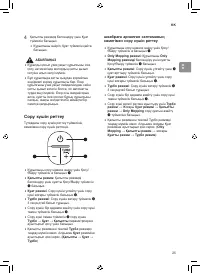
Using the Mop Nozzle
This feature is only available on some models.
Before Using the Mop Nozzle
•
The mop pads only rotate at one speed
regardless of what suction power setting the
product body is set to.
•
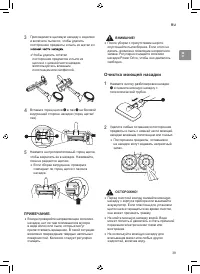
Do not use a soiled mop pad to clean floors.
•
To prevent product damage, the mop
attachment plate will automatically stop if
there are foreign objects stuck in the plate or
if it is subjected to a strong impact. Turn the
appliance off immediately and remove the
foreign objects or obstructions before resuming
use.
•
If you hear a noise while mopping, the mop
pad may have dropped off the mop attachment
plate. Turn off the product immediately and
reattach the mop to the attachment plate before
resuming use.
•
Use only authorized LG Electronics mop pads.
•
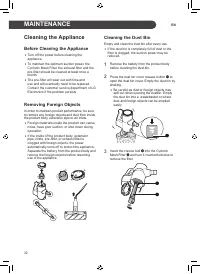
Empty the dust bin and clean the exhaust filter
and the pre-filter after using the mop nozzle.
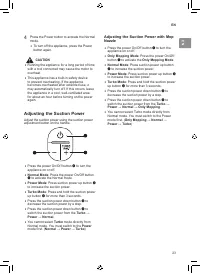
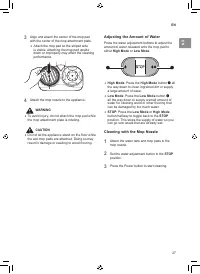
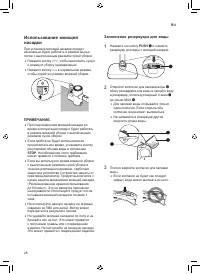
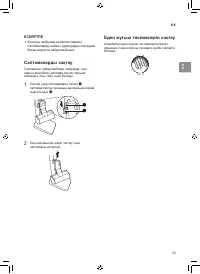
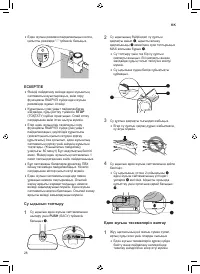
Using the Mop Nozzle
When you attach the mop nozzle, the product will
operate initially in only mop mode with suction
OFF.
•
Press the “+” button if you wish to carry out
both dust cleaning and mop cleaning at the
same time in only mop mode.
•
Press the “-” button in normal mode if you wish
to use the only mop mode.
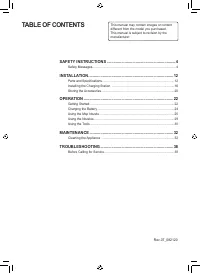
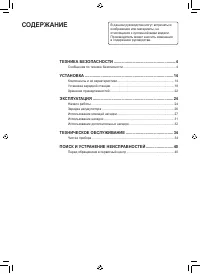
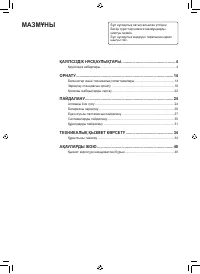
Содержание
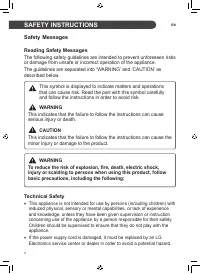
- 43 СОДЕРЖАНИЕ; ТЕХНИКА БЕЗОПАСНОСТИ
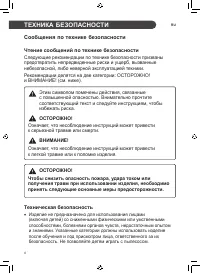
- 44 Сообщения по технике безопасности; Чтение сообщений по технике безопасности
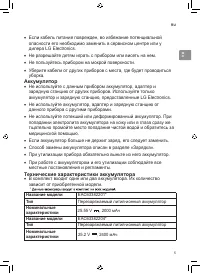
- 45 Перезаряжаемый литий-ионный аккумулятор
- 46 Установка
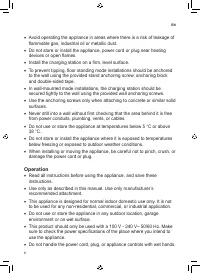
- 47 Эксплуатация
- 48 Перед использованием прибора следует убрать с пола провода или
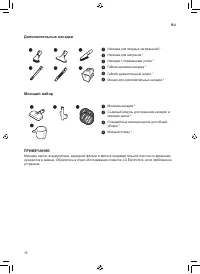
- 52 Моющая насадка
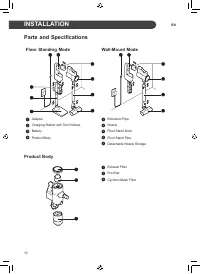
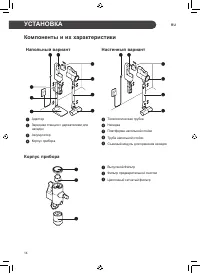
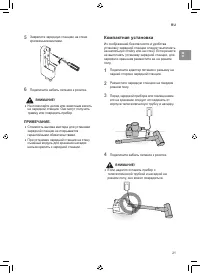
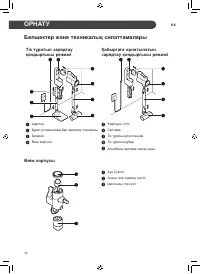
- 54 Компоненты и их характеристики; Напольный вариант; УСТАНОВКА
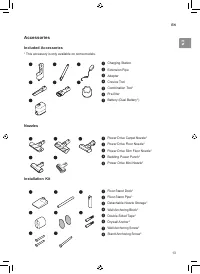
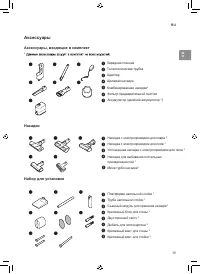
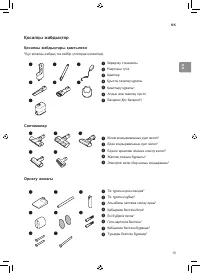
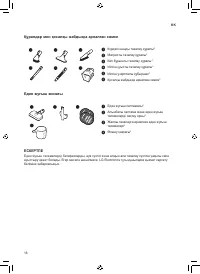
- 55 Аксессуары; Аксессуары, входящие в комплект
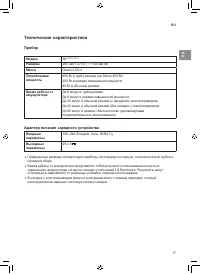
- 57 Прибор; Адаптер
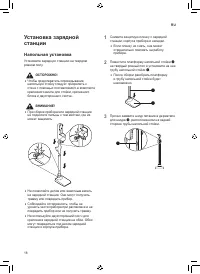
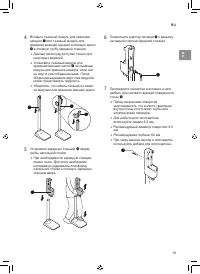
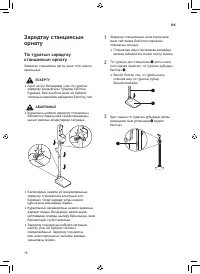
- 58 Напольная установка
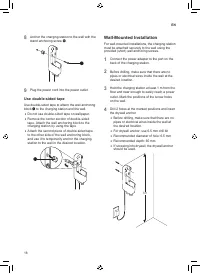
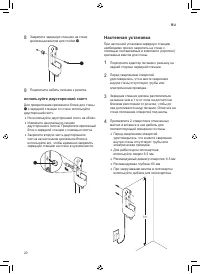
- 60 используйте двусторонний скотч; Настенная установка
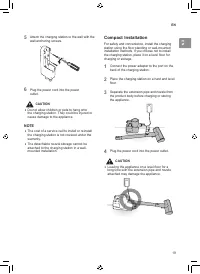
- 61 Компактная установка
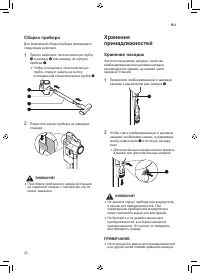
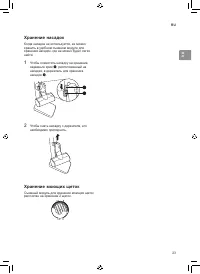
- 62 Сборка прибора; Хранение; Хранение насадок
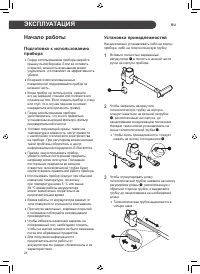
- 64 ЭКСПЛУАТАЦИЯ; Начало работы; Подготовка к использованию
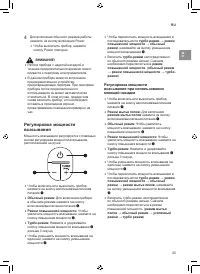
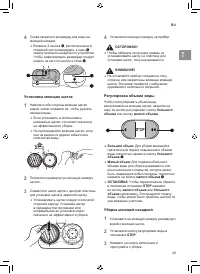
- 65 Регулировка мощности
- 66 Зарядка аккумулятора
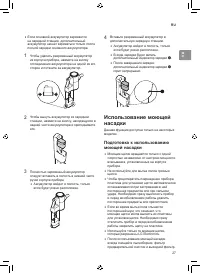
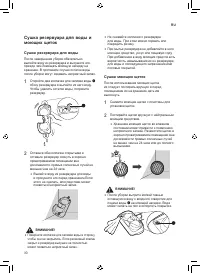
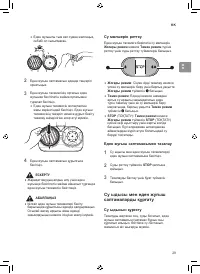
- 68 Заполнение резервуара для воды
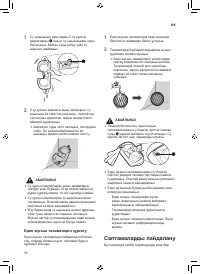
- 69 Уборка моющей насадкой
- 70 Сушка резервуара для воды
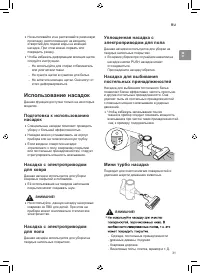
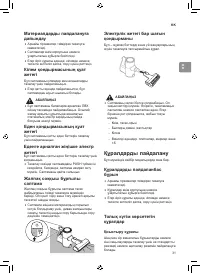
- 72 Комбинированная насадка; Щелевая насадка
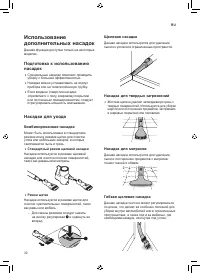
- 73 Насадка с переменным углом
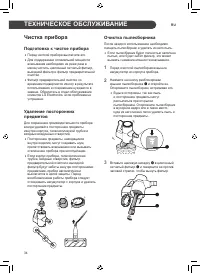
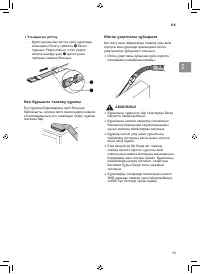
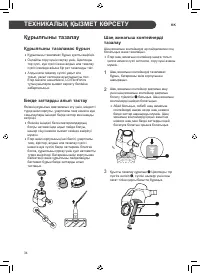
- 74 ТЕХНИЧЕСКОЕ ОБСЛУЖИВАНИЕ; Чистка прибора; Подготовка к чистке прибора
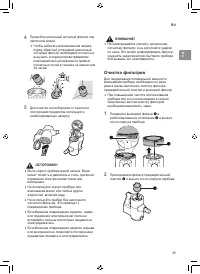
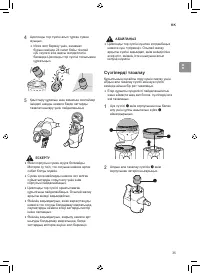
- 75 Очистка фильтров
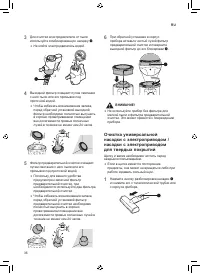
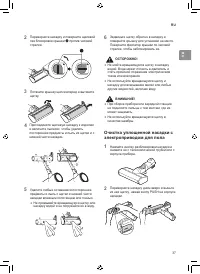
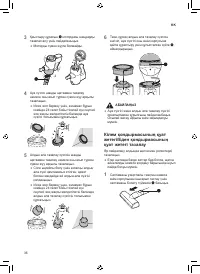
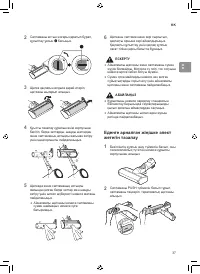
- 76 Очистка универсальной
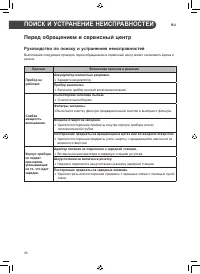
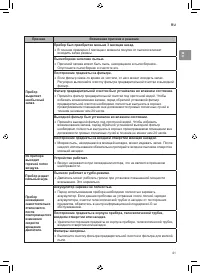
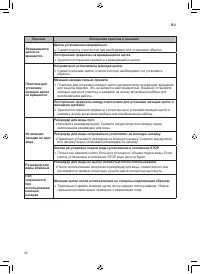
- 80 Перед обращением в сервисный центр; Руководство по поиску и устранению неисправностей; ПОИСК И УСТРАНЕНИЕ НЕИСПРАВНОСТЕЙ
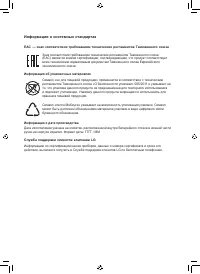
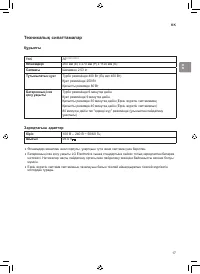
- 83 Информация о системных стандартах


