Пылесос Karcher VC 4s Cordless - инструкция пользователя по применению, эксплуатации и установке на русском языке. Мы надеемся, она поможет вам решить возникшие у вас вопросы при эксплуатации техники.
Если остались вопросы, задайте их в комментариях после инструкции.
"Загружаем инструкцию", означает, что нужно подождать пока файл загрузится и можно будет его читать онлайн. Некоторые инструкции очень большие и время их появления зависит от вашей скорости интернета.

24
English
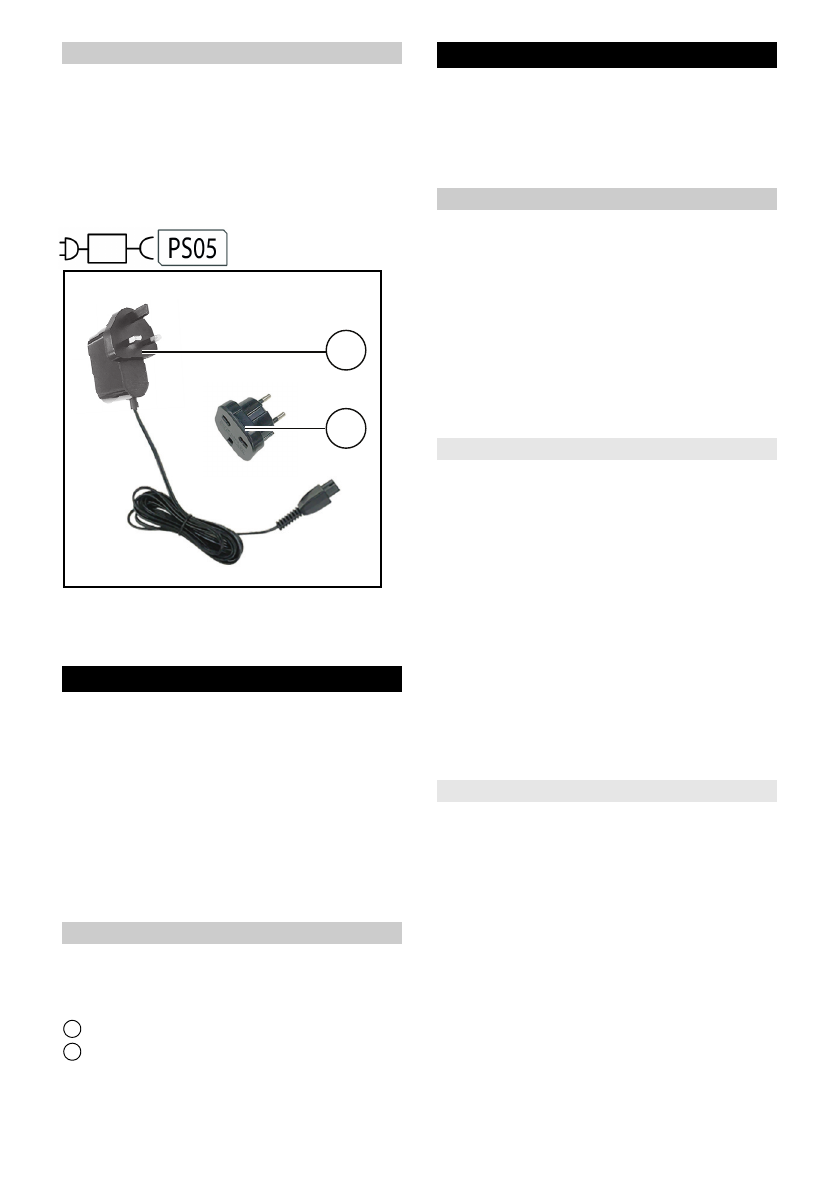
Charger
몇
WARNING
●
Only charge the appliance using the orig-
inal charger enclosed or with a charger
approved by KÄRCHER.
Use the following adapter:
Appliance type:1.198-2
8
1.0
6.195-095.0
Charger
(1)Charger
(2)Plug adapter (using the plug adapter ac-
cording to the actual situation)
Assembly
1. Insert the extension wand into the vacu-
um cleaner.
Illustration B
For removal, press the unlock button,
and unplug the extension wand.
2. Insert the extension wand into the floor
nozzle.
Illustration C
For removal, press the unlock button,
and unplug the floor nozzle.
Installing the storage dock
1. Insert the storage holder into the storage
base.
Illustration D
1
Storage holder
2
Storage base
Operation
Note
The appliance will be shut down automati-
cally if it is in danger of overheating. Ensure
that the brush roller is not blocked in any
way.
Charging
Note
The appliance does not work during the
charging process.
The charging time is approx. 3 - 4 hours.
The appliance must be fully charged be-
fore first use.
You can charge the appliance in 2 different
ways:
using the charging storage dock
using the charging socket on device
Charging storage dock
1.
Insert the connector of the charger into
the charging interface of the storage
dock.
Illustration E
2.
Connect the power cable of charger to
the power supply.
3.
Insert the appliance into the charging
storage dock.
Illustration F
The charging process starts automati-
cally.
4.
When the charging process is complete,
unplug the power cable of the c
harger
from the power supply.
Additional charging socket on device
1. Open the cover of the charging inter-
face.
Illustration G
2. Insert the connector of the charger into
the charging interface.
3. Connect the power cable of the charger
to the power supply.
The charging process starts automati-
cally.
4. When the charging process is complete,
unplug the power cable of the charger
from the power supply.
1
2
1.198-291.0
Характеристики
Остались вопросы?Не нашли свой ответ в руководстве или возникли другие проблемы? Задайте свой вопрос в форме ниже с подробным описанием вашей ситуации, чтобы другие люди и специалисты смогли дать на него ответ. Если вы знаете как решить проблему другого человека, пожалуйста, подскажите ему :)


