Пылесос JIMMY JV71 - инструкция пользователя по применению, эксплуатации и установке на русском языке. Мы надеемся, она поможет вам решить возникшие у вас вопросы при эксплуатации техники.
Если остались вопросы, задайте их в комментариях после инструкции.
"Загружаем инструкцию", означает, что нужно подождать пока файл загрузится и можно будет его читать онлайн. Некоторые инструкции очень большие и время их появления зависит от вашей скорости интернета.


4
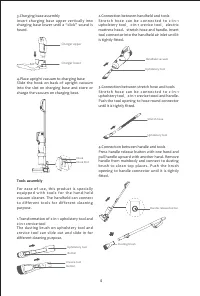
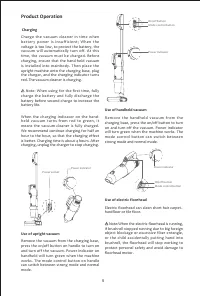
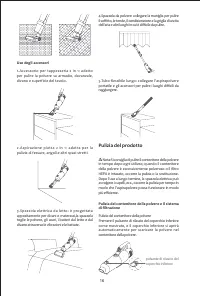
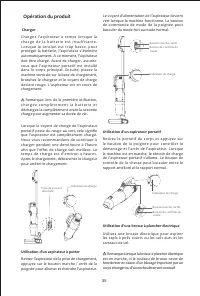
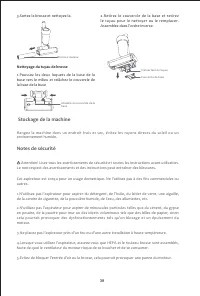
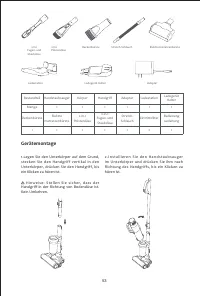
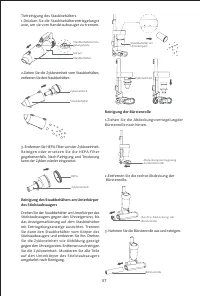
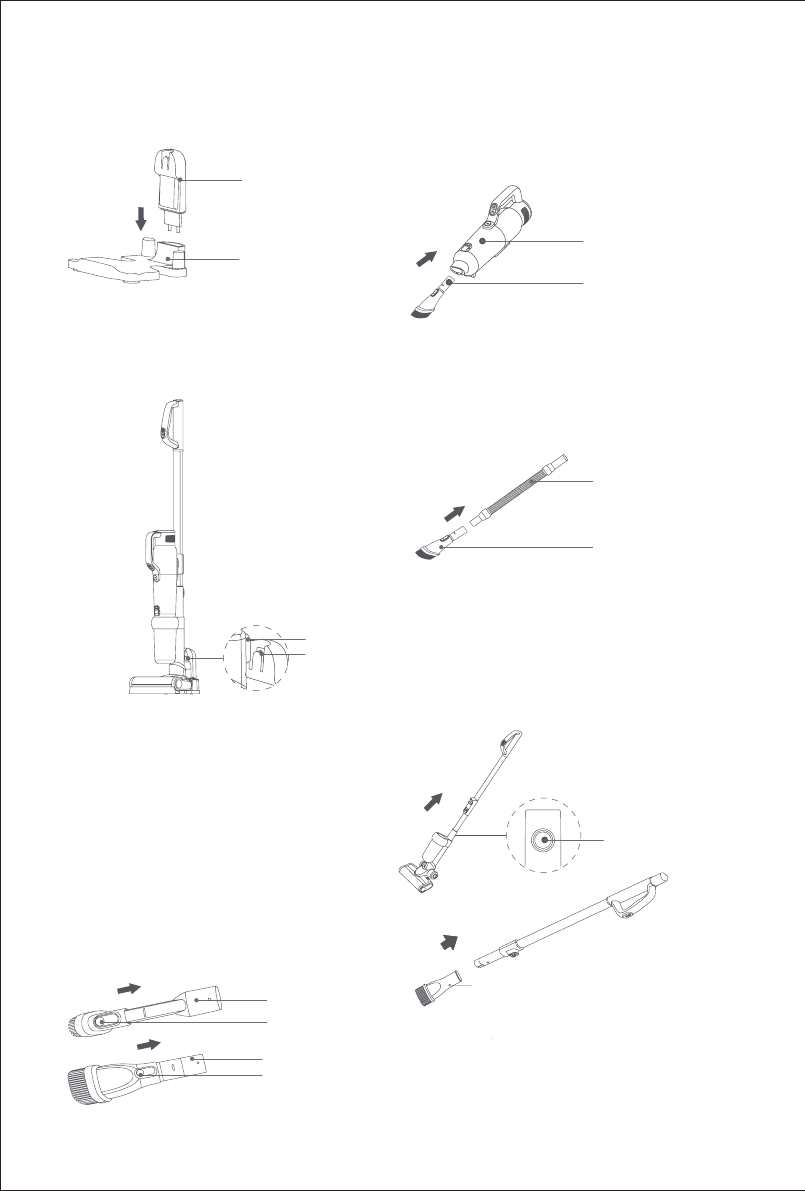
3.Charging base assembly
Insert charging base upper vertically into
charging base lower until a “click” sound is
heard.
Charger upper
Charger lower
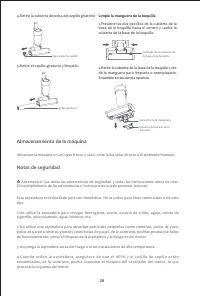
4.Place upright vacuum to charging base
Slide the hook on back of upright vacuum
into the slot on charging base and store or
charge the vacuum on charging base.
Hook Slot
Hook
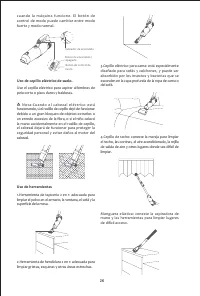
Tools assembly
For ease of use, this product is specially
e q u i p p e d w i t h t o o l s f o r t h e h a n d - h e l d
vacuum cleaner. The handheld can connect
to different tools for different cleaning
purpose.
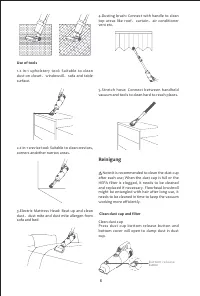
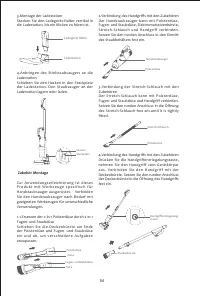
1.Transformation of 2-in-1 upholstery tool and
2-in-1 crevice tool
The dusting brush on upholstery tool and
crevice tool can slide out and slide in for
different cleaning purpose.
Upholstery tool
Button
Button
Crevice tool
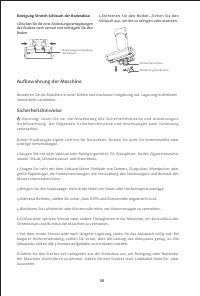
2.Connection between handheld and tools
S t r e t c h h o s e c a n b e c o n n e c t e d t o 2 - i n - 1
upholstery tool
、
2-in-1 crevice tool
、
electric
mattress head
、
stretch hose and handle. Insert
tool connector into the handheld air inlet until it
is tightly fitted.
Handheld vacuum
Upholstery tool
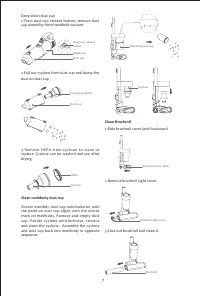
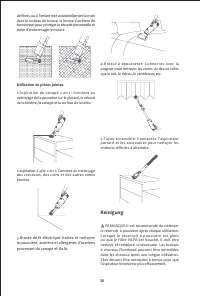
3.Connection between stretch hose and tools
S t r e t c h h o s e c a n b e c o n n e c t e d t o 2 - i n - 1
upholstery tool
、
2-in-1 crevice toool and handle.
Push the tool opening to hose round connector
until it is tightly fitted.
Upholstery tool
Stretch hose
4.Connection between handle and tools
Press handle release button with one hand and
pull handle upward with another hand. Remove
handle from mainbody and connect to dusting
brush to clean top places. Push the brush
opening to handle connector until it is tightly
fitted.
Handle release button
Dusting brush
Содержание
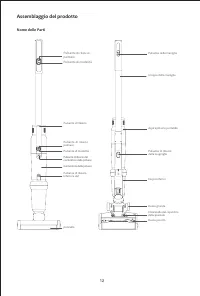
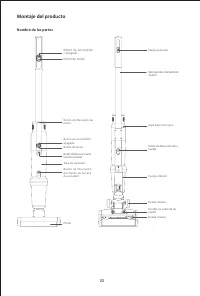
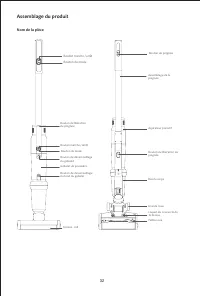
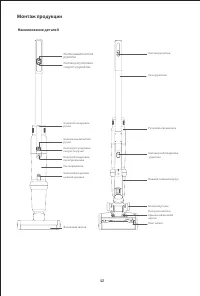
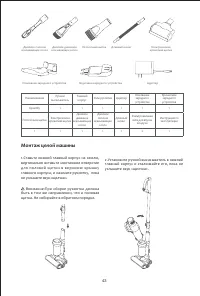
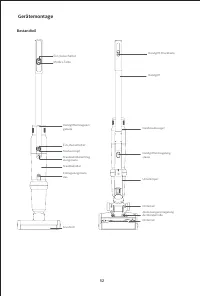
- 45 Монтаж целой машины
- 46 Монтаж пылесоса с толкателем и; Монтаж принадлежностей
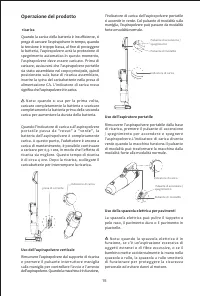
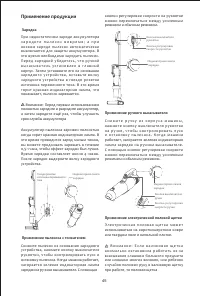
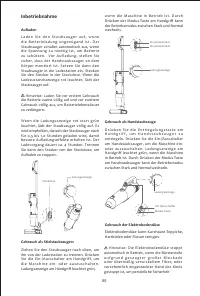
- 47 Применение продукции; Зарядка
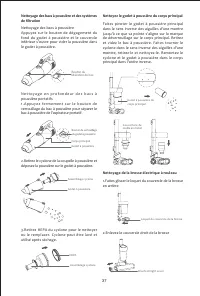
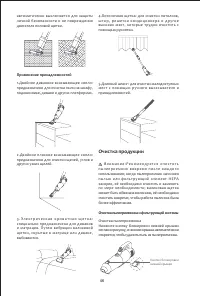
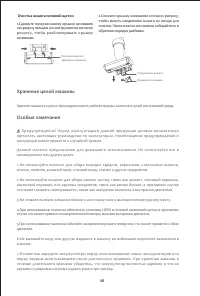
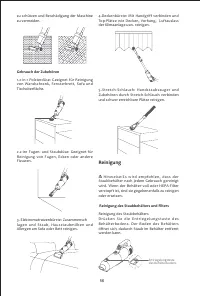
- 48 Применение принадлежностей; Очистка продукции; Очистка пылеприемника и фильтрующей системы
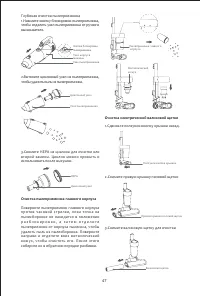
- 49 Очистка пылеприемника главного корпуса
- 50 Очистка шланга половой щетки; Сдвиньте ползунок-кнопку крышки основания; Хранение целой машины
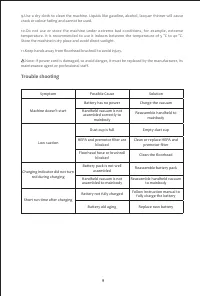
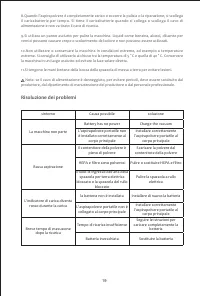
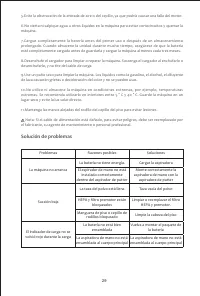
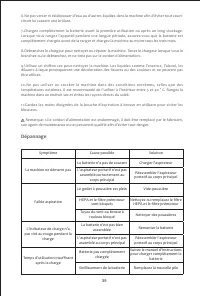
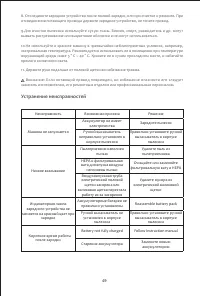
- 51 Держите руки подальше от половой щетки во избежание травма.; Устранение неисправностей; Reassemble battery pack
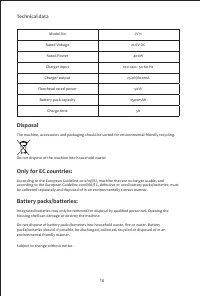
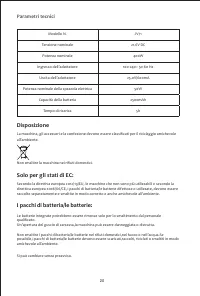
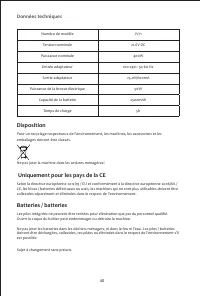
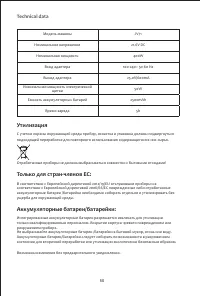
- 52 Утилизация
- 53 продукт имеет два года гарантии с момента покупки.; Указание по поводу гарантии


