
Пылесос JIMMY H8Pro - инструкция пользователя по применению, эксплуатации и установке на русском языке. Мы надеемся, она поможет вам решить возникшие у вас вопросы при эксплуатации техники.
Если остались вопросы, задайте их в комментариях после инструкции.
"Загружаем инструкцию", означает, что нужно подождать пока файл загрузится и можно будет его читать онлайн. Некоторые инструкции очень большие и время их появления зависит от вашей скорости интернета.


3
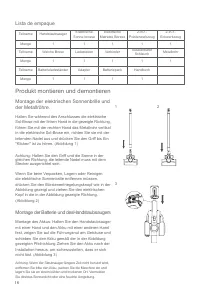
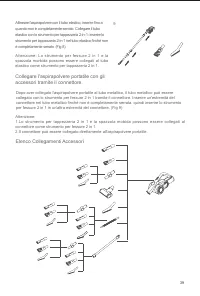
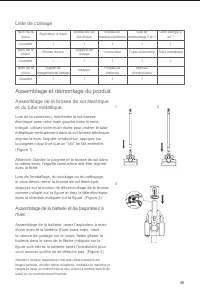
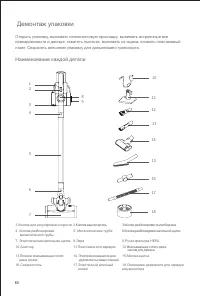
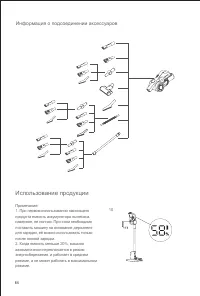
Packing List
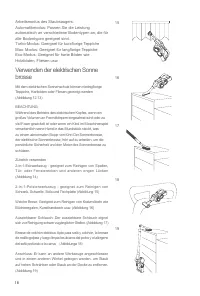
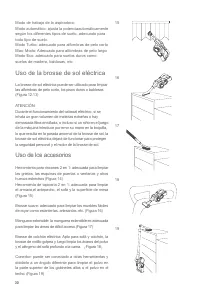
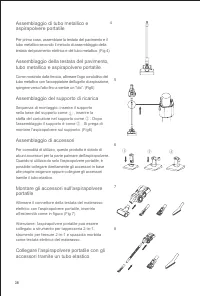
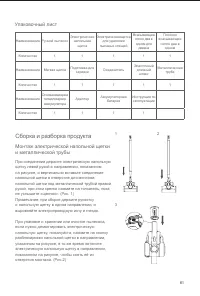
Product assembly and disassembly
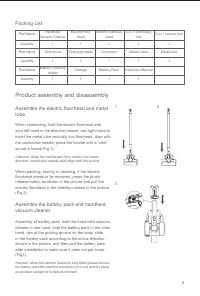
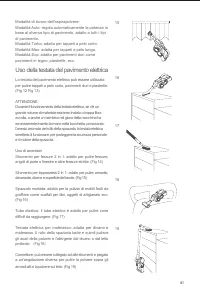
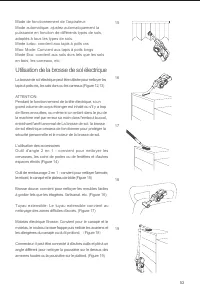
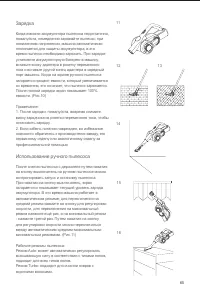
Assemble the electric floorhead and metal
tube
When connecting, hold the electric floorhead with
your left hand in the direction shown, use right hand to
insert the metal tube vertically into floorhead, align with
the conductive needle, press the handle until a “click”
sound is heard.(Fig 1)
Attention: Keep the handle and floor head in the same
direction, conductive needle shall align with the socket.
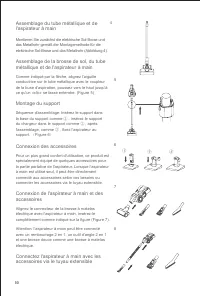
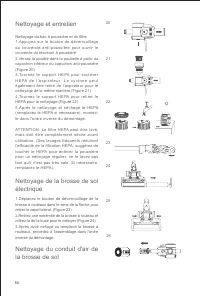
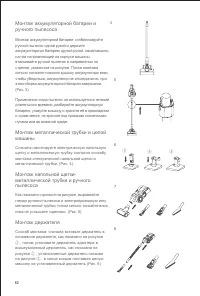
When packing, storing or cleaning, if the electric
floorhead needs to be removed, press the brush
release button as shown in the picture and pull the
electric floorhead in the direction shown in the picture.
(Fig 2)
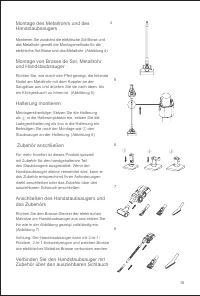
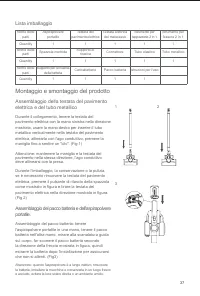
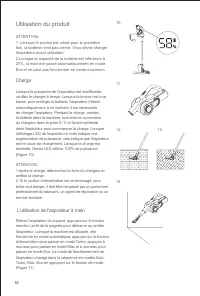
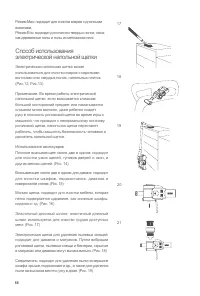
Assemble the battery pack and handheld
vacuum cleaner
Assembly of battery pack: hold the hand held vacuum
cleaner in one hand, hold the battery pack in the other
hand, aim at the guiding groove on the body, slide
in the battery pack according to the arrow direction
shown in the picture, and then pull the battery pack
after installation to make sure it does not get loose.
(Fig3)
Attention: when the vacuum cleaner is long idled, please remove
the battery, pack the machine and store it in a cool and dry place,
avoid direct sunlight or humid environment.
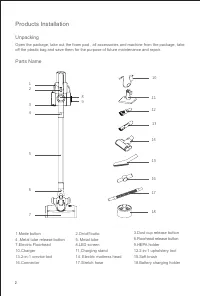
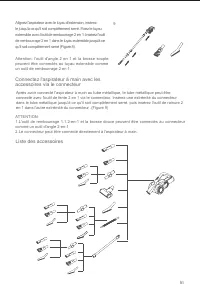
Part Name
Handheld
Vacuum Cleaner
ElectricFloor
head
Electric mattress
head
2-in-1 upholstery
tool
2-in-1 crevice tool
Quantity
1
1
1
1
1
Part Name
Soft brush
Charging stand
Connector
Stretch hose
Metal tube
Quantity
1
1
1
1
1
Part Name
Battery charging
holder
Charger
Battery Pack
Instruction Manual
Quantity
1
1
1
1
1
2
3
Содержание
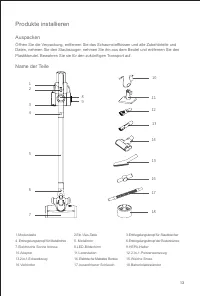
- 62 Демонтаж упаковки; Наименование каждой детали
- 63 Упаковочный лист; Сборка и разборка продукта; Монтаж электрической напольной щетки
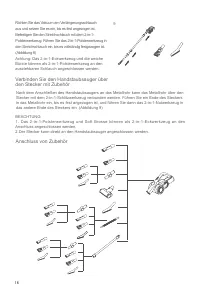
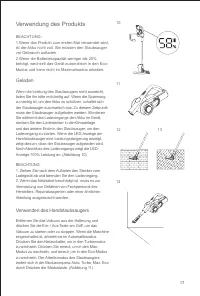
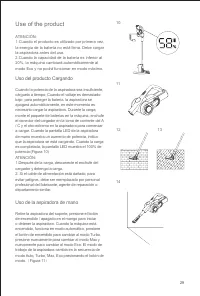
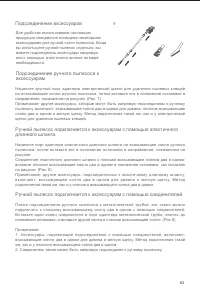
- 66 Использование продукции; Информация о подсоединении аксессуаров
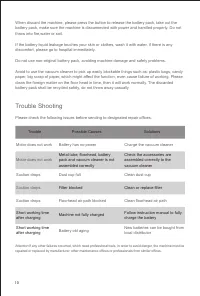
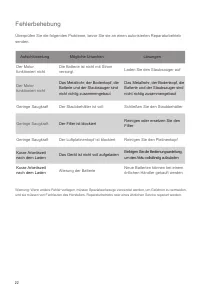
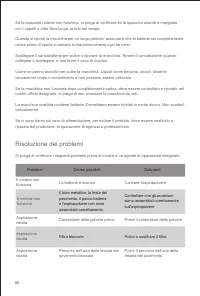
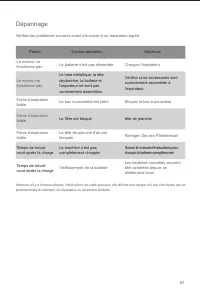
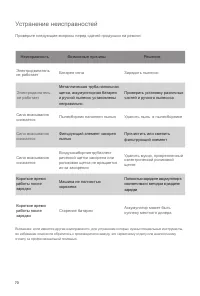
- 72 Устранение неисправностей
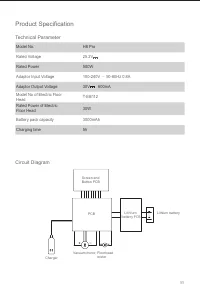
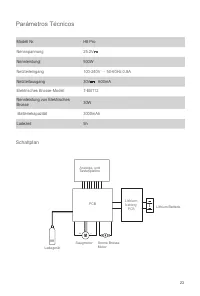
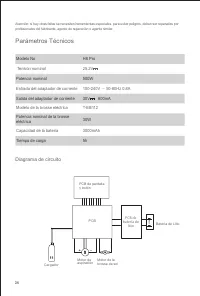
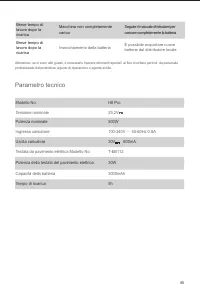
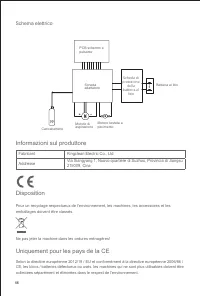
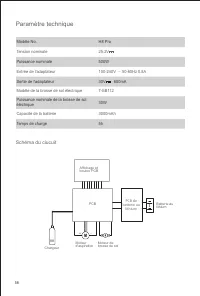
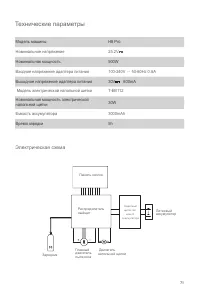
- 73 Технические параметры; Электрическая схема
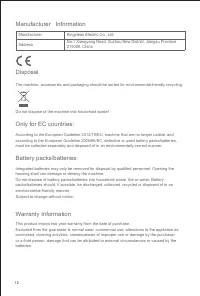
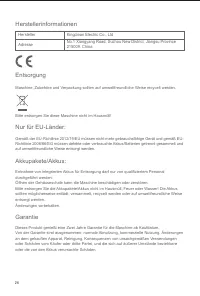
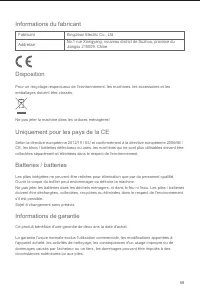
- 74 Информация изготовителя


