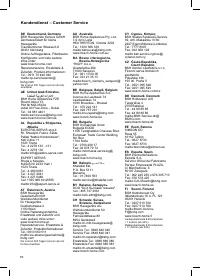
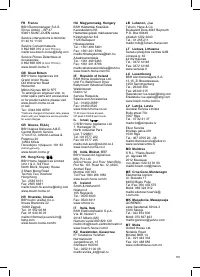
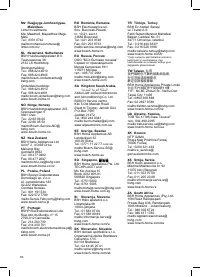
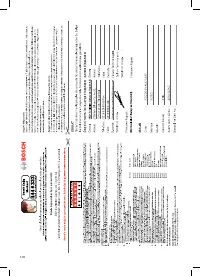
Пылесос Bosch BCH 7ATH32K - инструкция пользователя по применению, эксплуатации и установке на русском языке. Мы надеемся, она поможет вам решить возникшие у вас вопросы при эксплуатации техники.
Если остались вопросы, задайте их в комментариях после инструкции.
"Загружаем инструкцию", означает, что нужно подождать пока файл загрузится и можно будет его читать онлайн. Некоторые инструкции очень большие и время их появления зависит от вашей скорости интернета.


37
Congratulations on your purchase of the Bosch Athlet
vacuum cleaner.
This instruction manual describes various Athlet mo-
dels, which means that some of the equipment features
and functions described may not apply to your model.
You should only use original Bosch accessories, which
have been specially developed for your vacuum clea-
ner, in order to achieve the best possible vacuuming
results.
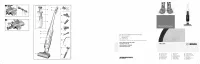
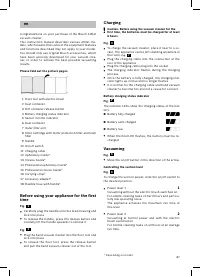
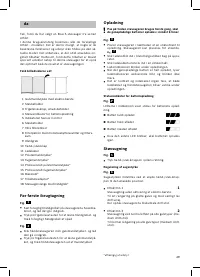
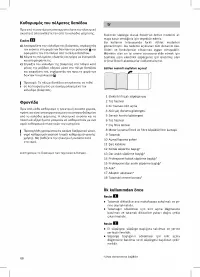
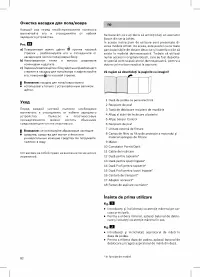
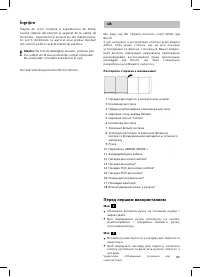
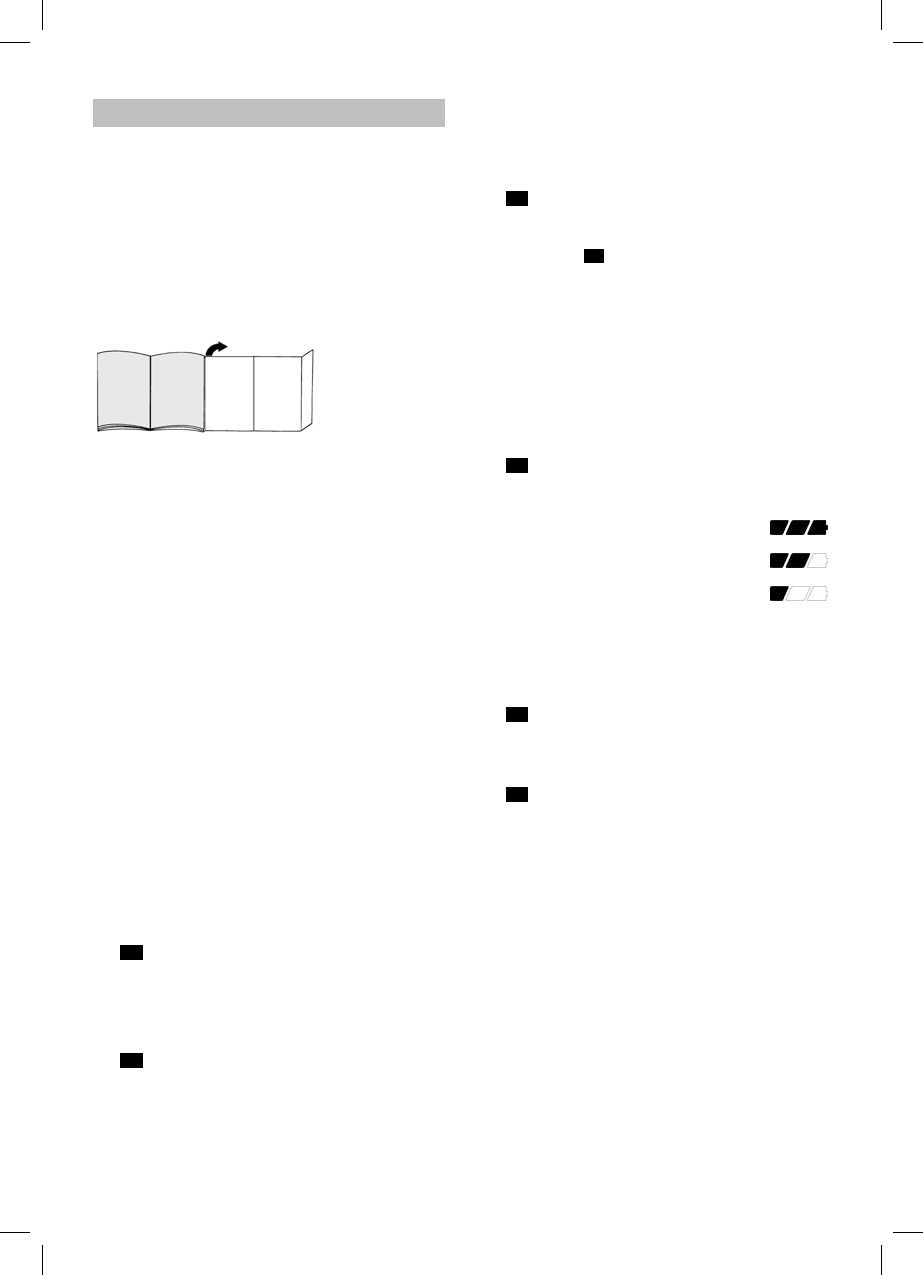
Please fold out the picture pages.
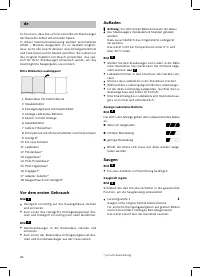
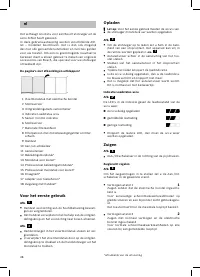
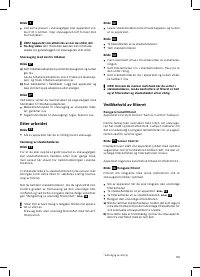
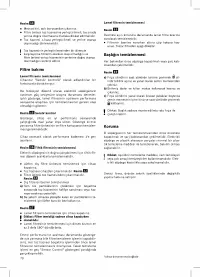
1 Floor tool with electric brush
2 Dust container
3 Dirt container release button
4 Battery charging status indicator
5 Sensor Control indicator
6 Dust container
7 Outer ilter unit
8 Filter cartridge with motor protection ilter and foam
ilter
9 Handle
10 On/off switch
11 Charging cable
12 Upholstery nozzle*
13 Crevice nozzle*
14 Professional upholstery nozzle*
15 Professional crevice nozzle*
16 Carrying strap*
17 Accessory adapter*
18 Flexible hose with handle*
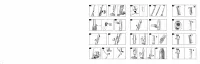
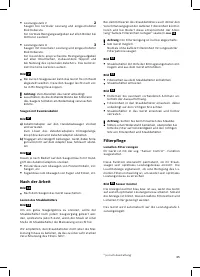
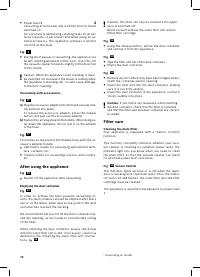
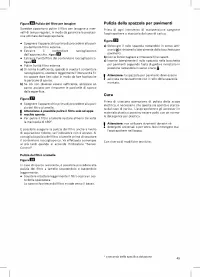
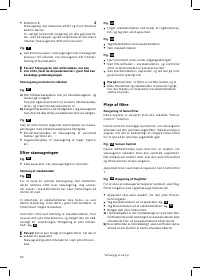
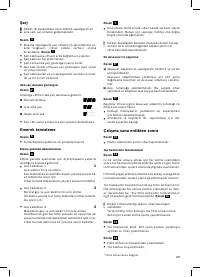
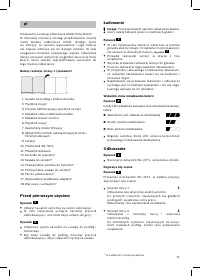
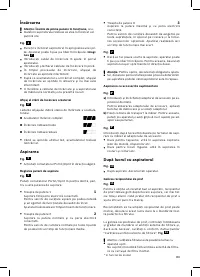
Before using your appliance for the irst
time
Fig.
1
•
Carefully plug the handle onto the main housing and
lock into place.
•
To release the handle, press the release button and
carefully lift the handle upwards to remove it.
Fig.
2
•
Plug the hand vacuum cleaner into the loor tool and
lock into place.
•
To release the loor tool, press the release button
and pull the hand vacuum cleaner out of the tool.
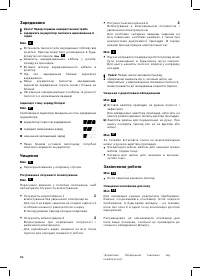
Charging
!
Caution: Before using the vacuum cleaner for the
irst time, the batteries must be charged for at least
6 hours
.
Fig.
3
•
To charge the vacuum cleaner, place it near to a so-
cket. The appliance can be left standing anywhere in
the room.
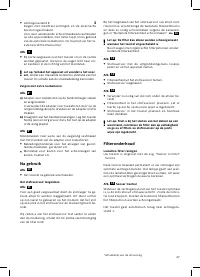
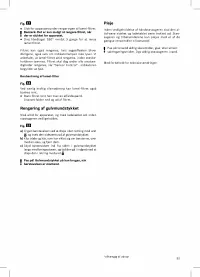
Fig.
7
•
Plug the charging cable into the connection at the
rear of the appliance.
•
Plug the charging cable plug into the socket.
•
The charging indicator lashes during the charging
process.
•
Once the batter y is fully charged, the charging indi-
cator lights up in blue and no longer lashes.
•
It is normal for the charging cable and hand vacuum
cleaner to become hot and not a cause for concern.
Battery charging status indicator
Fig.
4*
The indicator LEDs show the charging status of the bat-
tery.
Battery fully charged
Battery semi-charged
Battery low
•
When the inal LED lashes, the batter y must be re-
charged.
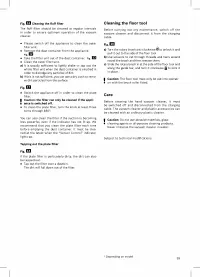
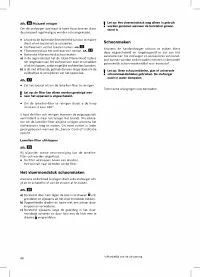
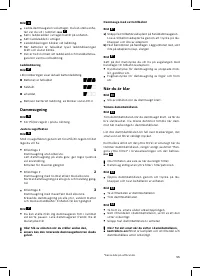
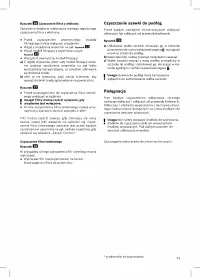
Vacuuming
Fig.
5
•
Move the on/off button in the direction of the arrow.
Controlling the suction level
Fig.
6
To change the suction power, slide the on/off switch to
the desired position:
•
Power level 1
1
Vacuuming without the electric brush switched on.
For simple cleaning tasks on hard loors and particu-
larly low operating noise.
The appliance achieves the maximum run time at
this level.
•
Power level 2
2
Vacuuming at normal power and with the electric
brush switched on.
For normal cleaning tasks on all loors at an average
run time.
en
* Depending on model
Характеристики

Остались вопросы?Не нашли свой ответ в руководстве или возникли другие проблемы? Задайте свой вопрос в форме ниже с подробным описанием вашей ситуации, чтобы другие люди и специалисты смогли дать на него ответ. Если вы знаете как решить проблему другого человека, пожалуйста, подскажите ему :)


