
Подогреватели AEG KD91404-B - инструкция пользователя по применению, эксплуатации и установке на русском языке. Мы надеемся, она поможет вам решить возникшие у вас вопросы при эксплуатации техники.
Если остались вопросы, задайте их в комментариях после инструкции.
"Загружаем инструкцию", означает, что нужно подождать пока файл загрузится и можно будет его читать онлайн. Некоторые инструкции очень большие и время их появления зависит от вашей скорости интернета.


15
www.aeg.com
10.
INSTALLATION INSTRUCTIONS
10.1.
Before installation
Check that the input voltage indicated
on the characteristics plate is the same
as the voltage of the power outlet you
are going to use.
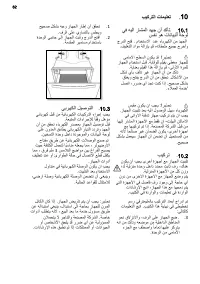
Open the drawer and take out all the
accessories and remove the packing
material.
Attention! The front surface of the
crockery heater may be wrapped in
a protective film. Before using the
crockery warmer for the first time,
remove this film carefully.
Make sure that the crockery warmer
is not damaged in any way. Check
that the drawer opens and closes
correctly. If you find any damage,
contact the Technical Assistance
Service.
Attention: the power socket should
be easily accessible after the
crockery warmer has been
installed.
The crockery warmer should only
be built-in in combination with those
appliances indicated by the
manufacturer. If it is fitted in
combination with other appliances,
the guarantee is no longer valid
since it is impossible to guarantee
that the crockery warmer will work
correctly.
10.2.
Installation
To build-in the crockery warmer in
combination with another appliance
there must be a fixed, interim shelf in
the housing unit to support the weight
of both appliances.
The appliance to be combined with the
crockery warmer will be placed directly
on the latter without any need to have a
separating shelf.
To build-in the appliance which is
combined with the crockery warmer,
follow the instructions set out in the
respective instructions and fitting
booklet.
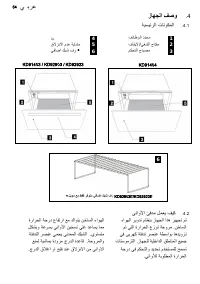
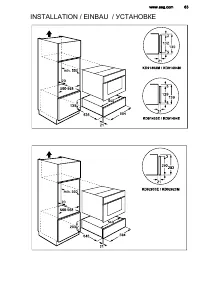
The relevant installation dimensions
are indicated in mm in the diagrams
shown at the end of this booklet.
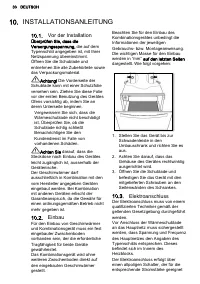
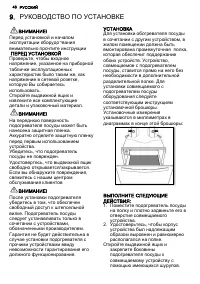
Proceed as follows:
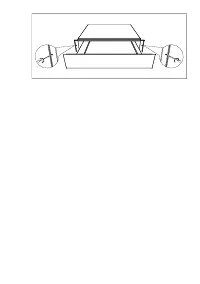
1.
Place the crockery warmer on the
shelf and slide it towards the interior
of the niche in such a way that it is
centred and completely lined up
with the front of the unit.
2.
Check that the crockery warmer
’
s
frame is properly levelled and is
sitting evenly on the shelf.
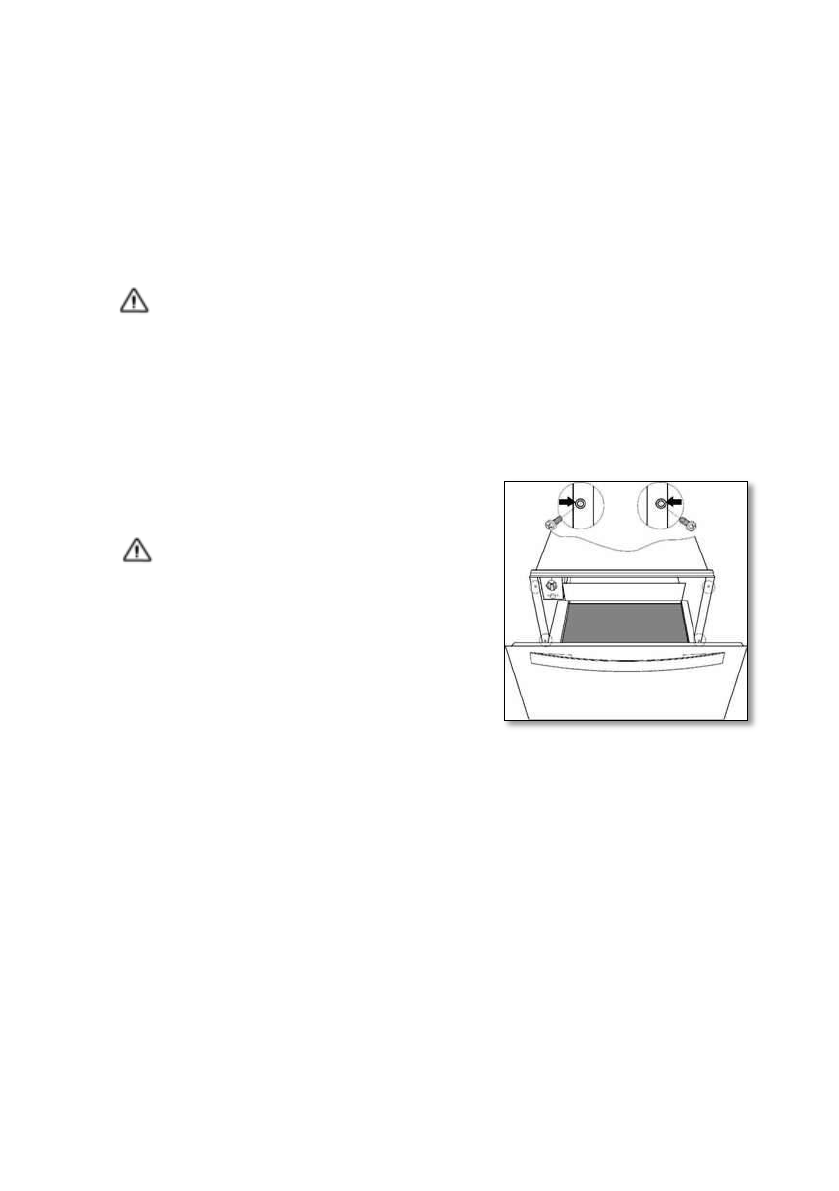
3.
Open the drawer and fix the
crockery warmer to the sides of the
unit using the provided screws.
10.3.
Electrical Connection
Electrical installation must be
performed by an electrician qualified in
accordance with the legislation in force.
Before connecting the crockery warmer
to the electric mains, check that the
voltage and frequency of the mains
matches that which is shown on the
rating plate located in the heating block
inside.
The electric connection is made via an
omnipolar switch, which is suitable for
the intensity to be tolerated and which
has a minimum gap of 3mm between
its contacts, which will ensure
disconnection in case of emergency or
when cleaning the crockery warmer.
Содержание
- 33 СВЕДЕНИЯ ПО ТЕХНИКЕ БЕЗОПАСНОСТИ
- 35 ИНСТРУКЦИИ ПО ТЕХНИКЕ БЕЗОПАСНОСТИ
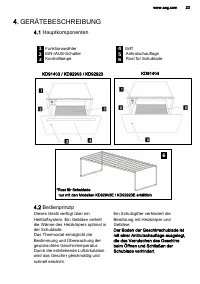
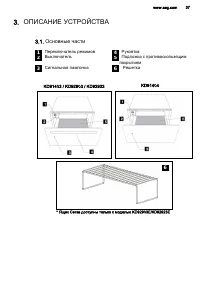
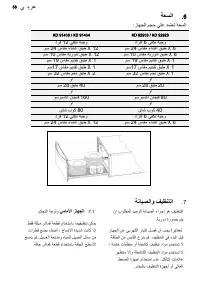
- 37 ОПИСАНИЕ УСТРОЙСТВА; Основные части
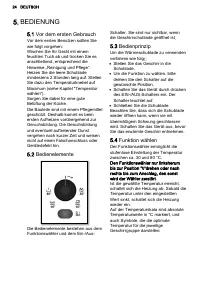
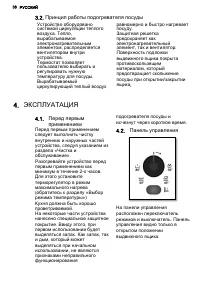
- 38 Принцип работы подогревателя посуды; ЭКСПЛУАТАЦИЯ; Перед первым
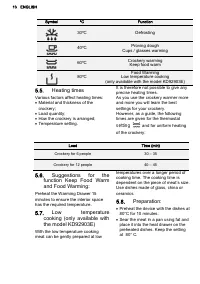
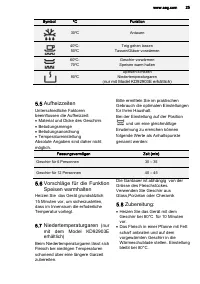
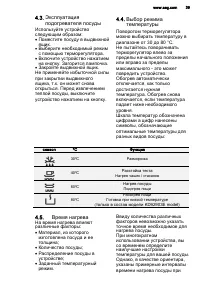
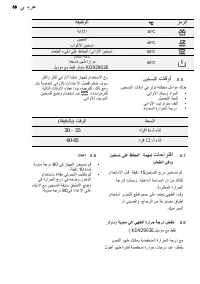
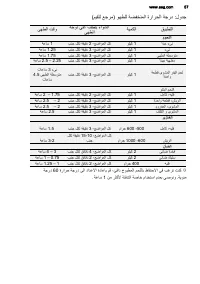
- 39 Время нагрева
- 40 разогрева
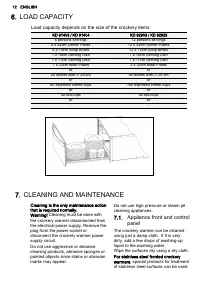
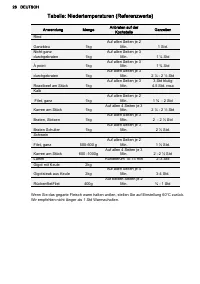
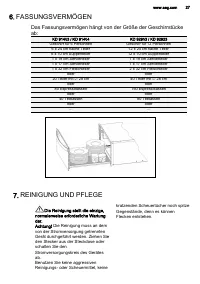
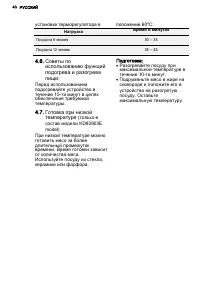
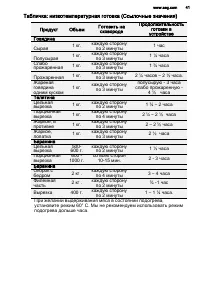
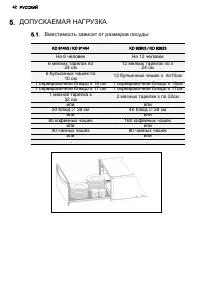
- 42 ДОПУСКАЕМАЯ НАГРУЗКА; Вместимость зависит от размеров посуды:
- 43 УХОД ЗА УСТРОЙСТВОМ И ОБСЛУЖИВАНИЕ
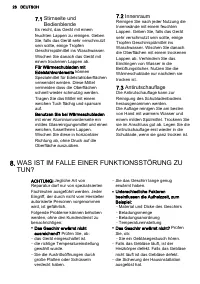
- 44 ЧТО ДЕЛАТЬ, ЕСЛИ УСТРОЙСТВО НЕ РАБОТАЕТ
- 45 ЗАЩИТА ОКРУЖАЮЩЕЙ СРЕДЫ
- 46 РУКОВОДСТВО ПО УСТАНОВКЕ
Характеристики

Остались вопросы?Не нашли свой ответ в руководстве или возникли другие проблемы? Задайте свой вопрос в форме ниже с подробным описанием вашей ситуации, чтобы другие люди и специалисты смогли дать на него ответ. Если вы знаете как решить проблему другого человека, пожалуйста, подскажите ему :)


