
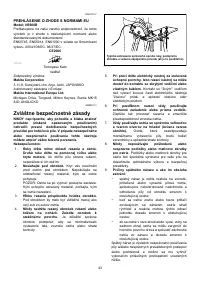
Пилы дисковые Makita N5900B - инструкция пользователя по применению, эксплуатации и установке на русском языке. Мы надеемся, она поможет вам решить возникшие у вас вопросы при эксплуатации техники.
Если остались вопросы, задайте их в комментариях после инструкции.
"Загружаем инструкцию", означает, что нужно подождать пока файл загрузится и можно будет его читать онлайн. Некоторые инструкции очень большие и время их появления зависит от вашей скорости интернета.


7
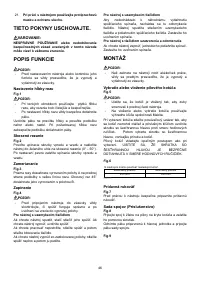
FUNCTIONAL DESCRIPTION
CAUTION:
•
Always be sure that the tool is switched off and
unplugged before adjusting or checking function on
the tool.
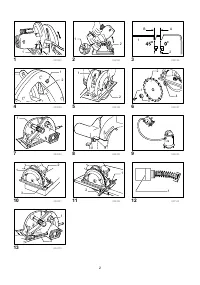
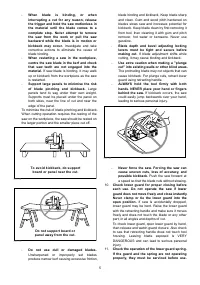
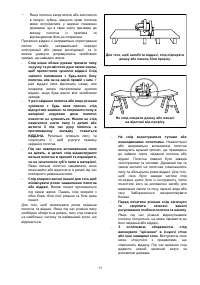
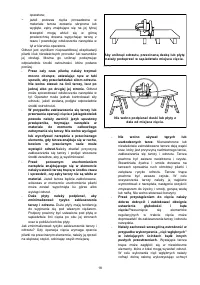
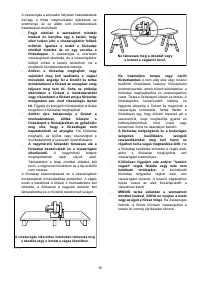
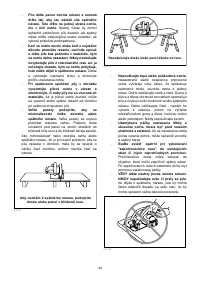
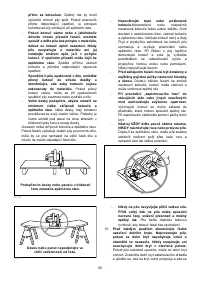
Adjusting depth of cut
Fig.1
CAUTION:
•
Use a shallow depth of cut when cutting thin
workpiece for cleaner, safer cutting.
•
After adjusting the depth of cut, always tighten the
lever securely.
Loosen the lever on the depth guide and move the base
up or down. At the desired depth of cut, secure the base
by tightening the lever.
Bevel cutting
Fig.2
Loosen the clamping screws in front and back, and tilt
the tool to the desired angle for bevel cuts (0° - 50°).
Secure the clamping screws tightly in front and back
after making the adjustment.
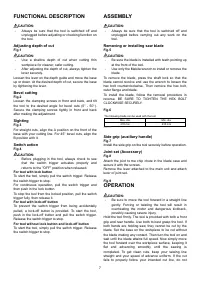
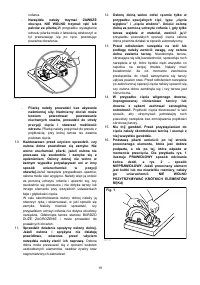
Sighting
Fig.3
For straight cuts, align the A position on the front of the
base with your cutting line. For 45° bevel cuts, align the
B position with it.
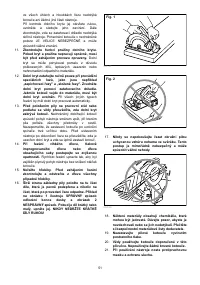
Switch action
Fig.4
CAUTION:
•
Before plugging in the tool, always check to see
that the switch trigger actuates properly and
returns to the "OFF" position when released.
For tool with lock button
To start the tool, simply pull the switch trigger. Release
the switch trigger to stop.
For continuous operation, pull the switch trigger and
then push in the lock button.
To stop the tool from the locked position, pull the switch
trigger fully, then release it.
For tool with lock-off button
To prevent the switch trigger from being accidentally
pulled, a lock-off button is provided. To start the tool,
push in the lock-off button and pull the switch trigger.
Release the switch trigger to stop.
For tool without lock button and lock-off button
To start the tool, simply pull the switch trigger. Release
the switch trigger to stop.
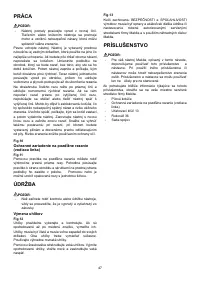
ASSEMBLY
CAUTION:
•
Always be sure that the tool is switched off and
unplugged before carrying out any work on the
tool.
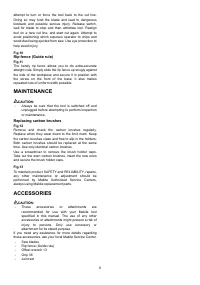
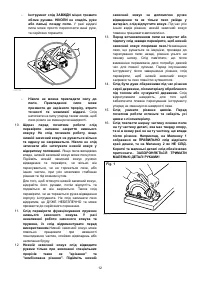
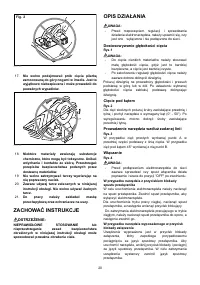
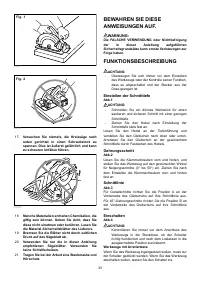
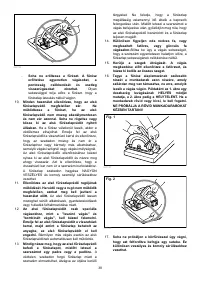
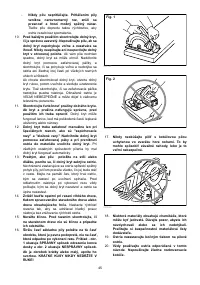
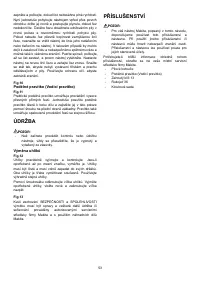
Removing or installing saw blade
Fig.5
CAUTION:
•
Be sure the blade is installed with teeth pointing up
at the front of the tool.
•
Use only the Makita wrench to install or remove the
blade.
To remove the blade, press the shaft lock so that the
blade cannot revolve and use the wrench to loosen the
hex bolt counterclockwise. Then remove the hex bolt,
outer flange and blade.
To install the blade, follow the removal procedure in
reverse. BE SURE TO TIGHTEN THE HEX BOLT
CLOCKWISE SECURELY.
Fig.6
The following blade can be used with the tool.
Max. dia.
Min. dia.
235 mm
230 mm
006410
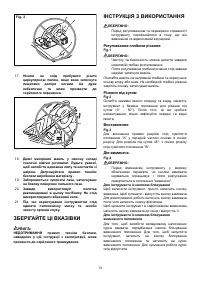
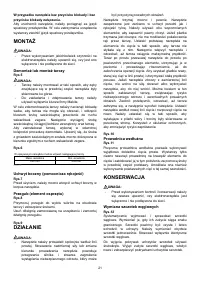
Side grip (auxiliary handle)
Fig.7
Install the side grip on the tool securely before operation.
Joint set (Accessory)
Fig.8
Attach the joint to the chip chute in the blade case and
secure it with the screws.
Remove the lever attached to the main unit and attach
lever of joint set.
Fig.9
OPERATION
CAUTION:
•
Be sure to move the tool forward in a straight line
gently. Forcing or twisting the tool will result in
overheating the motor and dangerous kickback,
possibly causing severe injury.
Hold the tool firmly. The tool is provided with both a front
grip and rear handle. Use both to best grasp the tool. If
both hands are holding saw, they cannot be cut by the
blade. Set the base on the workpiece to be cut without
the blade making any contact. Then turn the tool on and
wait until the blade attains full speed. Now simply move
the tool forward over the workpiece surface, keeping it
flat and advancing smoothly until the sawing is
completed. To get clean cuts, keep your sawing line
straight and your speed of advance uniform. If the cut
fails to properly follow your intended cut line, do not
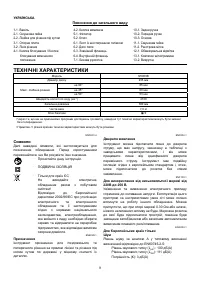
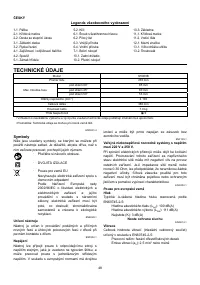
Характеристики

Остались вопросы?Не нашли свой ответ в руководстве или возникли другие проблемы? Задайте свой вопрос в форме ниже с подробным описанием вашей ситуации, чтобы другие люди и специалисты смогли дать на него ответ. Если вы знаете как решить проблему другого человека, пожалуйста, подскажите ему :)


