Пилы дисковые Makita HS6101 - инструкция пользователя по применению, эксплуатации и установке на русском языке. Мы надеемся, она поможет вам решить возникшие у вас вопросы при эксплуатации техники.
Если остались вопросы, задайте их в комментариях после инструкции.
"Загружаем инструкцию", означает, что нужно подождать пока файл загрузится и можно будет его читать онлайн. Некоторые инструкции очень большие и время их появления зависит от вашей скорости интернета.


9
BE SURE TO TIGHTEN THE HEX BOLT CLOCKWISE
SECURELY.
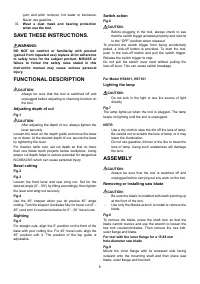
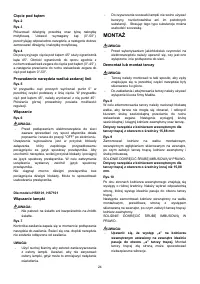
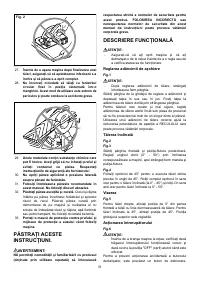
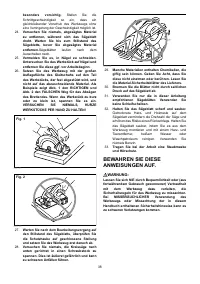
For tool with the inner flange for other than 15.88
mm hole-diameter saw blade
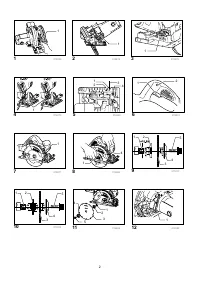
Fig.10
The inner flange has a certain diameter protrusion on
one side of it and a different diameter protrusion on the
other side. Choose a correct side on which protrusion fits
into the saw blade hole perfectly.
Next, mount the inner flange onto the mounting shaft so
that the correct side of protrusion on the inner flange
faces outward and then place saw blade and outer flange.
BE SURE TO TIGHTEN THE HEX BOLT CLOCKWISE
SECURELY.
CAUTION:
•
Make sure that the protrusion "a" on the inner
flange that is positioned outside fits into the
saw blade hole "a" perfectly.
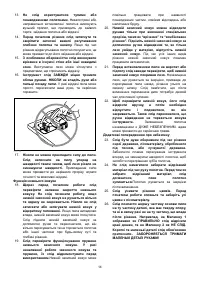
Mounting the blade
on the wrong side can result in the dangerous
vibration.
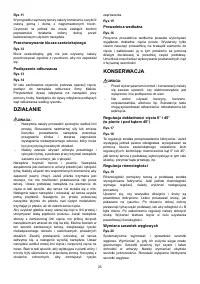
Fig.11
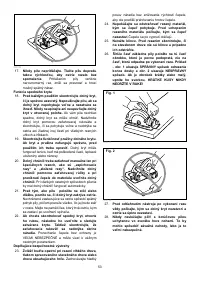
When changing blade, make sure to also clean upper
and lower blade guards of accumulated sawdust. Such
efforts do not, however, replace the need to check lower
guard operation before each use.
Hex wrench storage
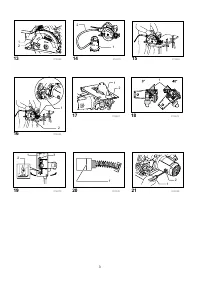
Fig.12
When not in use, store the hex wrench as shown in the
figure to keep it from being lost.
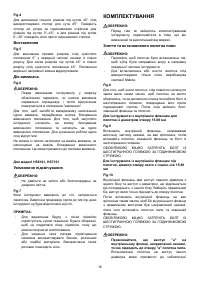
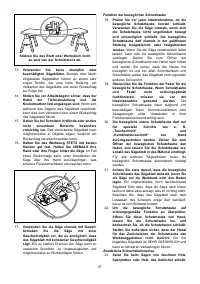
Connecting a vacuum cleaner
Fig.13
Fig.14
When you wish to perform clean cutting operation,
connect a Makita vacuum cleaner to your tool. Install the
dust nozzle on the tool using the screw. Then connect a
hose of the vacuum cleaner to the dust nozzle as shown
in the figure.
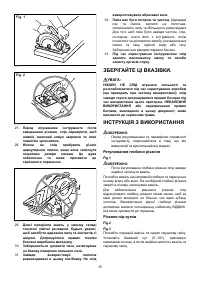
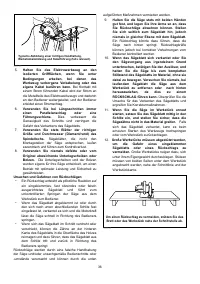
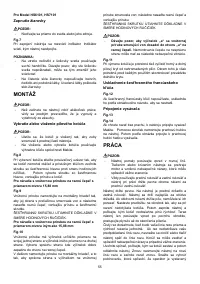
OPERATION
CAUTION:
•
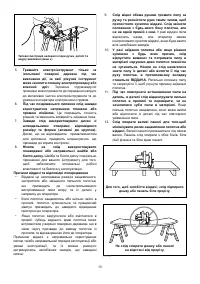
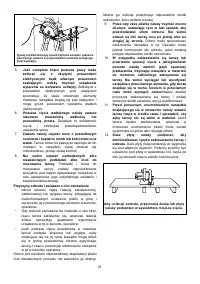
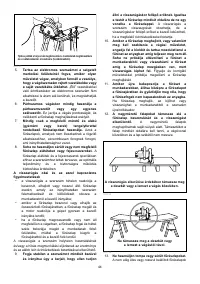
Be sure to move the tool forward in a straight line
gently. Forcing or twisting the tool will result in
overheating the motor and dangerous kickback,
possibly causing severe injury.
•
Always use a front grip and rear handle and firmly
hold the tool by both front grip and rear handle
during operations
Hold the tool firmly. The tool is provided with both a front
grip and rear handle. Use both to best grasp the tool. If
both hands are holding saw, they cannot be cut by the
blade. Set the base on the workpiece to be cut without the
blade making any contact. Then turn the tool on and wait
until the blade attains full speed. Now simply move the tool
forward over the workpiece surface, keeping it flat and
advancing smoothly until the sawing is completed.
To get clean cuts, keep your sawing line straight and your
speed of advance uniform. If the cut fails to properly follow
your intended cut line, do not attempt to turn or force the
tool back to the cut line. Doing so may bind the blade and
lead to dangerous kickback and possible serious injury.
Release switch, wait for blade to stop and then withdraw
tool. Realign tool on new cut line, and start cut again.
Attempt to avoid positioning which exposes operator to
chips and wood dust being ejected from saw. Use eye
protection to help avoid injury.
Fig.15
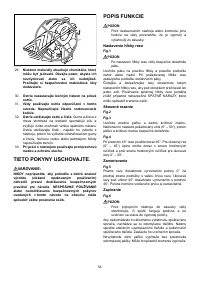
Rip fence (Guide rule)
Fig.16
The handy rip fence allows you to do extra-accurate
straight cuts. Simply slide the rip fence up snugly against
the side of the workpiece and secure it in position with
the clamp lever on the front of the base. It also makes
repeated cuts of uniform width possible.
MAINTENANCE
CAUTION:
•
Always be sure that the tool is switched off and
unplugged before attempting to perform inspection
or maintenance.
•
Never use gasoline, benzine, thinner, alcohol or the
like. Discoloration, deformation or cracks may
result.
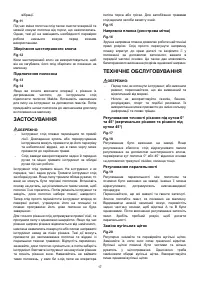
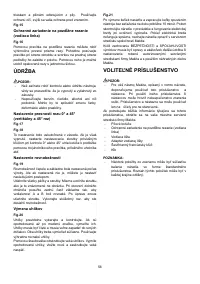
Adjusting for accuracy of 0° and 45° cut
(vertical and 45° cut)
Fig.17
Fig.18
This adjustment has been made at the factory. But if it is
off, adjust the adjusting screws with a hex wrench while
inspecting 0° or 45° the blade with the base using a
triangular rule or square rule, etc.
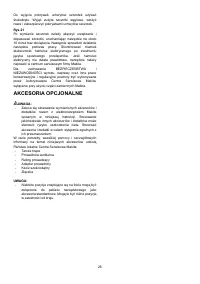
Adjusting for parallelism
Fig.19
The parallelism between the blade and the base has
been factory adjusted. But if it is off, you can adjust it as
the following procedure.
Make sure all levers and screws are tightened. Slightly
loosen the screw as illustrated. While opening the lower
guard, move the rear of base so that the distance A and B
are equal. After adjusting, tighten the screw. Make a test
cut to get a correct parallelism.
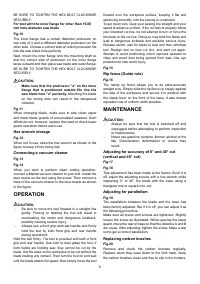
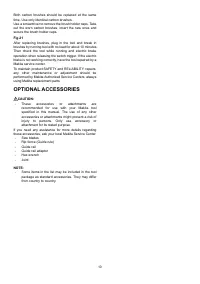
Replacing carbon brushes
Fig.20
Remove and check the carbon brushes regularly.
Replace when they wear down to the limit mark. Keep
the carbon brushes clean and free to slip in the holders.
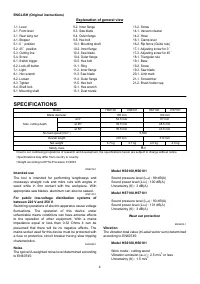
Характеристики

Остались вопросы?Не нашли свой ответ в руководстве или возникли другие проблемы? Задайте свой вопрос в форме ниже с подробным описанием вашей ситуации, чтобы другие люди и специалисты смогли дать на него ответ. Если вы знаете как решить проблему другого человека, пожалуйста, подскажите ему :)


