
Пилы дисковые Bosch 0.601.6A1.001 - инструкция пользователя по применению, эксплуатации и установке на русском языке. Мы надеемся, она поможет вам решить возникшие у вас вопросы при эксплуатации техники.
Если остались вопросы, задайте их в комментариях после инструкции.
"Загружаем инструкцию", означает, что нужно подождать пока файл загрузится и можно будет его читать онлайн. Некоторые инструкции очень большие и время их появления зависит от вашей скорости интернета.


u
Do not press the spindle lock button
(6)
while the saw
spindle is moving.
The power tool may become damaged
if this happens.
– Use the hex key
(5)
to undo the clamping bolt
(25)
in ro-
tational direction
➊
.
– Swing the retracting blade guard
(21)
back and hold on
to it firmly.
– Remove the clamping flange
(24)
and the saw blade
(23)
from the saw spindle
(20)
.
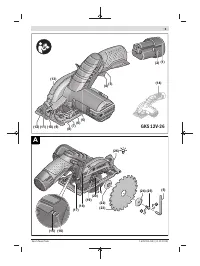
Fitting the saw blade (see figure A)
To change tools, we recommend that you place the power
tool down on the front side of the motor housing.
– Clean the saw blade
(23)
and all the clamping elements
to be fitted.
– Swing the retracting blade guard
(21)
back and hold on
to it firmly.
– Place the saw blade
(23)
on the mounting flange
(22)
.
The cutting direction of the teeth (direction of the arrow
on the saw blade) must match the rotational direction of
the arrow on the protective guard
(21)
.
– Attach the clamping flange
(24)
and screw in the clamp-
ing bolt
(25)
in rotational direction
➋
. Ensure that the
mounting flange
(22)
and clamping flange
(24)
are in-
stalled in the correct position.
– Press and hold the spindle lock button
(6)
.
– Use the hex key
(5)
to tighten the clamping bolt
(25)
in
rotational direction
➋
. The tightening torque should be
6–9 Nm, which corresponds to hand-tight plus ¼ turn.
Dust/chip extraction
The dust from materials such as lead paint, certain types of
wood, minerals and metal can be harmful to human health.
Touching or breathing in this dust can trigger allergic reac-
tions and/or cause respiratory illnesses in the user or in
people in the near vicinity.
Certain dusts, such as oak or beech dust, are classified as
carcinogenic, especially in conjunction with wood treatment
additives (chromate, wood preservative). Materials contain-
ing asbestos may only be machined by specialists.
– To achieve a high level of dust extraction, use a suitable
dust extractor together with this power tool.
– Provide good ventilation at the workplace.
– It is advisable to wear a P2 filter class breathing mask.
The regulations on the material being machined that apply in
the country of use must be observed.
u
Avoid dust accumulation at the workplace.
Dust can
easily ignite.
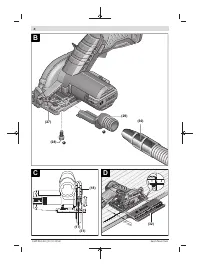
Fitting the dust extraction adapter (see figure B)
Fasten the dust extraction adapter
(29)
to the base plate
(7)
using the fastening screw
(28)
.
A dust extraction hose with a diameter of 19 mm can be con-
nected to the dust extraction adapter
(29)
.
u
The dust extraction adapter must only be fitted if an
external dust extraction system is connected.
Other-
wise the extraction duct can become clogged.
u
No dust bags should be connected to the dust extrac-
tion adapter
. Otherwise the extraction system can be-
come clogged.
To ensure optimum extraction, the dust extraction adapter
(29)
must be cleaned regularly.
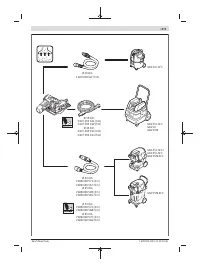
External dust extraction
Connect the dust extraction hose
(30)
to a dust extractor
(accessory). You will find an overview of how to connect to
various dust extractors at the end of these operating instruc-
tions.
The dust extractor must be suitable for the material being
worked.
When extracting dry dust that is especially detrimental to
health or carcinogenic, use a special dust extractor.
Operation
Operating modes
u
Remove the battery before carrying out any work on
the power tool.
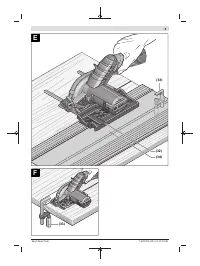
Setting the cutting depth (see figure C)
u
Adapt the cutting depth to the thickness of the work-
piece
. A space of less than the height of one full tooth
should be visible under the workpiece.
Loosen the wing bolt
(17)
. For a smaller cutting depth, pull
the power tool away from the base plate
(7)
; for a larger cut-
ting depth, push the power tool towards the base plate
(7)
.
Set the required cutting depth on the scale
(18)
. Retighten
the wing bolt
(17)
.
When setting the cutting depth, use the reference mark
(31)
to the side of the cutting depth scale
(18)
.
Adjusting the mitre/bevel angle
We recommend that you place the power tool down on the
front side of the protective guard
(13)
.
Loosen the wing bolt
(10)
. Swivel the saw to the side. Set
the required mitre angle on the scale
(9)
. Retighten the wing
bolt
(10)
.
When setting the mitre/bevel angle, use the reference mark
(27)
(upper edge of the holder).
Note:
When making mitre cuts, the cutting depth is less than
the value shown on the cutting depth scale
(18)
.
Cut marks
The 0° cut mark
(12)
indicates the position of the saw blade
when making a right-angled cut. The 45° cut mark
(11)
indic-
ates the position of the saw blade when making a 45° cut.
Start-up
Inserting the battery
u
Use only original Bosch lithium-ion batteries with the
voltage stated on the type plate of your power tool.
Using other batteries can lead to injuries and pose a fire
hazard.
English |
19
Bosch Power Tools
1 609 92A 4LK | (22.10.2018)
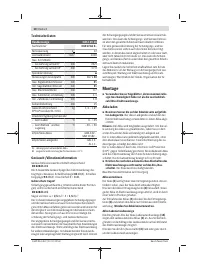
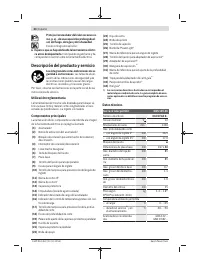
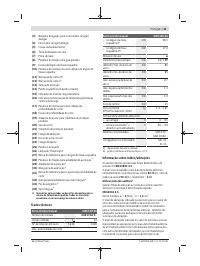
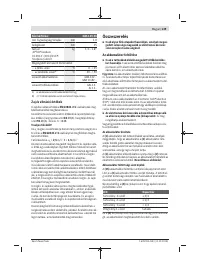
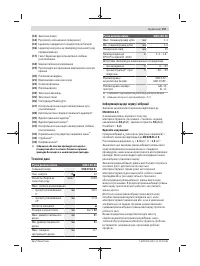
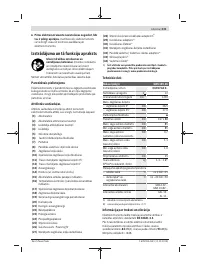
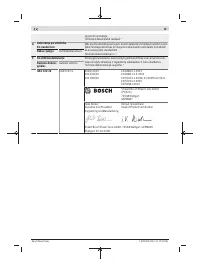
Характеристики

Остались вопросы?Не нашли свой ответ в руководстве или возникли другие проблемы? Задайте свой вопрос в форме ниже с подробным описанием вашей ситуации, чтобы другие люди и специалисты смогли дать на него ответ. Если вы знаете как решить проблему другого человека, пожалуйста, подскажите ему :)


