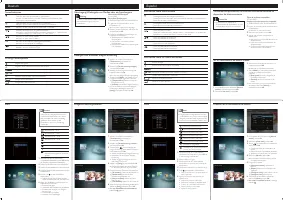
Philips SPH8408_10 - Краткое руководство

Цифровая фоторамка Philips PhotoAlbum SPH8408 и SPH8428. Инструкция описывает функции кнопок, перенос медиафайлов с карт памяти, процедуру первого запуска, включая начальную зарядку аккумулятора, а также создание и просмотр напоминаний о событиях.
Пошаговые руководства и описание значков помогут быстро освоить устройство.

Содержание:
- Страница 1 – Функции кнопок, запуск, перенос медиа и напоминания о событиях
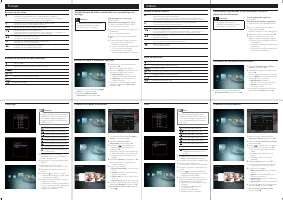
- Страница 2 – Инструкции на немецком и испанском языках
- Страница 3 – Инструкции на французском и итальянском языках
- Страница 4 – Инструкции на нидерландском и русском языках
Register your product and get support at
www.philips.com/welcome
PhotoAlbum
SPH8408
SPH8428
Know these buttons
- Press to turn on the PhotoAlbum
- Press and hold to turn off the PhotoAlbum
- Press to switch modes (between slideshow and clock/calendar; or
between wave view and album view)
- Hold to go to the home screen
- Tap to go back to the upper-level menu
MENU
- Tap to access or to exit the option menu
Tap to zoom in/out
- Tap to switch modes (wave mode <-> album mode <-> slideshow
mode<-> zoom in twice <-> zoom in 4 times)
▲▼
- Tap to scroll up
- Tap to scroll down
OK
- Tap to play/pause slideshow
- Tap to confirm a selection
◄►
- Tap to skip left
- Tap to skip right
Transfer/Play media via a storage device
Media type supported:
Photo (JPEG)
Storage device supported:
SD/SDHC/MMC/MMC Plus/xD/MS/MS Pro
1 Insert a storage device into the PhotoAlbum.
→ An option menu is displayed.
2 Select an option, and then tap OK.
3 Follow the on screen instructions to:
- Play media on the storage device
- Browse media on the storage device
- Copy media on the storage device to
PhotoAlbum
View a created event reminder
1 In the home screen, select [Event Reminder]
and then tap OK.
2 Select [View Event Reminder], and then tap OK.
3 Select an event reminder, and then tap OK.
→ An event reminder is displayed.
Tap MENU, and then select one of the following options to continue:
- [Re-schedule]: Reschedule the event reminder
- [Delete]: Delete the event reminder
To go back to view other event reminders, select [Done] and then tap OK.
Know these keypad icons
Input in English
Input in supported European languages
Русский
Input in Russian
$# / ABC
Switch to select symbols, punctuations, alphabet or numbers
aA
Switch between upper and lower case
Enter a blank space
Enter a line break
Startup
Note
Charge the built-in battery for about 2
hours before using the PhotoAlbum for the
first time.The fully charged built-in battery
lets you operate the PhotoAlbum for up
to 1 hour:
Battery level 0% - 5%
Battery level 5% - 20%
Battery level 20% - 40%
Battery level 40% - 60%
Battery level 60% - 80%
Battery level 80% - 100%
PhotoAlbum in charging
PhotoAlbum in dock, AC-powered,
not charging
1 Connect the DC plug of the supplied power
cord to the DC jack of the supplied charging
dock.
2 Feed the cord through the cord channel.
3 Connect the AC plug of the power cord to
a power supply socket.
4 Connect the PhotoAlbum to the charging
dock.
5 Press Ø to turn on the PhotoAlbum.
Select a language or set time and date if
applicable.
6 Follow the on screen instructions to:
Play media
Select or set clock/calendar
Create or view event reminders
Browse media
Adjust settings
Create an event reminder
1 In the home screen, select [Event Reminder]
and then tap OK.
2 Select [Create Event Reminder], and then
tap OK.
3 Tap ◄► to select a template of event
reminder, and then tap OK.
- Change image of event reminder.
- Edit the text of event reminder.
- Set the real time and date if applicable.
4 Select [Done], and then tap OK.
→ The screen prompts you to schedule the
event reminder.
5 Schedule the message:
[Event Name]: Enter the name.
[Repeat]: Select a repeat frequency
[Set Date]: Set the date or day
[Set Time]: Set the time
6 After you complete the event reminder,
select [Done] and then tap OK.
To go back to the home screen, hold .
"Загрузка инструкции" означает, что нужно подождать пока файл загрузится и можно будет его читать онлайн. Некоторые инструкции очень большие и время их появления зависит от вашей скорости интернета.
Была ли эта инструкция полезной?
Об этой инструкции
- Бренд
- Philips
- Модель
- SPH8408_10
- Тип документа
- Краткое руководство
- Категория
- Фоторамка
- Язык(и)
- Немецкий, Английский, Испанский, Французский, Итальянский, Dutch, Русский
- Страницы
- 4
- Размер файла
- 319,7 KB
- Формат
Краткое содержание
На странице представлен обзор кнопок устройства и их функций: включение/выключение, переключение режимов, навигация по меню. Описан перенос и воспроизведение медиа с карт памяти (SD/SDHC/MMC/xD/MS), создание и просмотр напоминаний о событиях, а также запуск устройства, включая начальную зарядку аккумулятора в течение 2 часов. Приведены значки клавиатуры для ввода текста....
Страница содержит те же инструкции, что и на первой странице, но переведённые на немецкий и испанский языки. Охвачены функции кнопок, перенос медиа, запуск и создание напоминаний. Включены индикаторы уровня заряда батареи и указания по зарядке....
На странице представлены инструкции на французском и итальянском языках: функции кнопок, перенос медиа с карт памяти, шаги запуска, создание и просмотр напоминаний. Даны примечания по зарядке аккумулятора и пошаговые процедуры....
Советы
- При первом использовании заряжайте встроенный аккумулятор около 2 часов — этого хватит примерно на 1 час работы.
- Устройство поддерживает фотографии JPEG и карты памяти SD/SDHC/MMC/xD/MS.
- Чтобы создать напоминание о событии, выберите шаблон, установите дату и время, а также частоту повторения.
- Для доступа к опциям используйте кнопку MENU, для подтверждения — OK.
Задать вопрос
Похожие инструкции
Другая техника Philips
 Philips 3 в 1 для сухой и влажной уборки XC8147/01 Инструкция по эксплуатации
 Philips 14PT6107_58 Инструкция по эксплуатации
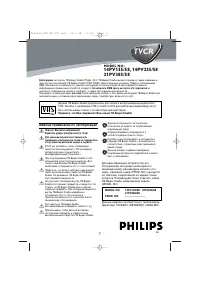 Philips 14PV135_58_14PV235_58_21PV385_58 Инструкция по эксплуатации
 Philips 15PF4121 Инструкция по эксплуатации
 Philips 15PF5121 Инструкция по эксплуатации
 Philips 15PT2966 Инструкция по эксплуатации
 Philips 19HFL4010W Инструкция по эксплуатации
 Philips 19PFL2908H Инструкция по эксплуатации
 Philips 19PFL3403_10 Инструкция по эксплуатации
 Philips 19PFL3403_60 Инструкция по эксплуатации
 Philips 19PFL3404 Инструкция по эксплуатации
 Philips 19PFL3405 Инструкция по эксплуатации
 Philips 19PFL3507T Инструкция по эксплуатации
 Philips 19PFL3606H Инструкция по эксплуатации
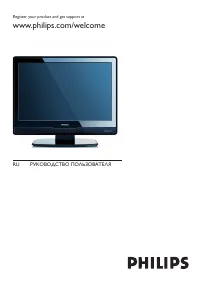 Philips 19PFL5403S_60 Инструкция по эксплуатации
 Philips 19PFL5602D Инструкция по эксплуатации
 Philips 19_22_26_32PFL3404_(12)_(60)_42PFL3604_(12)_(60) Инструкция по эксплуатации
 Philips 20HF5473 Инструкция по эксплуатации
 Philips 20HFL2819D Инструкция по эксплуатации
 Philips 20PF4121 Инструкция по эксплуатации