
Перфораторы Makita HR4003C - инструкция пользователя по применению, эксплуатации и установке на русском языке. Мы надеемся, она поможет вам решить возникшие у вас вопросы при эксплуатации техники.
Если остались вопросы, задайте их в комментариях после инструкции.
"Загружаем инструкцию", означает, что нужно подождать пока файл загрузится и можно будет его читать онлайн. Некоторые инструкции очень большие и время их появления зависит от вашей скорости интернета.


7
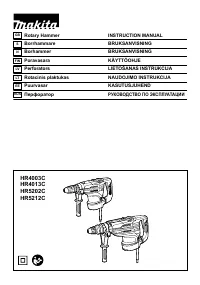
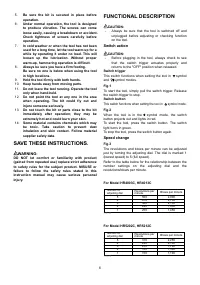
For model HR4013C, HR5212C only
NOTE:
•
Blows at no load per minute becomes smaller than
those on load in order to reduce vibration under no
load, but this does not show trouble. Once
operation starts with a bit against concrete, blows
per minute increase and get to the numbers as
shown in the table. When temperature is low and
there is less fluidity in grease, the tool may not
have this function even with the motor rotating.
CAUTION:
•
If the tool is operated continuously at low speeds
for a long time, the motor may get overloaded,
resulting in tool malfunction.
•
The speed adjusting dial can be turned only as far
as 5 and back to 1. Do not force it past 5 or 1, or
the speed adjusting function may no longer work.
Selecting the action mode
CAUTION:
•
Do not rotate the change lever when the tool is
running. The tool will be damaged.
•
To avoid rapid wear on the mode change
mechanism, be sure that the change lever is
always positively located in one of the action mode
positions.
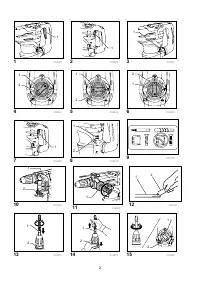
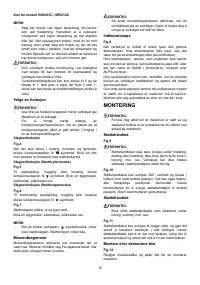
Hammer drilling mode
Fig.4
For drilling in concrete, masonry, etc., rotate the change
lever to the
symbol. Use a tungsten-carbide tipped bit.
Hammering mode (Switch trigger mode)
Fig.5
For chipping, scaling or demolition operations, rotate the
change lever to the
symbol. Use a bull point, cold
chisel, scaling chisel, etc.
Hammering mode (Switch button mode)
Fig.6
For continuous chipping, scaling or demolition
operations, rotate the change lever to the
symbol.
Fig.7
The switch button projects out and lights in red.
Use a bull point, cold chisel, scaling chisel, etc.
NOTE:
•
When using the tool in the
symbol mode, the
switch trigger does not work but only the switch
button works.
Torque limiter
The torque limiter actuates when torque reaches a
certain level. The motor disengages from the output
shaft. When this happens, the bit stops turning.
CAUTION:
•
As soon as the torque limiter actuates, switch off
the tool immediately. This helps to prevent
premature wear of the tool.
Indicator lamp
Fig.8
The green power-ON indicator lamp lights up when the
tool is plugged in. If the indicator lamp does not light up,
the mains cord or the controller may be defective.
When the indicator lamp lights up but the tool does not
start even the tool is switched on, the carbon brushes
may be worn out, or the controller, the motor or the
ON/OFF switch may be defective.
If above symptoms occur, stop using the tool
immediately and ask your local service center.
The red service indicator lamp lights up when the
carbon brushes are nearly worn out to indicate that the
tool needs servicing. After some period of use, the
motor automatically shuts off.
ASSEMBLY
CAUTION:
•
Always be sure that the tool is switched off and
unplugged before carrying out any work on the
tool.
Side handle
Fig.9
CAUTION:
•
Use the side handle only when chipping, scaling or
demolishing. Do not use it when drilling in
concrete, masonry, etc. The tool cannot be held
properly with this side handle when drilling.
Fig.10
The side handle can be swung 360° on the vertical and
secured at any desired position. It also secures at eight
different positions back and forth on the horizontal. Just
loosen the clamp nut to swing the side handle to a
desired position. Then tighten the clamp nut securely.
Side grip
CAUTION:
•
Always use the side grip to ensure operating
safety when drilling in concrete, masonry, etc.
Fig.11
The side grip swings around to either side, allowing
easy handling of the tool in any position. Loosen the
side grip by turning it counterclockwise, swing it to the
desired position and then tighten it by turning clockwise.
Installing or removing the bit
Fig.12
Clean the bit shank and apply bit grease before
installing the bit.
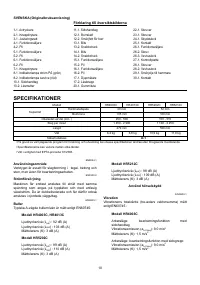
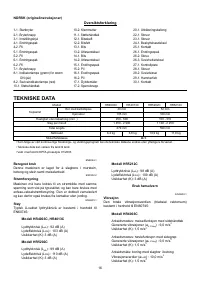
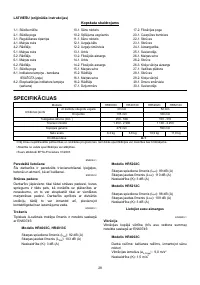
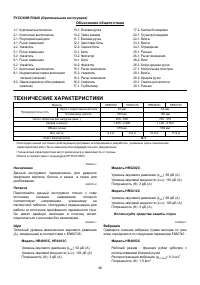
Характеристики

Остались вопросы?Не нашли свой ответ в руководстве или возникли другие проблемы? Задайте свой вопрос в форме ниже с подробным описанием вашей ситуации, чтобы другие люди и специалисты смогли дать на него ответ. Если вы знаете как решить проблему другого человека, пожалуйста, подскажите ему :)


