
Отбойные молотки Metabo MHEV 5 BL - инструкция пользователя по применению, эксплуатации и установке на русском языке. Мы надеемся, она поможет вам решить возникшие у вас вопросы при эксплуатации техники.
Если остались вопросы, задайте их в комментариях после инструкции.
"Загружаем инструкцию", означает, что нужно подождать пока файл загрузится и можно будет его читать онлайн. Некоторые инструкции очень большие и время их появления зависит от вашей скорости интернета.


ENGLISH
en
9
Never touch the tool or parts near the tool directly
after work because they may be extremely hot and
can cause burns to the skin,
Always position the power cable so that it leads
away from the back of the machine.
A damaged or cracked additional handle must be
replaced. Never operate a machine with a defective
additional handle.
Secure the workpiece to prevent slipping or rotation
(e.g. by securing with screw clamps).
Reducing dust exposure:
WARNING
- Some dust created by power
sanding, sawing, grinding, drilling, and other
construction activities contains chemicals known to
cause cancer, birth defects or other reproductive
harm. Some examples of these chemicals are:
- Lead from lead-based paints,
- Crystalline silica from bricks and cement and
other masonry products, and
- Arsenic and chromium from chemically treated
lumber.
Your risk from these exposures varies, depending
on how often you do this type of work. To reduce
your exposure to these chemicals: work in a well-
ventilated area, and work with approved safety
equipment, such as those dust masks that are
specially designed to filter out microscopic
particles.
This also applies to dust from other materials such
as some timber types (like oak or beech dust),
metals, asbestos. Other known diseases are e.g.
allergic reactions, respiratory diseases. Do not let
dust enter the body.
Observe the relevant guidelines and national
regulations for your material, staff, application and
place of application (e.g. occupational health and
safety regulations, disposal).
Collect the particles generated at the source, avoid
deposits in the surrounding area.
Use suitable accessories for special work. In this
way, fewer particles enter the environment in an
uncontrolled manner.
Use a suitable extraction unit.
Reduce dust exposure with the following measures:
- do not direct the escaping particles and the
exhaust air stream towards yourself or nearby
persons or towards dust deposits,
- use an extraction unit and/or an air purifier,
- ensure good ventilation of the workplace and keep
it clean using a vacuum cleaner. Sweeping or
blowing stirs up dust.
- Vacuum or wash protective clothing. Do not blow,
beat or brush protective gear.
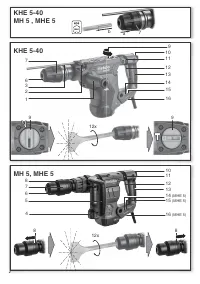
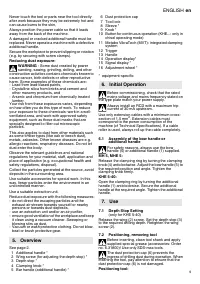
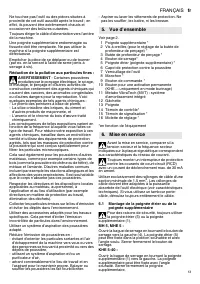
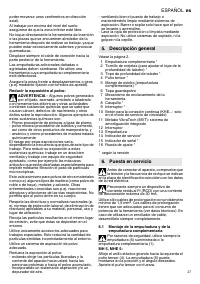
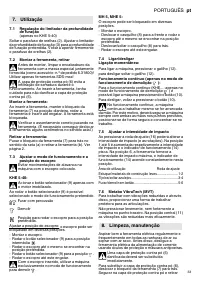
See page 2.
1 Additional handle *
2 Wing screw (for adjusting the depth stop) *
3 Depth stop *
4 Clamping knob *
5 Bar handle (additional handle) *
6 Dust protection cap
7 Tool lock
8 Sleeve *
9 Knob *
10 Button for continuous operation (KHE...: only in
chisel operating mode)
11 Metabo VibraTech (MVT): integrated damping
system
12 Trigger
13 Handle
14 Operation display*
15 Signal display *
16 Adjustment wheel *
* equipment-specific
Before commissioning, check that the rated
mains voltage and mains frequency stated on
the type plate match your power supply.
Always install an RCD with a maximum trip
current of 30 mA upstream.
Use only extension cables with a minimum cross-
section of 1.5 mm
2
. Extension cables must
correspond to the power consumption of the
machine (cf Technical Specifications). If a cable
roller is used, always roll up the cable completely.
6.1 Assembly of the bow handle or
additional handle
For safety reasons, always use the bow
handle (5) or additional handle (1) supplied.
MH 5, MHE 5:
Release the clamping ring by turning the clamping
knob (4) anticlockwise. Adjust the bow handle (5) to
the required position and angle. Tighten the
clamping knob firmly.
KHE 5-40:
Open the clamping ring by turning the additional
handle (1) anticlockwise. Secure the additional
handle at the required angle. Tighten the additional
handle.
7.1 Depth Stop Setting
(only for KHE 5-40)
Release the wing (2) screw. Set the depth stop (3)
to the required drilling depth. Retighten the wing
screw (2).
7.2 Positioning, removing tool
Before inserting, clean tool shank and apply
supplied special grease (accessories: Order
no. 6.31800)! Use only SDS-max tools.
The dust protection cap (6) prevents the
ingress of drilling dust during operation. When
inserting the tool, pay attention to ensure that the
dust protection cap (6) is not damaged.
Positioning tool:
5. Overview
6. Initial Operation
7. Use
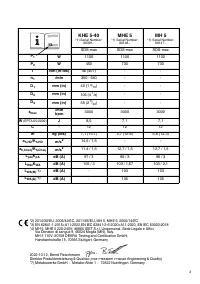
Характеристики

Остались вопросы?Не нашли свой ответ в руководстве или возникли другие проблемы? Задайте свой вопрос в форме ниже с подробным описанием вашей ситуации, чтобы другие люди и специалисты смогли дать на него ответ. Если вы знаете как решить проблему другого человека, пожалуйста, подскажите ему :)

