
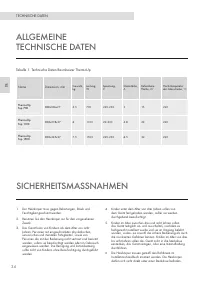
Обогреватели ThermoUp TOP 1100 gray TUT11g - инструкция пользователя по применению, эксплуатации и установке на русском языке. Мы надеемся, она поможет вам решить возникшие у вас вопросы при эксплуатации техники.
Если остались вопросы, задайте их в комментариях после инструкции.
"Загружаем инструкцию", означает, что нужно подождать пока файл загрузится и можно будет его читать онлайн. Некоторые инструкции очень большие и время их появления зависит от вашей скорости интернета.


25
EN
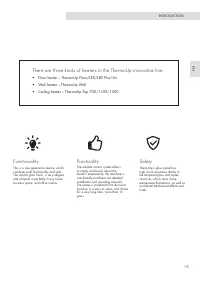
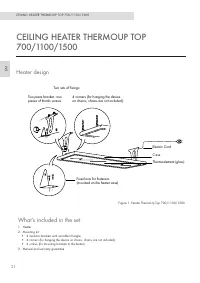
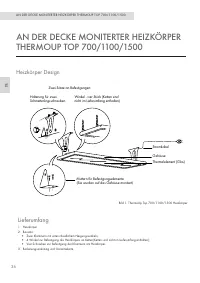
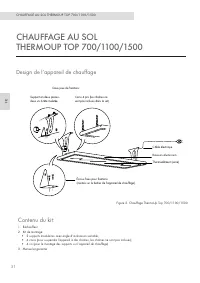
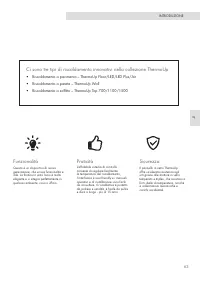
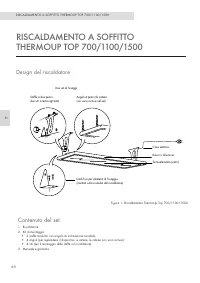
CEILING HEATER THERMOUP TOP 700/1100/1500
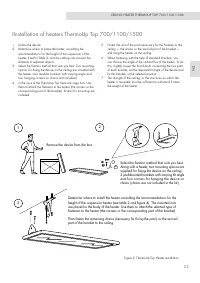
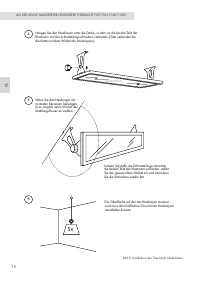
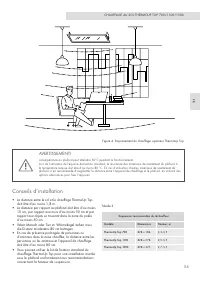
1. Connection is recommended to be made by quali
fi
ed
specialists.
2. Before connecting, you must remove the voltage from the
supply cable.
3. Connect the ends of the power supply cable to the power
cord leaving the heater through the terminal block (not
included), respecting the polarity.
4. Ground the instrument using the provided grounding screw.
The screw is placed on the body of the heater and is
labeled.
5. The heater can be connected directly to a 220-230 V
network that has a protective earth conductor using a 3-wire
cable with a core of at least 1.5 mm
²
, as well as through an
automatic switch and/or thermostat (not included in the set.)
6. When installing two or more heaters, the following must be
insured: their parallel connection,
fi
xed wiring, installation
of cables and a switch for the total current, as well as the
installation of an appropriate circuit breaker.
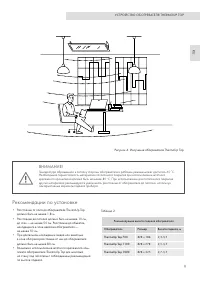
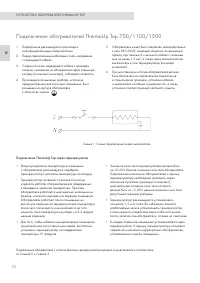
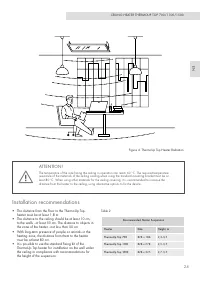
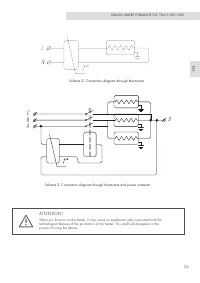
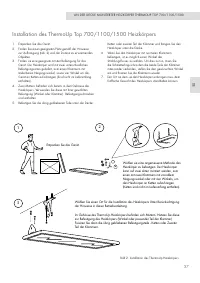
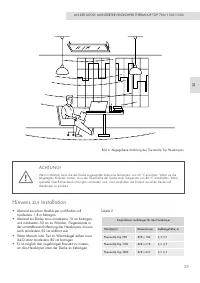
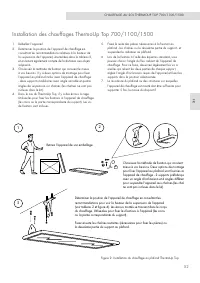
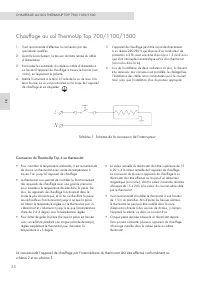
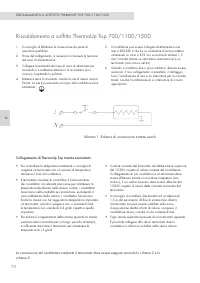
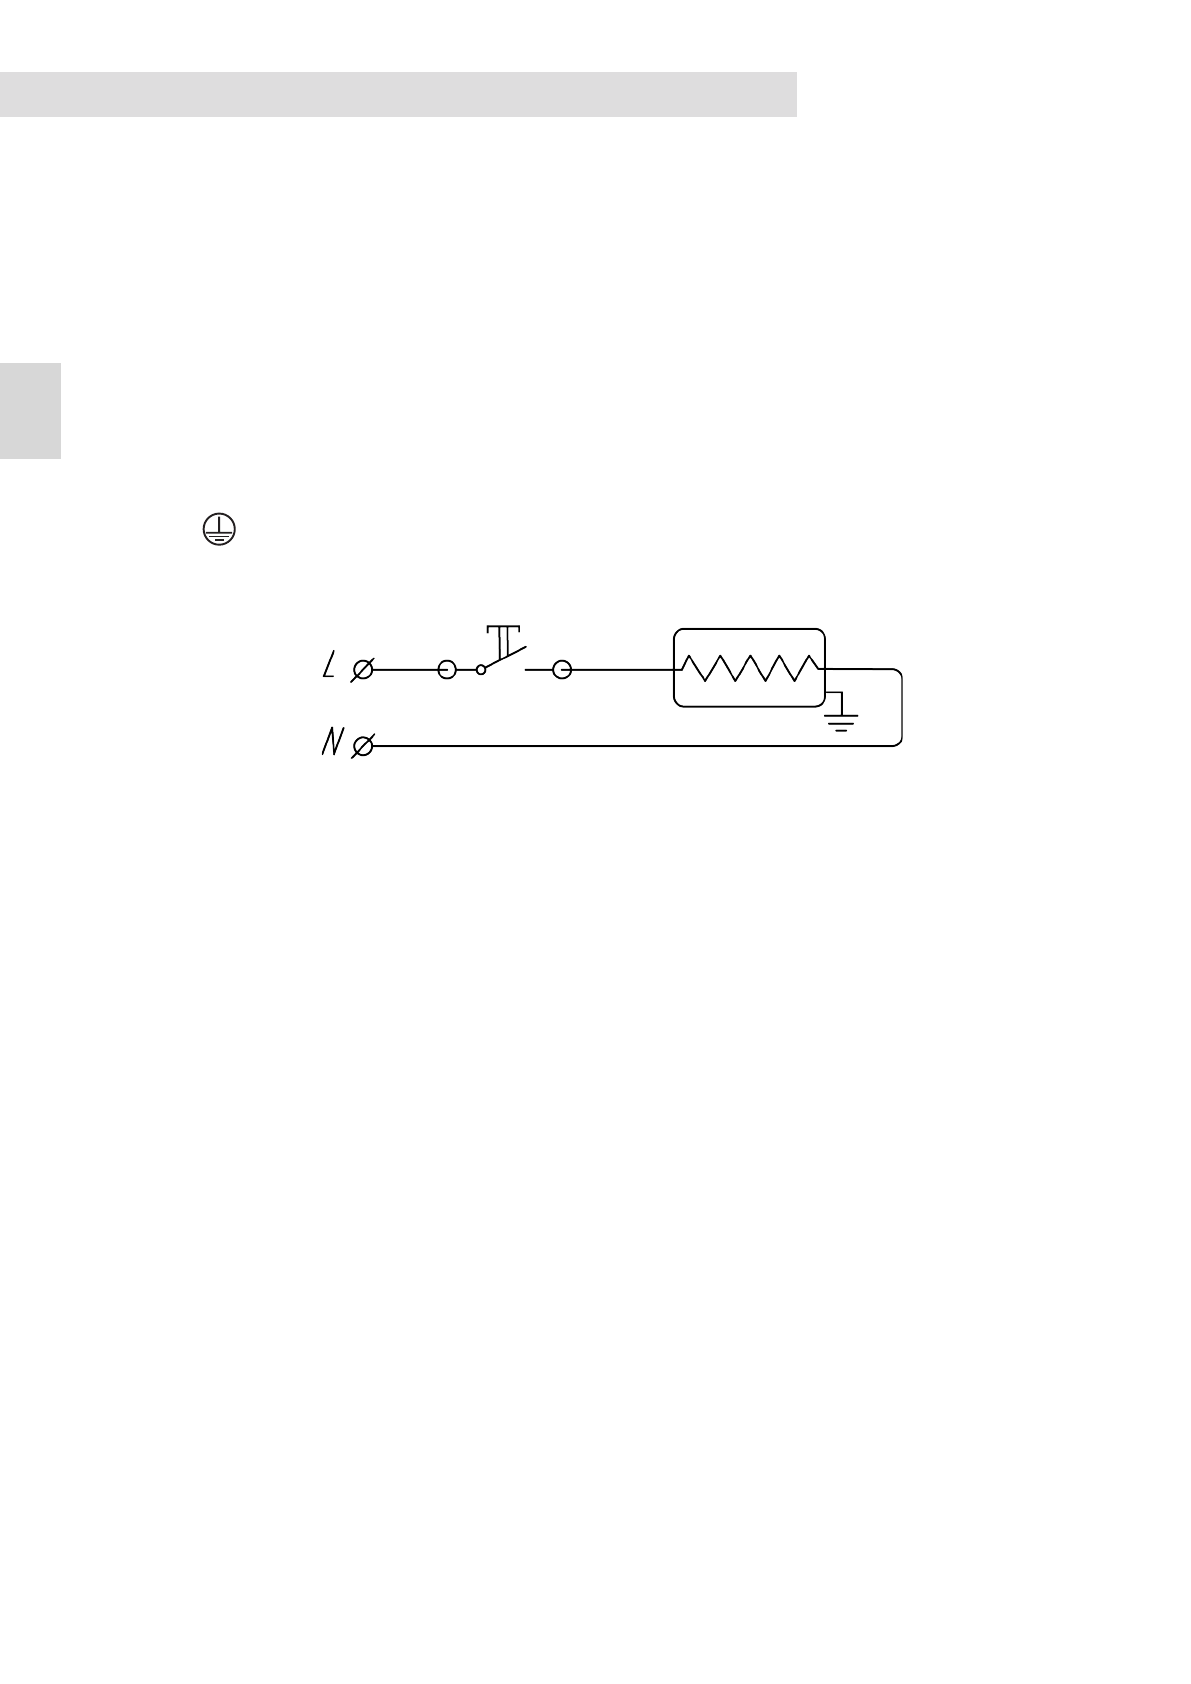
Connection of ThermoUp Top 700/1100/1500
Scheme 1. Connection scheme via switch
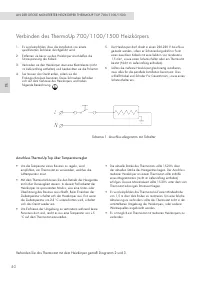
• The current value of the thermostat should be 15-20% higher
than the current value of the heater. Connection of several
heaters to one thermostat should be carried out through a
magnetic starter (not included), the maximum value of which
should be 15-20% less than the value of the current allowed
by the thermostat.
• It is recommended to install the thermostat at a height of
1.5 m from the
fl
oor. In order to avoid false triggering, the
thermostat cannot be installed in the zone of direct exposure
to any heat sources, including the heater itself, as well as in
a draft.
• Each separate room needs a separate thermostat. It is possible
to connect several infrared heaters installed in the same room
to one thermostat.
• To control the room temperature it is recommended to
choose a thermostat with a temperature sensor through the
air to the heater.
• The thermostat allows you to control the operation of
heaters with high accuracy to maintain the desired
temperature in the room. Moreover, the heaters operate in
the most economical mode, excluding the underheating or
overheating of the room. Heaters work until the room has
reached the temperature set on the thermostat, then turns
off and does not turn on until the temperature drops 2-3
degrees less than the set one.
• In order to prevent the room from freezing (when the room
is left unattended for a long period of time), it is enough
to set the thermostat to maintain the temperature of +5
degrees.
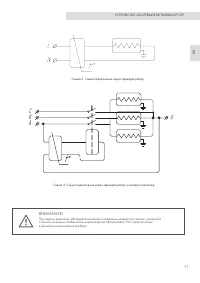
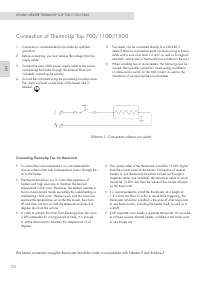
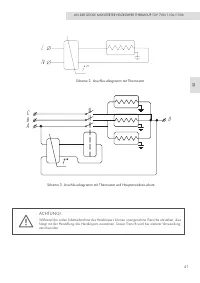
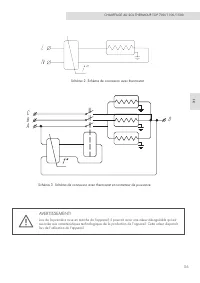
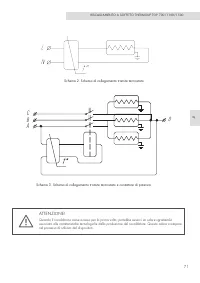
Connecting ThermoUp Top via thermostat
The heater connection using the thermostat should be made in accordance with Scheme 2 and Scheme 3.


