
Обогреватели ThermoUp TOP 1100 gray TUT11g - инструкция пользователя по применению, эксплуатации и установке на русском языке. Мы надеемся, она поможет вам решить возникшие у вас вопросы при эксплуатации техники.
Если остались вопросы, задайте их в комментариях после инструкции.
"Загружаем инструкцию", означает, что нужно подождать пока файл загрузится и можно будет его читать онлайн. Некоторые инструкции очень большие и время их появления зависит от вашей скорости интернета.


22
EN
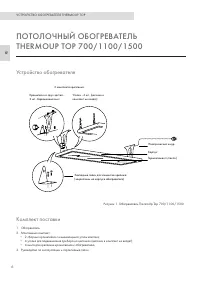
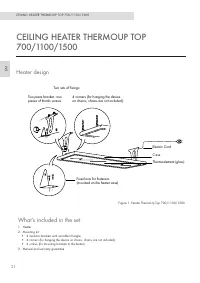
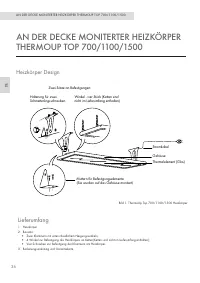
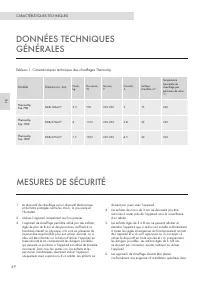
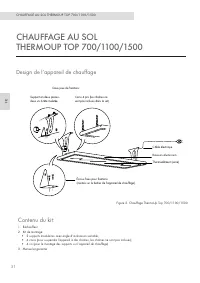
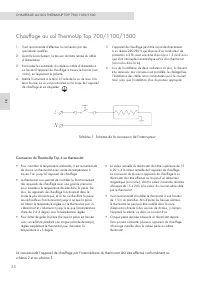
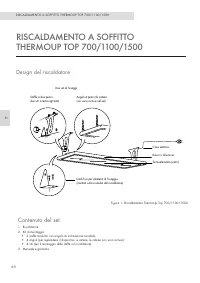
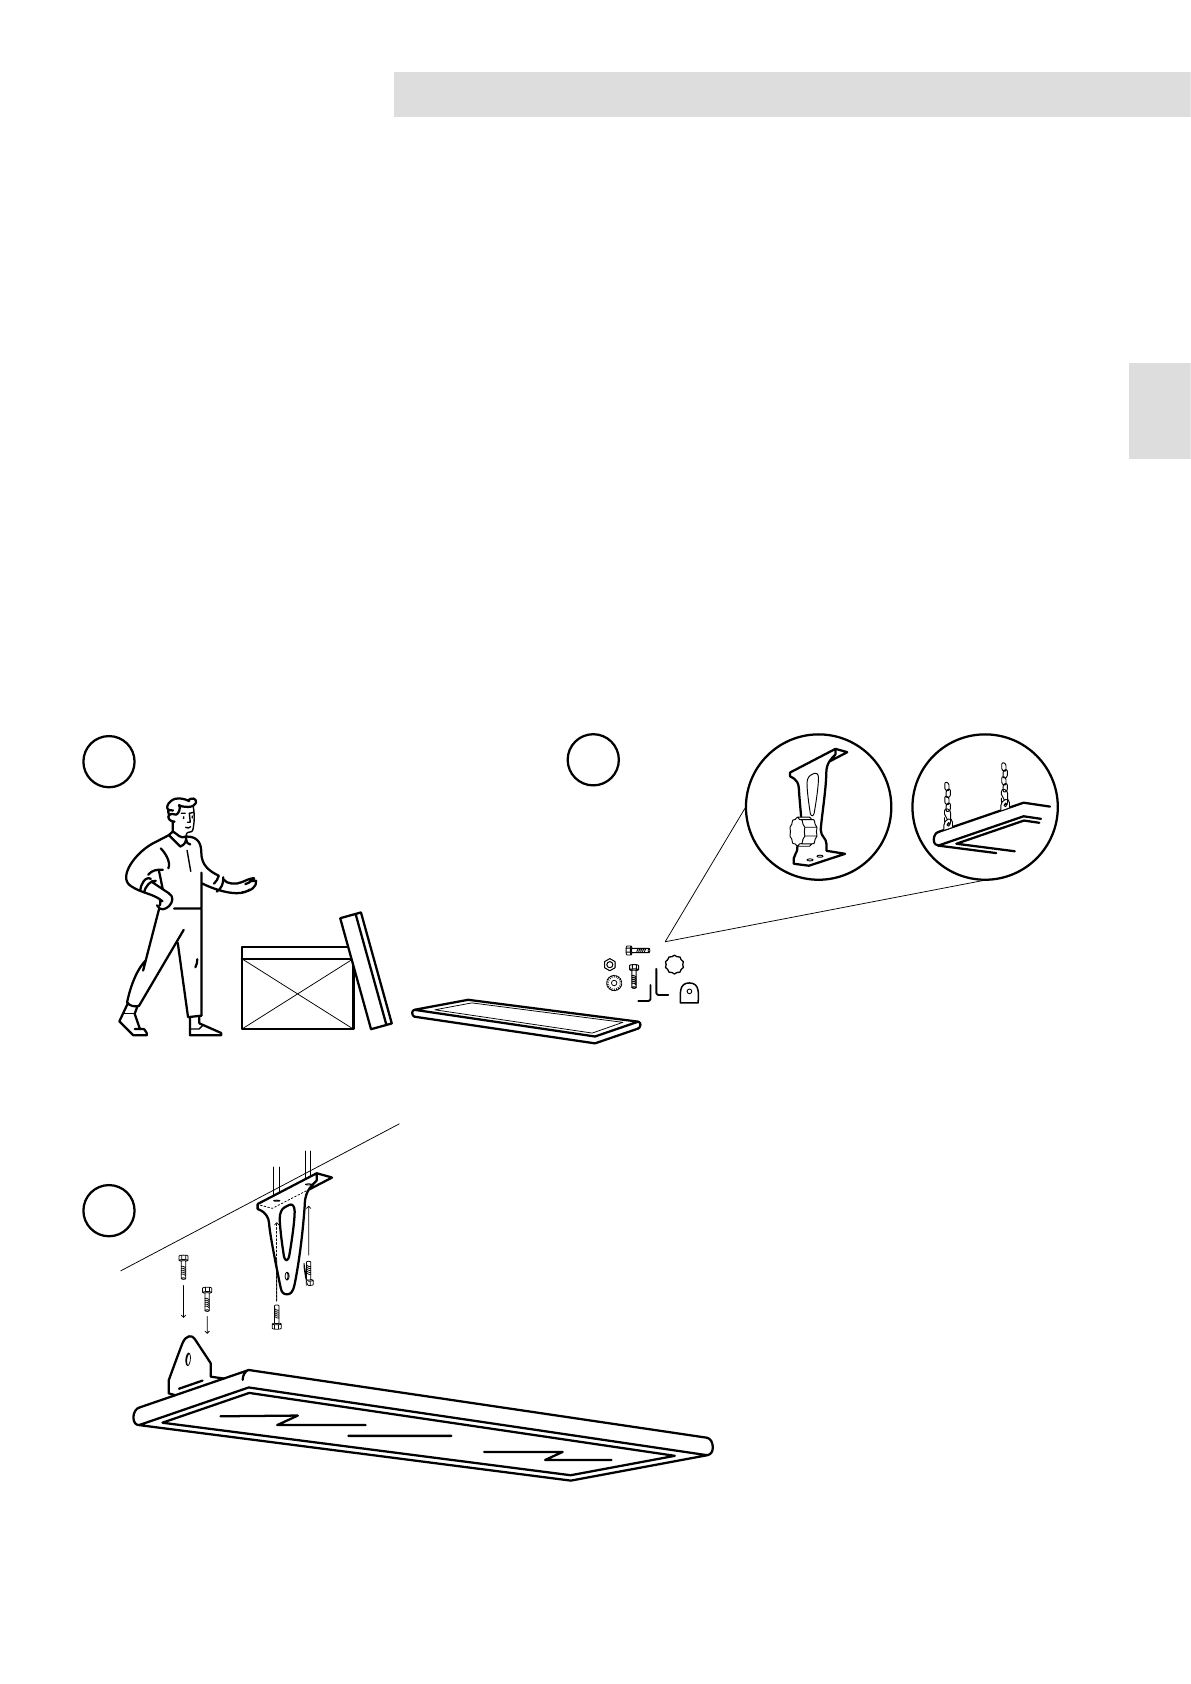
CEILING HEATER THERMOUP TOP 700/1100/1500
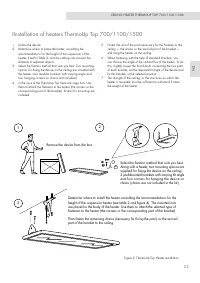
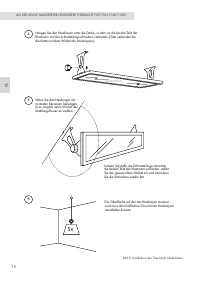
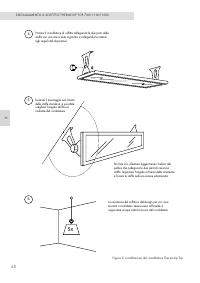
1. Unbox the device.
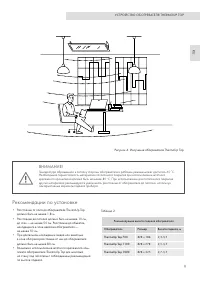
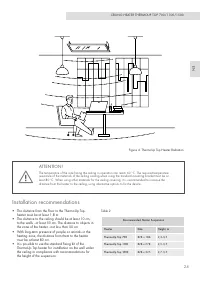
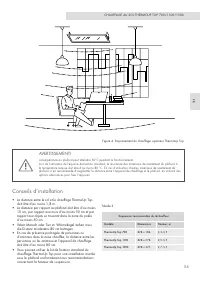
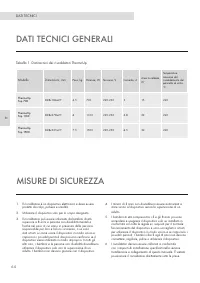
2. Determine where to place the heater, consulting the
recommendations for the height of the suspension of the
heater, listed in Table 2, and also taking into account the
distance to adjacent objects.
3. Select the
fi
xation method that suits you best. Two mounting
options for
fi
xing the device on the ceiling are included with
the heater - two modular brackets with varying angle and
four hanging corners on chains (not included.)
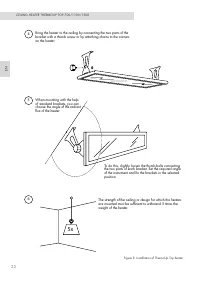
4. In the case of the ThermoUp Top there are cage nuts. Use
them to attach the fasteners to the heater (the corners or the
corresponding part of the bracket). Screws for mounting are
included.
5. Fasten the rest of the parts necessary for the fastener to the
ceiling — the chains or the second part of the bracket —
and hang the heater on the ceiling.
6. When fastening with the help of standard brackets, you
can choose the angle of the radiant
fl
ux of the heater. To do
this, slightly loosen the thumb bolts connecting the two parts
of each bracket, set the required tilt angle of the device and
fi
x the brackets in the selected position.
7. The strength of the ceiling, or the structures on which the
heater is mounted, must be suf
fi
cient to withstand 5 times
the weight of the heater.
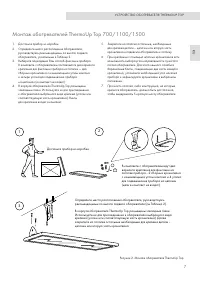
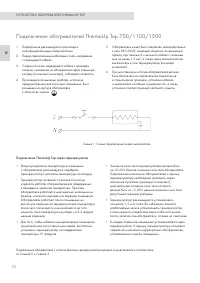
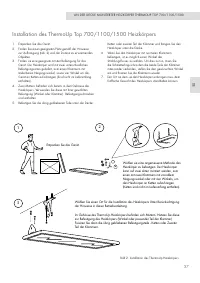
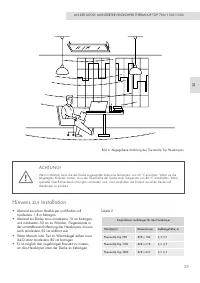
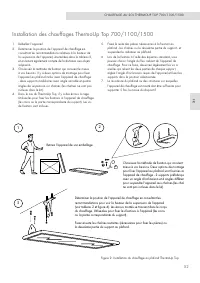
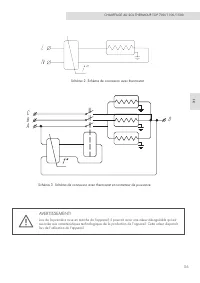
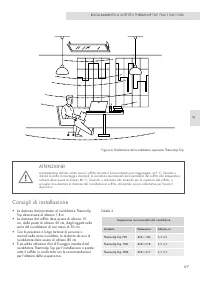
IInstallation of heaters ThermoUp Top 700/1100/1500
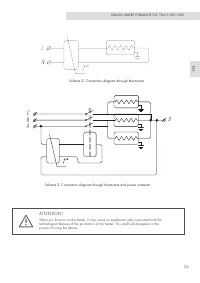
Figure 2. ThermoUp Top Heater Installation
Select the
fi
xation method that suits you best.
Along with a heater, two mounting options are
supplied for
fi
xing the device on the ceiling -
2 prefabricated brackets with varying tilt angle
and four corners for hanging the device on
chains (chains are not included in the kit.)
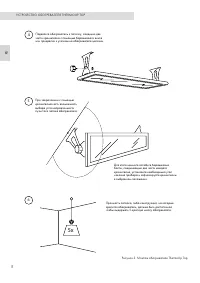
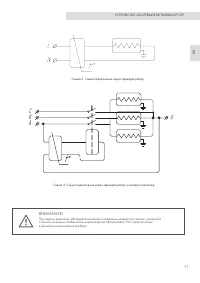
Determine where to install the heater consulting the recommendations for the
height of the suspension heater (see table 2 and
fi
gure 4). The mounted nuts
are placed in the body of the heater. Use them to attach the selected type of
fasteners to the heater (the corners or the corresponding part of the bracket).
Then fasten the remaining chains (necessary for
fi
xing the parts) or the second
part of the bracket to the ceiling.
Remove the device from the box.
1
2
3


