
Обогреватели Hyundai H-HD2-20-UI586 - инструкция пользователя по применению, эксплуатации и установке на русском языке. Мы надеемся, она поможет вам решить возникшие у вас вопросы при эксплуатации техники.
Если остались вопросы, задайте их в комментариях после инструкции.
"Загружаем инструкцию", означает, что нужно подождать пока файл загрузится и можно будет его читать онлайн. Некоторые инструкции очень большие и время их появления зависит от вашей скорости интернета.


8.
Diesel forced heater
EN
ATTENTION!
For ignition of the device never use matches or lighters or other
sources of the open lame
3. DISPOSAL
Detailed information on the recycling can be obtained from representative of the local authority.
Service life of the device speciied in the warranty card.
4. ASSEMBLY AND INSTALLATION
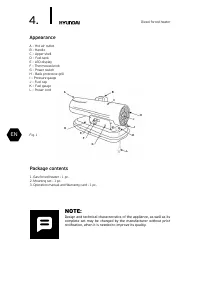
1. Carefully remove the heater from the package.
2. Make sure that the heating elements and other parts of the appliance have no remaining
crumbles of packing foam plastic or other debris.
3. Fill the tank with diesel fuel.
4. Connect the heater to a suitable electric socket ~220V, 50Hz. Make sure that the machine is
properly earthed.
How to ill the tank
• Make sure the power plug is removed from the power source and the power switch is in OFF
position «0»
• Place the appliance on the stable and level ground, remove the fuel cap and ill the fuel tank with
fuel ilter installed.
• Do not overill the heater. See the fuel level position.
• Check if there is water or waste in the fuel tank, clean the tank if it’s dirty.
• Fill diesel in fuel tank with oil pump only when the fuel ilter is proper installed, ater the illing
turn the cap clockwise and tighten it.
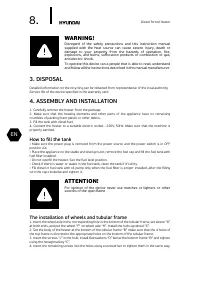
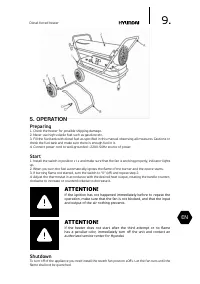
The installation of wheels and tubular frame
1. Insert the wheel axle in the corresponding hole in the bottom of the tubular frame, set sleeve “G”
at both ends, and put the wheel “F” on wheel axle “H”. Install the hub cap wheel “E”.
2. Set the body of the heater at the bottom of the tubular frame “B” make sure that the 4 holes of
the top frame is directed to the appropriate holes on the bottom of the tubular frame.
3. Insert the screws “J” in the hole, install lat washers “D” below the bottom frame “B” and tighten
using the hexagonal key “C”.
4. Insert the remaining screws into the holes using a screwdriver to tighten them in the same way.
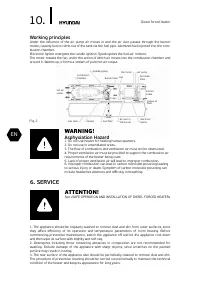
WARNING!
Disregard of the safety precautions and this instruction manual
supplied with the heat source can cause severe injury, death or
damage to your property from the hazards of operation, ire,
explosions, and burns, sufocation products of combustion or gas,
and electric shock.
To operate this device can a people that is able to read, understand
and follow all the instructions described in this manual manufacturer.
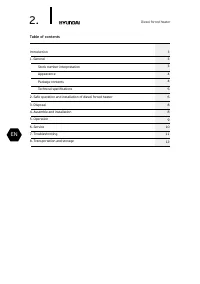
Содержание
- 14 Содержание
- 15 Уважаемый покупатель!; Описание
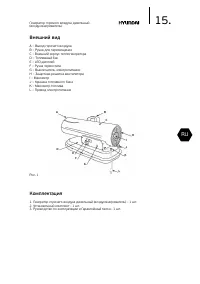
- 16 Комплектация
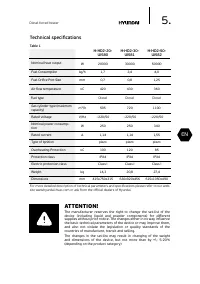
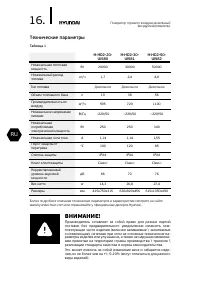
- 17 Технические параметры
- 18 ОБЩИЕ ПРАВИЛА БЕЗОПАСНОСТИ
- 20 Минимальные рекомендованные расстояния для
- 21 СБОРКА И УСТАНОВКА; Подготовка к работе
- 22 Начало работы
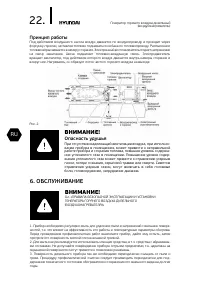
- 23 Опасность удушья; Принцип работы
- 24 Неисправность; ПОИСК И УСТРАНЕНИЕ НЕИСПРАВНОСТЕЙ
- 28 Гарантийные обязательства
- 29 Заполнение гарантийного талона
- 30 Изготовитель оставляет за собой право:; Общие правила установки, подключения и запуска в эксплу
- 31 Гарантийные обязательства не распространяются на
- 32 Изготовитель не несет гарантийных обязательств за изделие; Особые условия гарантийного обслуживания для отдельных
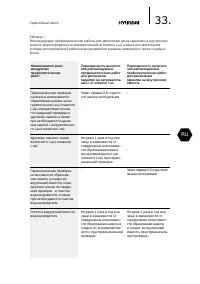
- 33 Водонагревательное оборудование
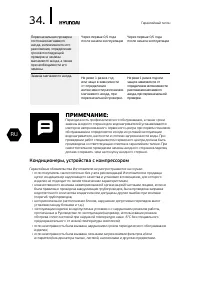
- 35 Кондиционеры, устройства с компрессором
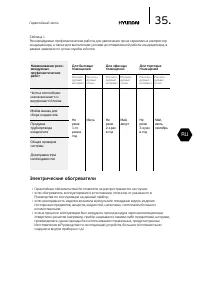
- 36 Электрические обогреватели
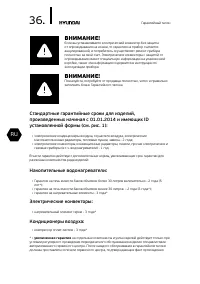
- 37 Cтандартные гарантийные сроки для изделий,; Кондиционеры воздуха:
- 40 Сведения об установке изделия
- 43 Отрывной талон «A»; Отрывной талон «В»; Отрывной талон «Г»
- 44 Профилактическое обслуживание изделия.
- 46 Вниманию покупателей!


