Микрофоны Vaddio (999-85100) - инструкция пользователя по применению, эксплуатации и установке на русском языке. Мы надеемся, она поможет вам решить возникшие у вас вопросы при эксплуатации техники.
Если остались вопросы, задайте их в комментариях после инструкции.
"Загружаем инструкцию", означает, что нужно подождать пока файл загрузится и можно будет его читать онлайн. Некоторые инструкции очень большие и время их появления зависит от вашей скорости интернета.

Connecting the Microphone Body
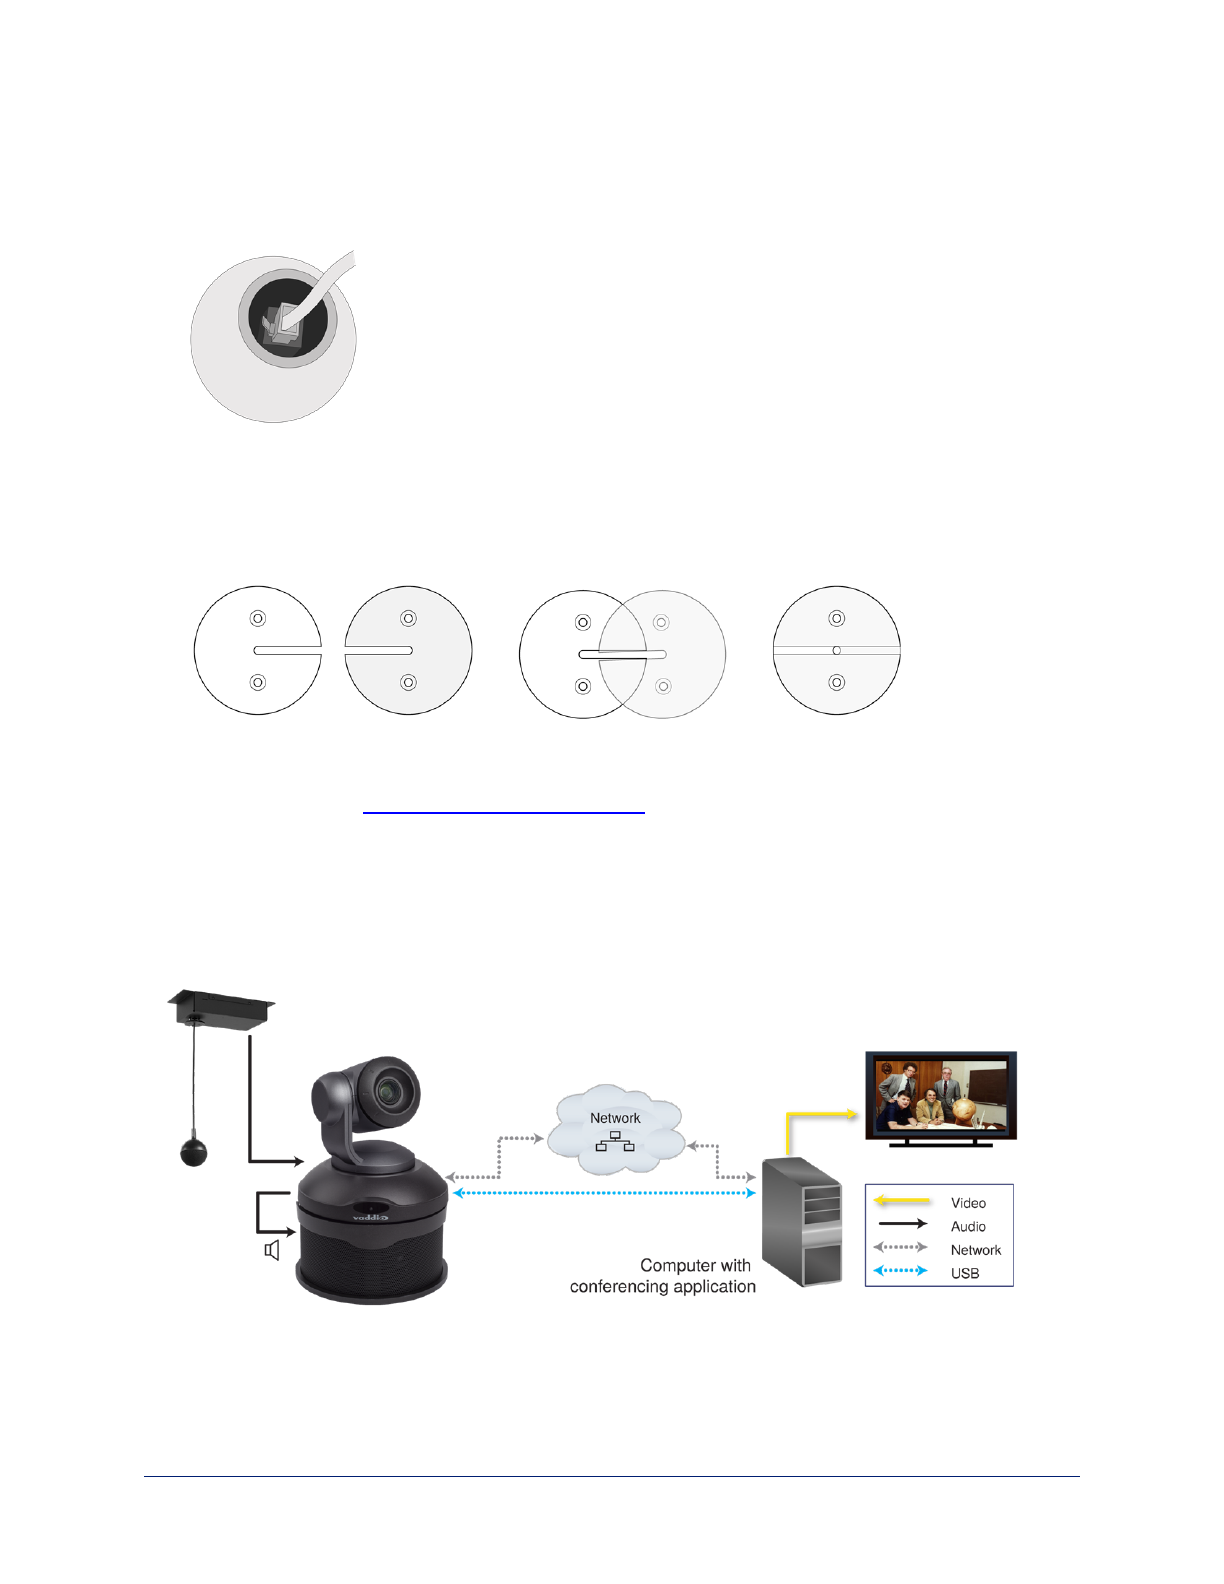
Working below the ceiling:
1. Connect the drop cable to the port in the microphone body.
2. Fit the strain relief boot over the drop cable.
3. Fit the strain relief boot into place in the microphone body.
4. Making sure the countersinks face outward, slide both the slotted trim plates over the cable, with the
slots on opposite sides. Use the 3/4 inch flat head screws to secure the trim plates to the threaded
posts on the bottom of the interface box.
(Illustration shaded for clarity)
Contact Vaddio Technical Support if you have questions or encounter any problems. Phone 800.572.2011 /
+1.763.971.4400, email
.
Basic Connections – CeilingMIC
This is a simple installation for a small conference room, using the CeilingMIC with a ConferenceSHOT AV
system. In this installation, the CeilingMIC connects to a ConferenceSHOT AV camera with speaker. The
camera connects to a computer over a USB 3 connection, making audio and video available to soft
conferencing applications.
8
Complete Manual for CeilingMIC and EasyIP CeilingMIC D Overhead Microphones
Характеристики
Остались вопросы?Не нашли свой ответ в руководстве или возникли другие проблемы? Задайте свой вопрос в форме ниже с подробным описанием вашей ситуации, чтобы другие люди и специалисты смогли дать на него ответ. Если вы знаете как решить проблему другого человека, пожалуйста, подскажите ему :)


