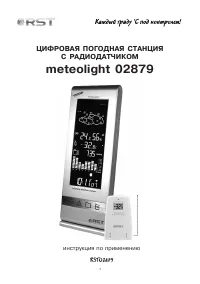
Метеостанции RST 02879 - инструкция пользователя по применению, эксплуатации и установке на русском языке. Мы надеемся, она поможет вам решить возникшие у вас вопросы при эксплуатации техники.
Если остались вопросы, задайте их в комментариях после инструкции.
"Загружаем инструкцию", означает, что нужно подождать пока файл загрузится и можно будет его читать онлайн. Некоторые инструкции очень большие и время их появления зависит от вашей скорости интернета.


BATTERY INSTALLATION FOR MAIN UNIT
1 . Turn t he m etal n ut a nti-clockwise o n t he b ottom o f t he u nit t o o pen a nd r elease t he b attery c ompartme
2 . Insert 4pcs AA size 1.5V alkaline battery as indicate by the polarity;
3 . Push the battery compartment back, turn the metal nut clockwise to lock;
Note: Replace the batteries when the low battery indicator appears on the top-right
corner of the LCD.
WIRELESS REMOTE SENSOR REGISTRATION PROCEDURE
1 . Insert 4pcs AA batteries first to the main unit, the temperature display shows
- - . –
While the
wave icon will keep blinking f or 2 minutes indi cate unit is in sensor sear ching mode.
2 . In a second step, insert the 2pcs AAA batteries for the sensor unit. The LED on the front panel
start flashing at a rate of one time per around 2 seconds indicates channel-1 is in use.
3 . While the LED is flashing, press once the [CH] key will change the sensor channel setting to 2. Ke
toggle on [CH] key can change channel setting up to 5. The LED is blinking at a frequency to
indicate the channel setting. i.e. continuous blinks 2 times indicate channel-2 is selected.
Note: If user does not press any key for 10 seconds, it will exit the channel setting
mode and transmit the RF signal. The main unit will register the temperature
reading.
(If the transmitter has the LCD display, the °C/°F key will toggle the temperature unit on the LCD.)
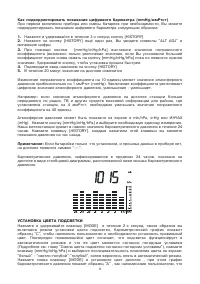
REMOTE CHANNEL AUTO-SCROLLING
This device is equipped with an auto-scroll function. While the auto-scroll function is set, the unit will
automatically cycle to display the temperature of each remote sensor for 6 seconds.
1 . To retrieve manually the specific sensor temperature and humidity reading, press CHANNEL key u
desired channel number is displayed.
2 . To enable auto-scroll function, use CHANNEL button to select channel 1, 2, ... until auto scroll ico
appears on the left hand corner of the 3rd line display.
SET THE CLOCK, CALENDAR & LANGUAGE
1 . Press & hold [CL OCK] but ton f or 2 seconds to enter clock
setting mode. Flashing 24
hours will appe
2 . Press [ ] or [ ] button to switch between 24 hours and 12 hours format, and then press [CLOC
button to confirm.
3 . The hour digits will flash. Use the [ ] button to increase by one hour or [ ] button to decease by
one hour to your desired hours. Holding down either button will change the increment unit rapidly
Press [CLOCK] button to confirm.
4 . The minute digits wil l flash. Use the [ ] button or [ ] button to set your desir ed minutes. Holding
down either button will change the increment unit rapidly. Press [CLOCK] button to confirm.
Note: Every change of minute digit will automatically reset the seconds to zero.
5 . The year digit will flash and Yr icon appears. Press [ ] or [ ] but ton to set y our desired y ear.
Press [CLOCK] button to confirm.
Note: Year range is from 2000 to 2099.
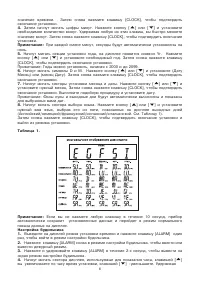
7. D and M icons will flash. Press [
] or [
] to select D M (Date Month) or M D (Month Date) format.
Press [CLOCK] button to confirm.
13


