Метеостанции Ea2 DE908 - инструкция пользователя по применению, эксплуатации и установке на русском языке. Мы надеемся, она поможет вам решить возникшие у вас вопросы при эксплуатации техники.
Если остались вопросы, задайте их в комментариях после инструкции.
"Загружаем инструкцию", означает, что нужно подождать пока файл загрузится и можно будет его читать онлайн. Некоторые инструкции очень большие и время их появления зависит от вашей скорости интернета.


ENGLISH 7
ENGLISH 8
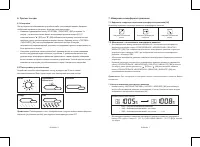
(3) Celsius / Fahrenheit
• Press “°C /°F” button (B7) to select Indoor/Outdoor Temperature in Celsius mode or
Fahrenheit mode.
• If the temperature is out of the measurable range, LL.L (beyond the minimum
temperature) or HH.H (beyond the maximum temperature) will be shown on the LCD.
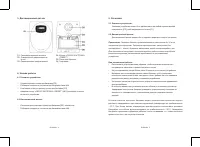
9. Time and Alarm Setting
9.1 Manual Time Setting:
• Hold “MODE/SET” button (B1) for 3 seconds to enter Clock/Calendar setting mode.
• Press “+” (B2) or “-” (B4) button to adjust the setting and press “MODE/SET” button
(B1) to confirm each setting.
• The setting sequence is shown as follow: Hour, Minutes, Second, Year, Month/Day
sequence, Month, Day, Time Zone, Day-of-week language.
• 8 languages can be selected in Day-of-week, they are: German, French, Spanish,
Italian, Dutch, Denmark, Russian, and English.
• The languages and their selected abbreviations for each day of the week are shown in
the following table.
• For Time Zone: If you receive no RC-DCF frequency signal, the time zone should be
set to 0. Time Zone is used in countries which can received the DCF frequency signal
but the time zone is different from German Time ( i.e. GMT+1).
Note:
(1) Second adjusted to zero only.
(2) The Time Setting Mode will automatically exit in 15 seconds without any adjustment.
9.2 12/24 Hour Display mode:
Press “+(12/24)” button (B2) to select 12 or 24 hours mode.
8. Thermometer
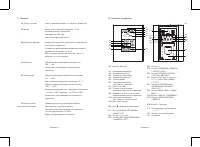
8.1 RF Transmission Procedure:
• The main unit automatically starts receiving transmission from outdoor thermo sensor
for outdoor temperature after batteries are inserted.
• The thermo sensor unit will automatically transmit temperature to the main unit after
batteries inserted. For having more than one external transmitter (Maximum3), select
the Channel, CH1, CH2 or CH3 to ensure each sensor is transmitting difference
channel before inserting batteries. The channel select switch (D3) is at the back of the
thermo sensor.
• If main unit failed to receive transmission from outdoor thermo sensor in first 3 minutes
after the batteries inserted (“- - . –”display on the LCD), hold “Channel” button (B10) for
3 seconds to receive transmission manually. RF icon “
” flashes on the LCD.
Note:
“WEATHER/HISTROY” (B6), “HPA/INHG/MMHG/▲ (C/F)” (B7), “RELATIVE/
ABSOLUTE"(B8), "MAX/MIN/▼” (B9) buttons will not function while scanning for thermo
sensor’s signal unless they are well received or stopped manually.
8.2 Temperature & Humidity
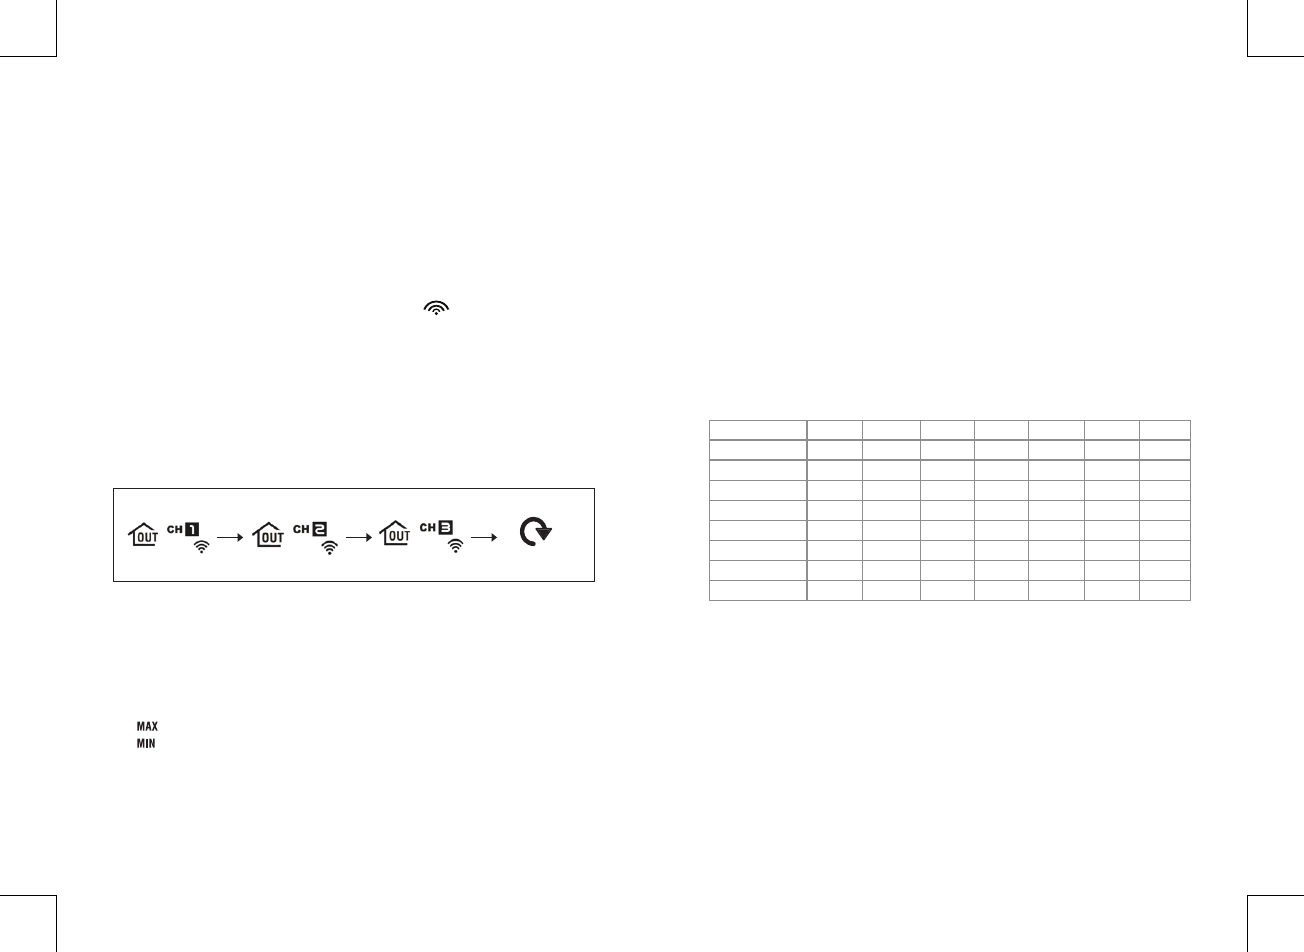
(1) Outdoor Temperature--- Channel Selection
• Press “CHANNEL” button (B10) to view the 3 Channels’ temperature & humidity. The
sequence is shown as follow:
PRESS “CHANNEL” button
>
PRESS “CHANNEL” button
>
PRESS “CHANNEL” button
• When viewing the record on CHANNEL 1 or 2, or 3, hold “CHANNEL” button (B10)
for 3 seconds to cancel the record on this channel manually, and receive the
transmission automatically again.
(2) Maximum / Minimum Temperature / Humidity
• Press “MAX/MIN” button (B9) to show the max/min for the indoor/outdoor temperature
and humidity
“
” is shown on the LCD if maximum Temperature / Humidity is shown.
“
” is shown on the LCD if minimum Temperature / Humidity is shown.
• Hold “MAX/MIN” button (B9) for 3 seconds to clear the recorded maximum and
minimum reading.
Display the three
channels alternatively
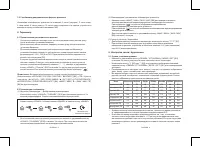
Language
Sunday
Monday
Tuesday Wednesday Thursday
Friday
Saturday
German, GE
SO
MO
DI
MI
DO
FR
SA
English, EN
SU
MO
TU
WE
TH
FR
SA
Russian, RU
BC
ПН
BT
CP
ЧТ
ПТ
СБ
Denmark, DA
SO
MA
TI
ON
TO
FR
LO
Dutch, NE
ZO
MA
DI
WO
DO
VR
ZA
Italian, IT
DO
LU
MA
ME
GI
VE
SA
Spanish, ES
DO
LU
MA
MI
JU
VI
SA
French, FR
DI
LU
MA
ME
JE
VE
SA
Содержание
- 3 Свойства; стене
- 4 Дистанционный датчик; Передача данных осуществляется на расстояние до 30 м на; Для оптимизации работы:
- 5 Измерение атмосферного давления; подтверждения сделанных настроек.; История измерений атмосферного давления; Нажмите кнопку «ИСТОРИЯ»
- 6 Столбиковая диаграмма атмосферного давления; Во время принудительного поиска сигнала дистанционного; Язык; Понедельник; Вторник

