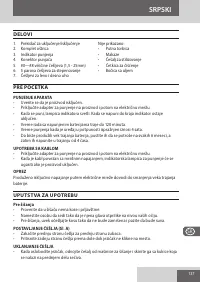
Машинки для стрижки Remington HC550 - инструкция пользователя по применению, эксплуатации и установке на русском языке. Мы надеемся, она поможет вам решить возникшие у вас вопросы при эксплуатации техники.
Если остались вопросы, задайте их в комментариях после инструкции.
"Загружаем инструкцию", означает, что нужно подождать пока файл загрузится и можно будет его читать онлайн. Некоторые инструкции очень большие и время их появления зависит от вашей скорости интернета.


7
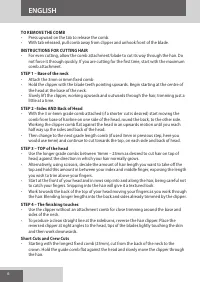
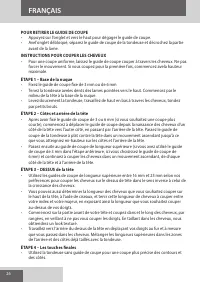
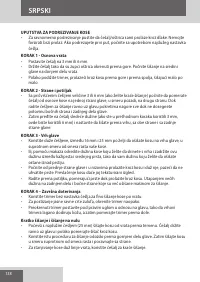
• Use the same procedure from the lower side to the upper side of the head. Then cut the
hair against the direction in which it grows and level with the sides.
• Use a closer guide comb to taper the hair down to the neckline as desired.
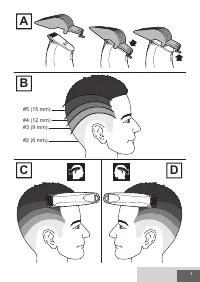
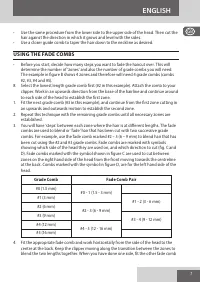
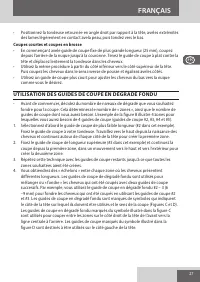
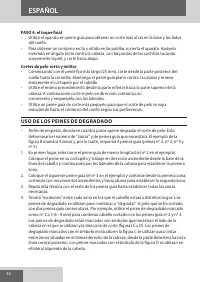
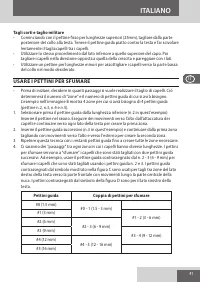
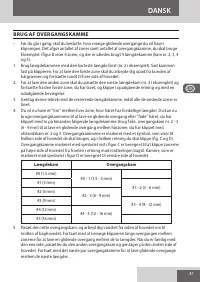
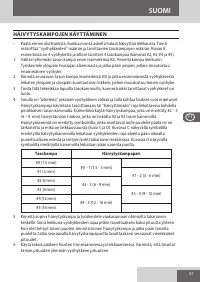
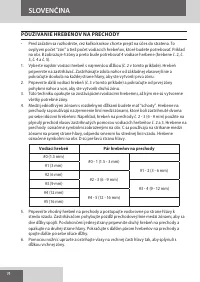
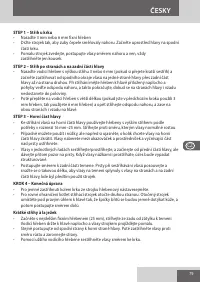
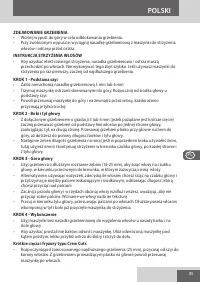
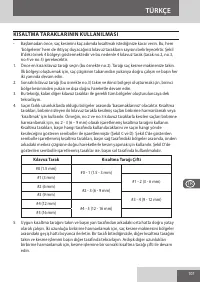
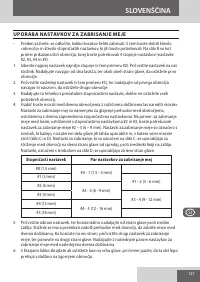
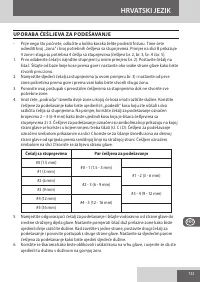
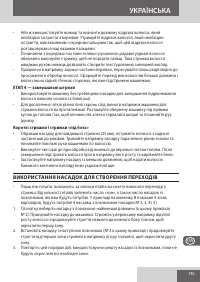
USING THE FADE COMBS
• Before you start, decide how many steps you want to fade the haircut over. This will
determine the number of ‘zones’ and also the number of grade combs you will need.
The example in figure B shows 4 zones and therefore will need 4 grade combs (combs
#2, #3, #4 and #5).
8. Select the lowest length grade comb first (#2 in this example). Attach the comb to your
clipper. Work in an upwards direction from the base of the hairline and continue around
to each side of the head to establish the first zone.
1. Fit the next grade comb (#3 in this example), and continue from the first zone cutting in
an upwards and outwards motion to establish the second zone.
2. Repeat this technique with the remaining grade combs until all necessary zones are
established.
3. You will have ‘steps’ between each zone where the hair is at different lengths. The fade
combs are used to blend or ‘fade’ hair that has been cut with two successive grade
combs. For example, use the fade comb marked #2 – 3 (6 – 9 mm) to blend hair that has
been cut using the #2 and #3 grade combs. Fade combs are marked with symbols
showing which side of the head they are used on, and which direction to cut (fig. C and
D). Fade combs marked with the symbol shown in figure C are used to cut between
zones on the right hand side of the head from the front moving towards the centreline
at the back. Combs marked with the symbol in figure D, are for the left hand side of the
head.
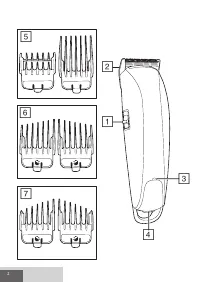
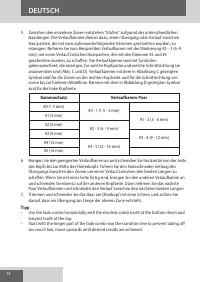
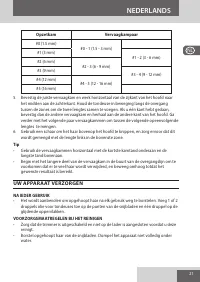
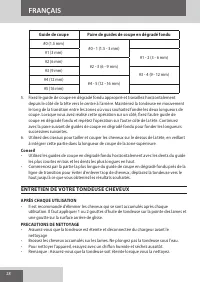
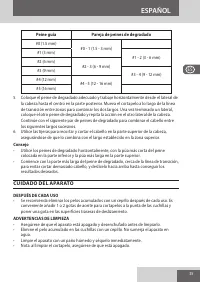
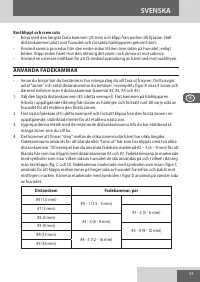
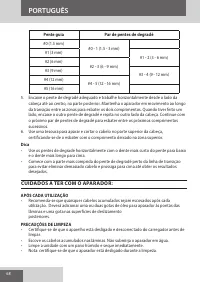
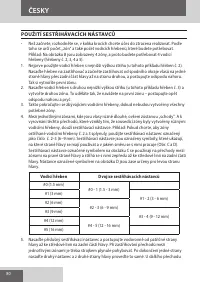
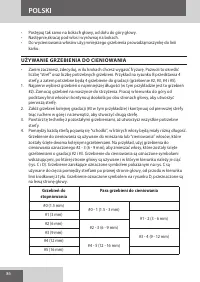
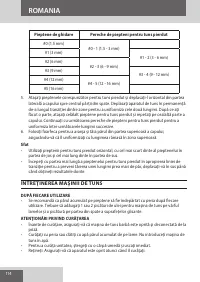
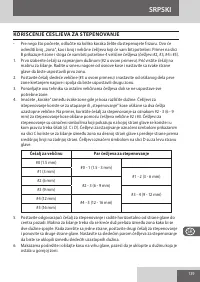
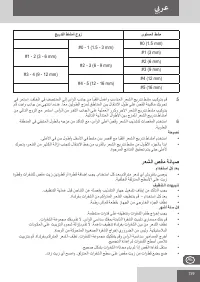
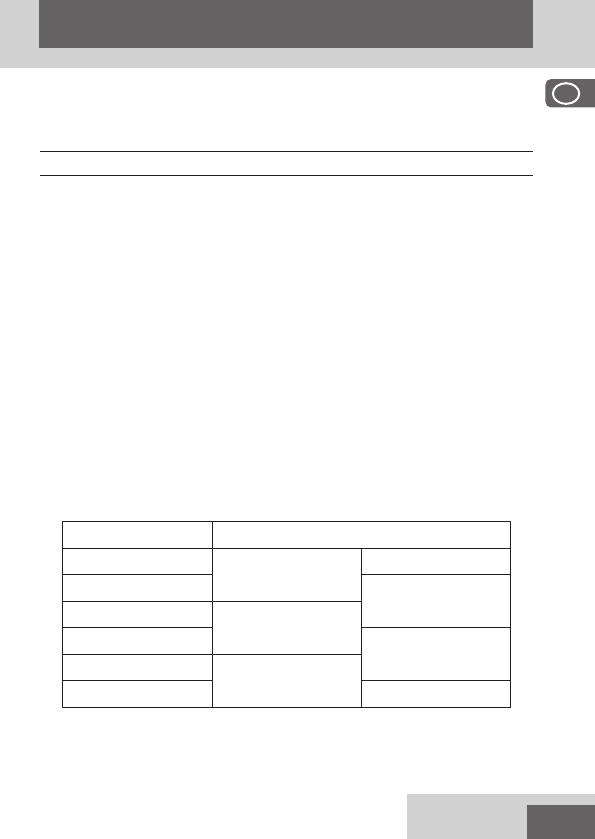
Grade Comb
Fade Comb Pair
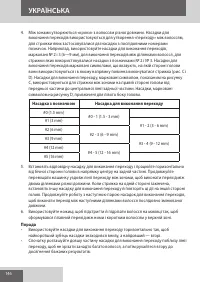
#0 (1.5 mm)
#0 - 1 (1.5 - 3 mm)
#1 (3 mm)
#1 - 2 (3 - 6 mm)
#2 (6 mm)
#2 - 3 (6 - 9 mm)
#3 (9 mm)
#3 - 4 (9 - 12 mm)
#4 (12 mm)
#4 - 5 (12 - 16 mm)
#5 (16 mm)
4. Fit the appropriate fade comb and work horizontally from the side of the head to the
centre at the back. Keep the clipper moving along the transition between the zones to
blend the two lengths together. When you have done one side, fit the other fade comb
ENGLISH
GB
DE
NL
FR
ES
IT
DK
SE
FI
NO
PT
SK
CZ
PL
HU
RU
TR
RO
GR
SI
HR
UA
SR
BG
AE
Содержание
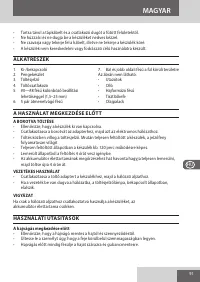
- 98 КОМПОНЕНТЫ; ЗАРЯДКА БРИТВЫ
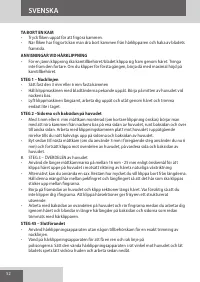
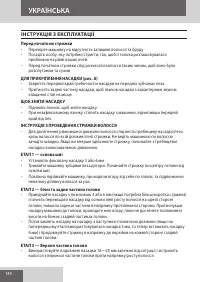
- 99 ИНСТРУКЦИИ ПО ЭКСПЛУАТАЦИИ
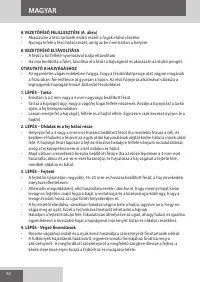
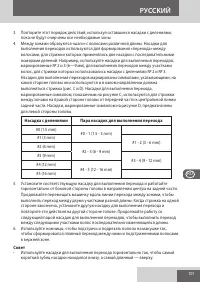
- 100 ШАГ 4 — Последний штрих; ИСПОЛЬЗОВАНИЕ НАСАДОК ДЛЯ ПЕРЕХОДОВ
- 101 пока не будут очерчены все необходимые зоны.; Насадка с делениями; короткий зубец насадки находился внизу, а самый длинный — вверху.
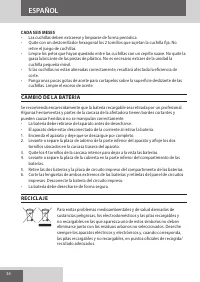
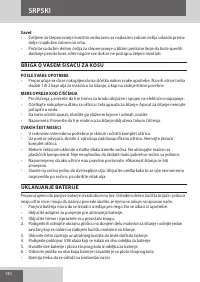
- 102 УХОД ЗА МАШИНКОЙ ДЛЯ СТРИЖКИ ВОЛОС; ПОСЛЕ КАЖДОГО ПРИМЕНЕНИЯ; ИЗВЛЕЧЕНИЕ БАТАРЕИ
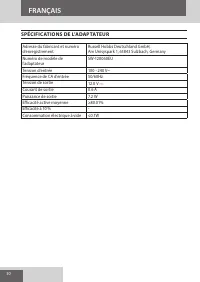
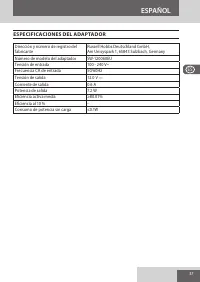
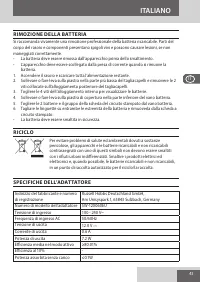
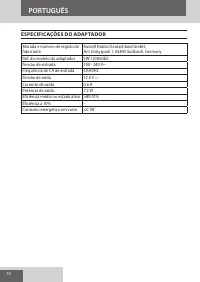
- 103 ТЕХНИЧЕСКИЕ ХАРАКТЕРИСТИКИ БЛОКА ПИТАНИЯ
Характеристики

Остались вопросы?Не нашли свой ответ в руководстве или возникли другие проблемы? Задайте свой вопрос в форме ниже с подробным описанием вашей ситуации, чтобы другие люди и специалисты смогли дать на него ответ. Если вы знаете как решить проблему другого человека, пожалуйста, подскажите ему :)


