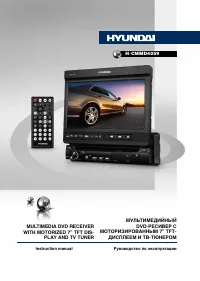
Магнитолы Hyundai Electronics H-CMMD4059 - инструкция пользователя по применению, эксплуатации и установке на русском языке. Мы надеемся, она поможет вам решить возникшие у вас вопросы при эксплуатации техники.
Если остались вопросы, задайте их в комментариях после инструкции.
"Загружаем инструкцию", означает, что нужно подождать пока файл загрузится и можно будет его читать онлайн. Некоторые инструкции очень большие и время их появления зависит от вашей скорости интернета.


12
13
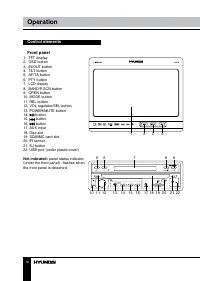
Operation
Operation
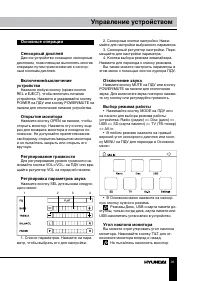
General operations
Touch screen
Due to the touch screen, you can fulfill most
functions not only by pressing buttons but also
by touching the options you need.
Turning the unit on/off
Press any button (except REL button and
EJECT button) to switch the unit on. Press and
hold POWER button on the RC or POWER/
MUTE button on the panel to turn off the power.
Open the monitor
Press OPEN button on the unit to open the
monitor. Press the button again, the monitor
returns to the previous state. Do not obstruct
opening/closing the monitor and do not do it
manually.
Volume control
Press VOL+/VOL- buttons on the RC or
rotate VOL regulator on the unit to increase/
decrease the sound level.
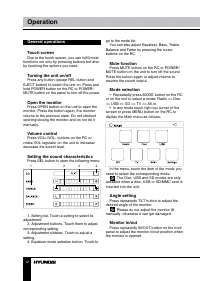
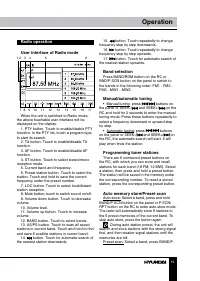
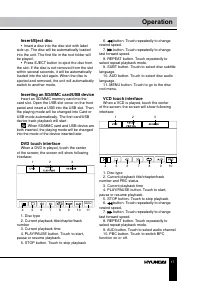
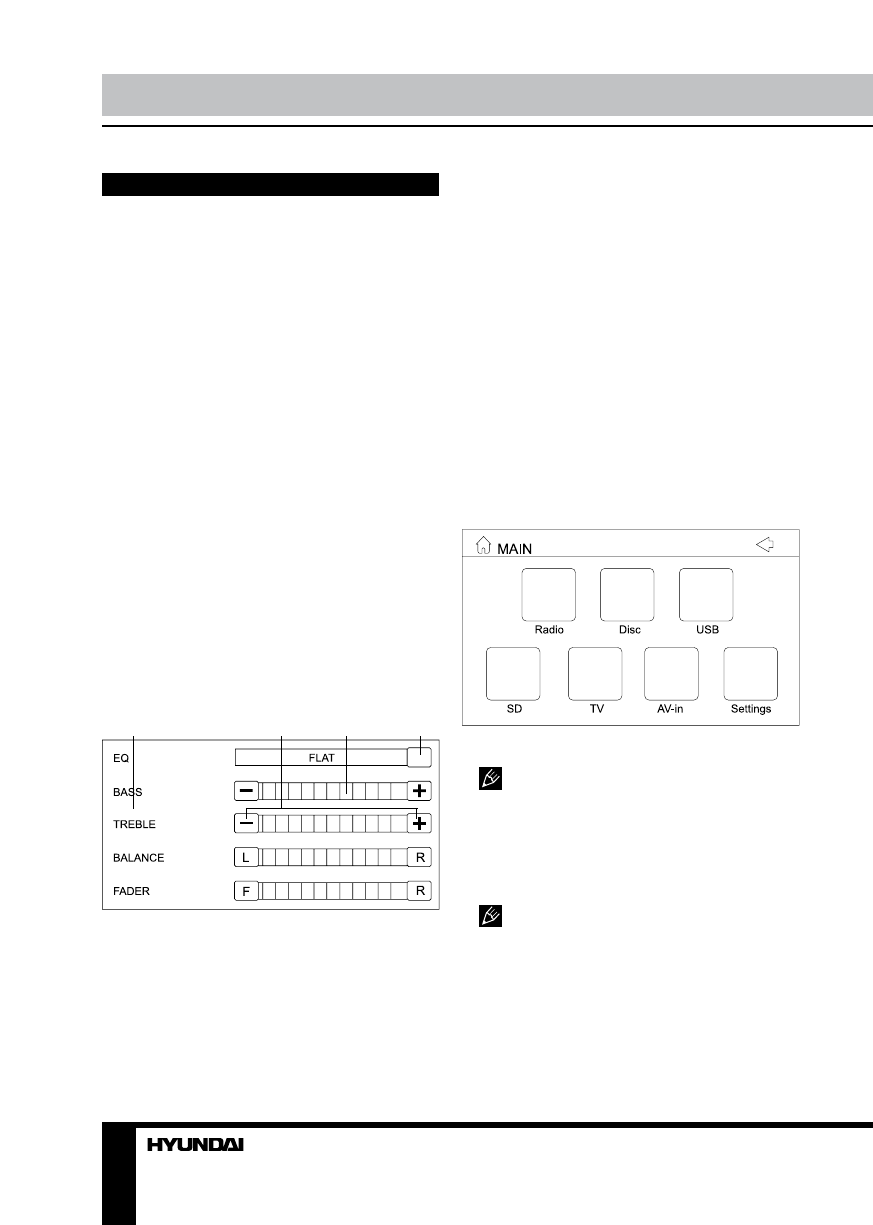
Setting the sound characteristics
Press SEL button to open the following menu:
1
2
3
4
1. Setting list. Touch a setting to select its
adjustment.
2. Adjustment buttons. Touch them to adjust
corresponding setting.
3. Adjustment slidebar. Touch to adjust a
setting.
4. Equalizer mode selection button. Touch to
go to the mode list.
You can also adjust Equalizer, Bass, Treble,
Balance and Fader by pressing the cursor
buttons on the RC.
Mute function
Press MUTE button on the RC or POWER/
MUTE button on the unit to turn off the sound.
Press the button again or adjust volume to
resume the sound output.
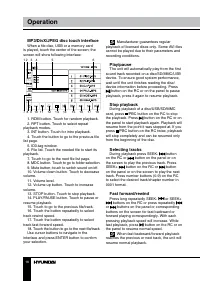
Mode selection
• Repeatedly press MODE button on the RC
or on the unit to select a mode: Radio => Disc
=> USB => SD => TV => AV-in.
• In any mode touch right top corner of the
screen or press MENU button on the RC to
display the Main menu as follows:
In the menu, touch the item of the mode you
need to select the corresponding mode.
The Disc, USB and SD modes are only
available when a disc, USB or SD/MMC card is
inserted into the unit.
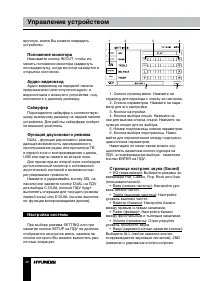
Angle setting
Press repeatedly TILT button to adjust the
desired angle of the monitor.
Please do not adjust the monitor tilt
manually, otherwise it can get damaged.
Monitor in/out
Press repeatedly IN/OUT button on the front
panel to adjust the monitor in/out position when
the monitor is opened.
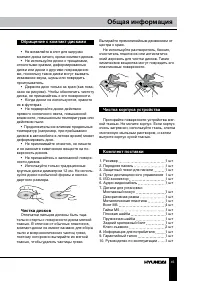
Содержание
- 23 Уважаемый покупатель!; Установка/Подключение
- 24 параметрам; Общая информация; Обращение с компакт-дисками
- 25 Утилизация изделия
- 26 • Убедитесь, что источник питания и
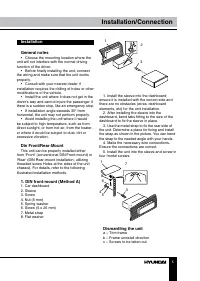
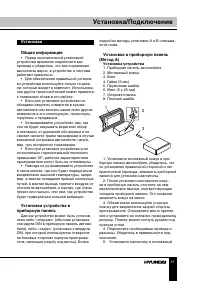
- 27 Установка; Установка устройства
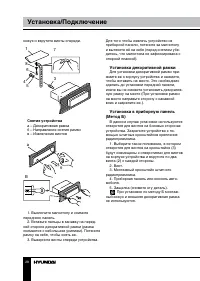
- 28 кожух и вкрутите винты спереди.; Снятие устройства; Выключите магнитолу и снимите; Установка декоративной рамки; Для установки декоративной рамки при-; Установка в приборную панель; В данном случае установки используются
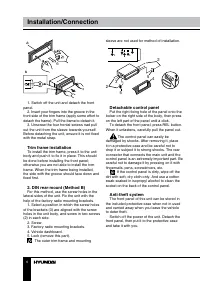
- 29 Операции со съемной панелью
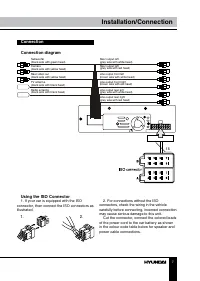
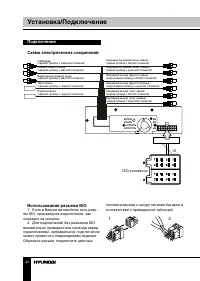
- 30 Подключение; Использование разъема ISO; Для подключений без разъемов ISO
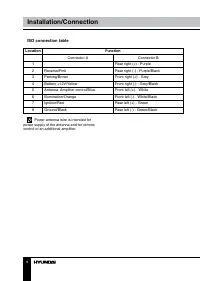
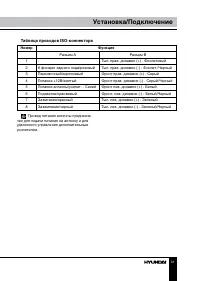
- 31 Таблица проводов ISO-коннектора; Номер; Разъем A
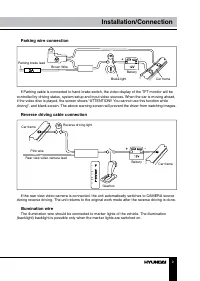
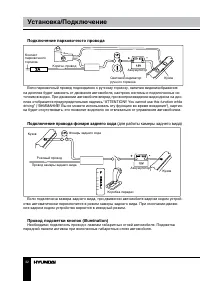
- 32 Подключение парковочного провода
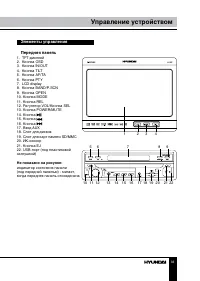
- 33 Элементы управления; Не показано на рисунке:
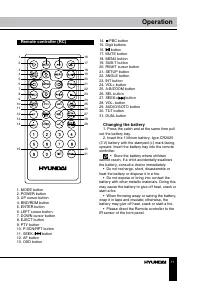
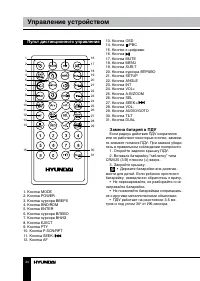
- 34 Пульт дистанционного управления
- 35 Основные операции
- 36 Положение монитора
- 37 Страница настроек дисплея
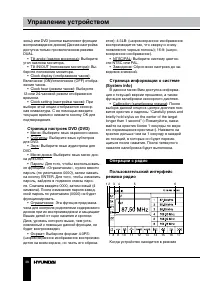
- 38 угол наклона монитора.; Страница информации о системе; В данном меню Вам доступна информа-; Операции с радио; Когда устройство находится в режиме
- 40 Сервис RDS
- 41 разъемам
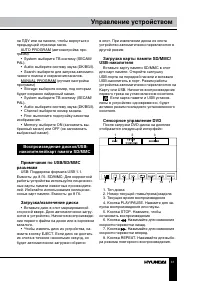
- 42 Сенсорное управление VCD
- 44 Функция PBC (Управление
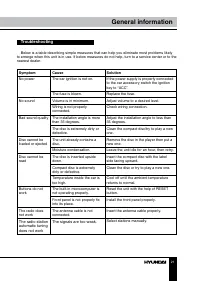
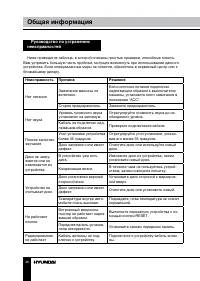
- 46 Руководство по устранению; Неисправность
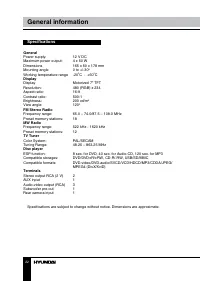
- 47 Технические характеристики

