Измерительные приборы Condtrol MicroX Set - инструкция пользователя по применению, эксплуатации и установке на русском языке. Мы надеемся, она поможет вам решить возникшие у вас вопросы при эксплуатации техники.
Если остались вопросы, задайте их в комментариях после инструкции.
"Загружаем инструкцию", означает, что нужно подождать пока файл загрузится и можно будет его читать онлайн. Некоторые инструкции очень большие и время их появления зависит от вашей скорости интернета.

14
15
14
15
User Manual
CROSS LINE
LASER
User Manual
CROSS LINE
LASER
CONDTROL MicroX /MicroX Set
CONDTROL MicroX /MicroX Set
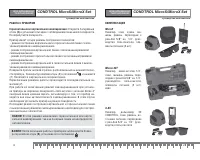
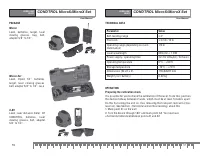
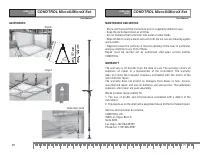
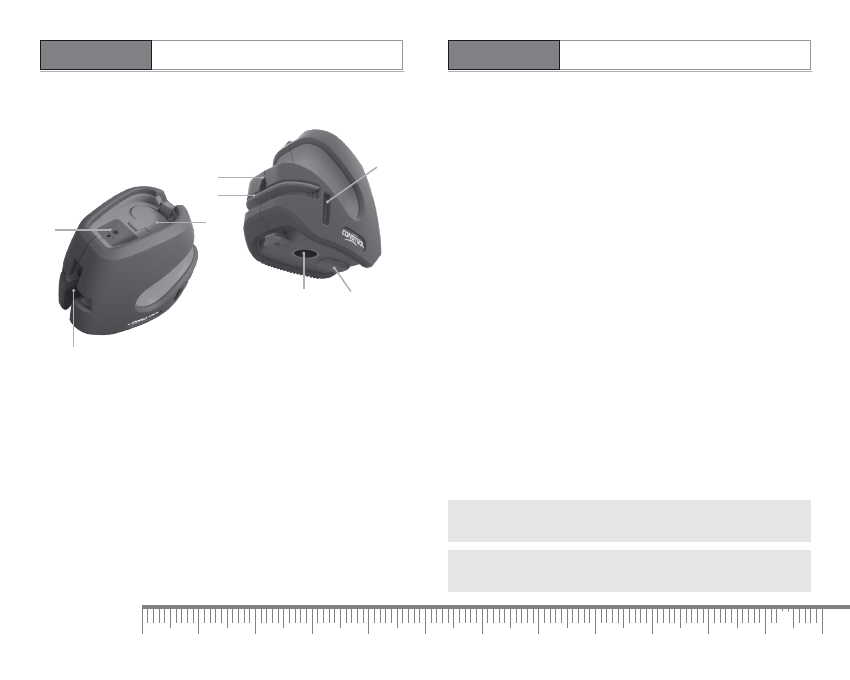
PRODUCT FEATURES
1 Laser lines aper tures
2 On/Of f switch but ton
3 Bat ter y cover
4 Tripod mount 5/8”
5 Transpor t retainer
6 Mount hole
7 Mount clip
8 Belt mount
1
2
3
5
4
8
6
7
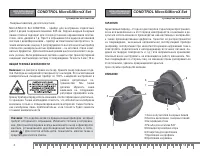
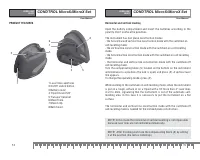
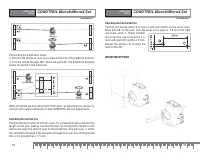
Horizontal and vertical leveling
Open the bat ter y compar tment and inser t the bat teries according to the
polarity. Don’t confuse the polarities.
The instrument has four plane construction modes:
- the horizontal and ver tical line construction mode with the switched-on
self-levelling mode.
- the ver tical line construction mode with the switched-on self-levelling
mode.
- the horizontal line construction mode with the switched-on self-levelling
mode.
- the horizontal and ver tical line construction mode with the switched-of f
self-levelling mode.
Turn the compensating block (5) located on the bot tom on the instrument
anticlockwise to a position (the lock is open) and press (2). A ver tical laser
line appears.
To change the operating modes press (2).
While working in the switched-on self-levelling mode, when the instrument
is put on a rough sur face or on a tripod with a tilt more than 4° laser lines
star t to blink, signalizing that the instrument is out of the automatic self-
levelling area. In this case it is necessar y to put the instrument on a flat
sur face
The horizontal and ver tical line construction mode with the switched-of f
self-levelling mode is needed for the inclined plane construction.
NOTE! In this mode the horizontal or ver tical levelling is not impossible
because laser lines are not centered automatically.
NOTE! Af ter finishing work lock the compensating block (5) by set ting
it at the position (the lock is locked up).
Содержание
- 3 Лазерный нивелир, дву хплоскостной; ОБЩАЯ ТЕХНИКА БЕЗОПАСНОСТИ; не смотрите прямо на лазер. Храните лазер подальше от де-; ГАРАНТИЯ
- 4 РАБОТА С ПРИБОРОМ; MicroX
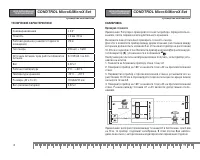
- 5 ТЕХНИЧЕСКИЕ Х АРАКТЕРИСТИКИ
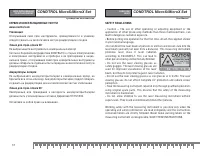
- 6 Проверка вертикальной линии:; Поставьте прибор на расстоянии около; Проверка горизонтальной линии:; Поставьте прибор на рас-; ВАРИАНТЫ КРЕПЛЕНИЯ; штанга
- 7 СЕРВИС И КОНСУЛЬТАЦИОННЫЕ УСЛУГИ; Утилизация; SAFETY REGULATIONS


