
Измерительные приборы Bort BMM-750C - инструкция пользователя по применению, эксплуатации и установке на русском языке. Мы надеемся, она поможет вам решить возникшие у вас вопросы при эксплуатации техники.
Если остались вопросы, задайте их в комментариях после инструкции.
"Загружаем инструкцию", означает, что нужно подождать пока файл загрузится и можно будет его читать онлайн. Некоторые инструкции очень большие и время их появления зависит от вашей скорости интернета.


5
ATTENTION!
• In case the parameter value of measured current force is
unknown, you must set the function switch in the highest
measurement range and then reduce the range gradually
if required .
• If the figure «1» now appears on the display, the measur-
and lies outside the range set .
Insulation testing
(using an additional insulation tester up to 500 V)
1.
Connect the three banana type plugs VΩ, COM, and
EXT of the insulation tester, respectively, to the input sock-
ets VΩ, COM, and EXT of the multimeter .
2.
Set the rotary switch of the multimeter (3) in position
2000 MΩ .
3.
Connect test leads, connected to jacks L and E of the
insulation tester, to the device under test (the voltage in
the device to be tested must be disconnected) .
4.
Set the insulation tester switch to ON-position .
5.
Press the 500V button on the insulation tester . At the
same time, a red 500V ON indicator will light on it . The
insulation value appears on the multimeter display . If the
measurement result is below 19 MΩ, switch the multime-
ter and insulation tester to the measuring range of 20 MΩ
to increase the measurement accuracy .
6.
If the insulation tester is not used, set its switch to
OFF-position and disconnect the test leads from its sock-
ets L and E . It will extend the battery life and eliminate the
risk of electric shock .
Measuring the resistance (Ω Ohm)
• Insert the probe with the black cable into the “COM”
connector, and the probe with the red cable into the “V
/ Ω” connector .
• Set the mode switch in position “Ω” and select the meas-
uring range .
• Connect the multimeter to the circuit in which you plan
to measure the electrical resistance .
• Read the electrical resistance value of the circuit on the
display .
• The current of the multimeter’s battery is used during
measuring electrical resistance .
ATTENTION! Do not touch the exposed parts of the
probes, as this may cause measurement errors .
Mode
Unit of
measure
Measurement accuracy
200 Ω
0 .1 Ω
±1 .0% value + 10 units of measure
20 kΩ
10 Ω
±1 .0% value + 4 units of measure
Recommendation
• If the value of the electric resistance of the circuit deter-
mined during the measurement is higher than the value
of the selected range, the figure “1” will appear on the dis-
play . In that case a higher range value should be selected .
With an electrical resistance close to 1 MΩ, it may take
several seconds for the multimeter to stabilize . This is the
normal behavior of the multimeter when measuring high
electrical resistance values .
• If the circuit is broken, the figure “1” will appear on the
display . In this case, this means that the resistance of the
circuit is infinity .
• If the electric circuit is under current, it is necessary to
de-energize the circuit before measuring the electrical
resistance and make sure that all capacitors present in it
are discharged .
Continuity test
• Connect the BLACK lead to the «COM» connector socket
and the RED lead to the «VΩ» connector socket .
• Set the mode switch on the « » range and connect
the measuring tips to the power circuit to be measured .
• If the circuit is continuous, a beep will sound .
Changing battery
• A battery symbol appears on the display if the battery is
almost discharged .
CAUTION! The device must be switched off and the leads
removed before opening the casing of the multimeter .
• Set the rotary switch on the OFF setting .
• Remove the rear panel of the multimeter by loosening
the screws .
• Replace the battery by an analogous one .
• Replace and screw the back cover of the multimeter .
MAINTENANCE AND CLEANING
Always remove the battery before servicing and
cleaning of the multimeter . Never use water or oth-
er fluids to clean the device .
• Keep the instrument leads and the multimeter clean .
Never use any liquids to clean the multimeter . Some
cleaning fluids and solvents (petrol, thinner etc .) can at-
tach or dissolve the plastic . Clean the casing regularly us-
ing a soft piece of cloth, preferably after every use .
• If the display is difficult to read, replace the battery .
• In case of failure of the multimeter, contact the service
division .
Made in China .
Содержание
- 7 ИСПОЛЬЗОВАНИЕ ИНСТРУМЕНТА
- 9 ТЕХНИЧЕСКОЕ ОБСЛУЖИВАНИЕ И УХОД; Список авторизованных сервисных центров в России
- 13 УСЛОВИЯ ГАРАНТИИ
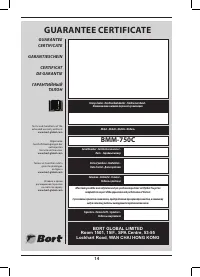
- 14 GUARANTEE CERTIFICATE; BORT GLOBAL LIMITED
- 15 Купон No2; Купон No3; Repair comletion date:; Купон No1; Repair comletion date:
- 17 ГАРАНТИЙНЫЙ ТАЛОН; ДЕЙСТВУЕТ НА ТЕРРИТОРИИ
Характеристики

Остались вопросы?Не нашли свой ответ в руководстве или возникли другие проблемы? Задайте свой вопрос в форме ниже с подробным описанием вашей ситуации, чтобы другие люди и специалисты смогли дать на него ответ. Если вы знаете как решить проблему другого человека, пожалуйста, подскажите ему :)


