
Холодильник Kraft KF-FN240NFW - инструкция пользователя по применению, эксплуатации и установке на русском языке. Мы надеемся, она поможет вам решить возникшие у вас вопросы при эксплуатации техники.
Если остались вопросы, задайте их в комментариях после инструкции.
"Загружаем инструкцию", означает, что нужно подождать пока файл загрузится и можно будет его читать онлайн. Некоторые инструкции очень большие и время их появления зависит от вашей скорости интернета.

10
11
ХОЛОДИЛЬНИК
REFRIGERATOR FREEZER
ХОЛОДИЛЬНИК
REFRIGERATOR FREEZER
ИНСТРУКЦИЯ ПО ЭКСПЛУАТАЦИИ • USER GUIDE
ИНСТРУКЦИЯ ПО ЭКСПЛУАТАЦИИ • USER GUIDE
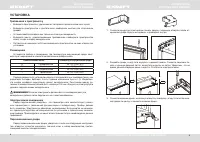
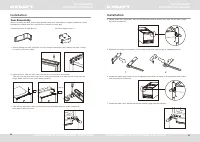
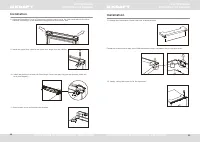
4. Положите холодильник на заднюю панель. Открутите ножки, а затем и нижнюю
дверную петлю.
Installation
4. Laying down the refrigerator, take out the adjusting feet as below, then take off the lower hinge
by cross screwdriver.
5. Adjusting the hinge core position of the lower hinge and upper hinge to opposite position
6. Install the lower hinge under to the refrigerator like below, screwing in the adjusting feet, make
sure the position in horizon.
7. Install the lower door, adjust and fix the middle hinge onto the cabinet.
1
2
9
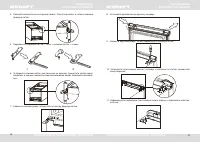
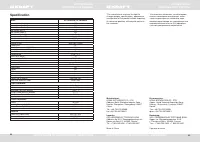
5. Переместите верхнюю петлю — вниз, а нижнюю петлю — вверх.
Installation
4. Laying down the refrigerator, take out the adjusting feet as below, then take off the lower hinge
by cross screwdriver.
5. Adjusting the hinge core position of the lower hinge and upper hinge to opposite position
6. Install the lower hinge under to the refrigerator like below, screwing in the adjusting feet, make
sure the position in horizon.
7. Install the lower door, adjust and fix the middle hinge onto the cabinet.
1
2
9
6. Установите нижнюю петлю, как показано на рисунке, прикрутите затем ножку,
убедитесь в ровном горизонтальном расположении ножек, поднимите холодиль-
ник.
Installation
4. Laying down the refrigerator, take out the adjusting feet as below, then take off the lower hinge
by cross screwdriver.
5. Adjusting the hinge core position of the lower hinge and upper hinge to opposite position
6. Install the lower hinge under to the refrigerator like below, screwing in the adjusting feet, make
sure the position in horizon.
7. Install the lower door, adjust and fix the middle hinge onto the cabinet.
1
2
9
7. Навесьте нижнюю дверь, прикрутите по центру дверную петлю.
Installation
4. Laying down the refrigerator, take out the adjusting feet as below, then take off the lower hinge
by cross screwdriver.
5. Adjusting the hinge core position of the lower hinge and upper hinge to opposite position
6. Install the lower hinge under to the refrigerator like below, screwing in the adjusting feet, make
sure the position in horizon.
7. Install the lower door, adjust and fix the middle hinge onto the cabinet.
1
2
9
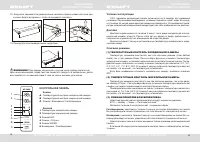
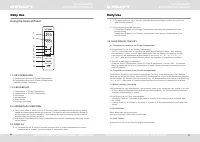
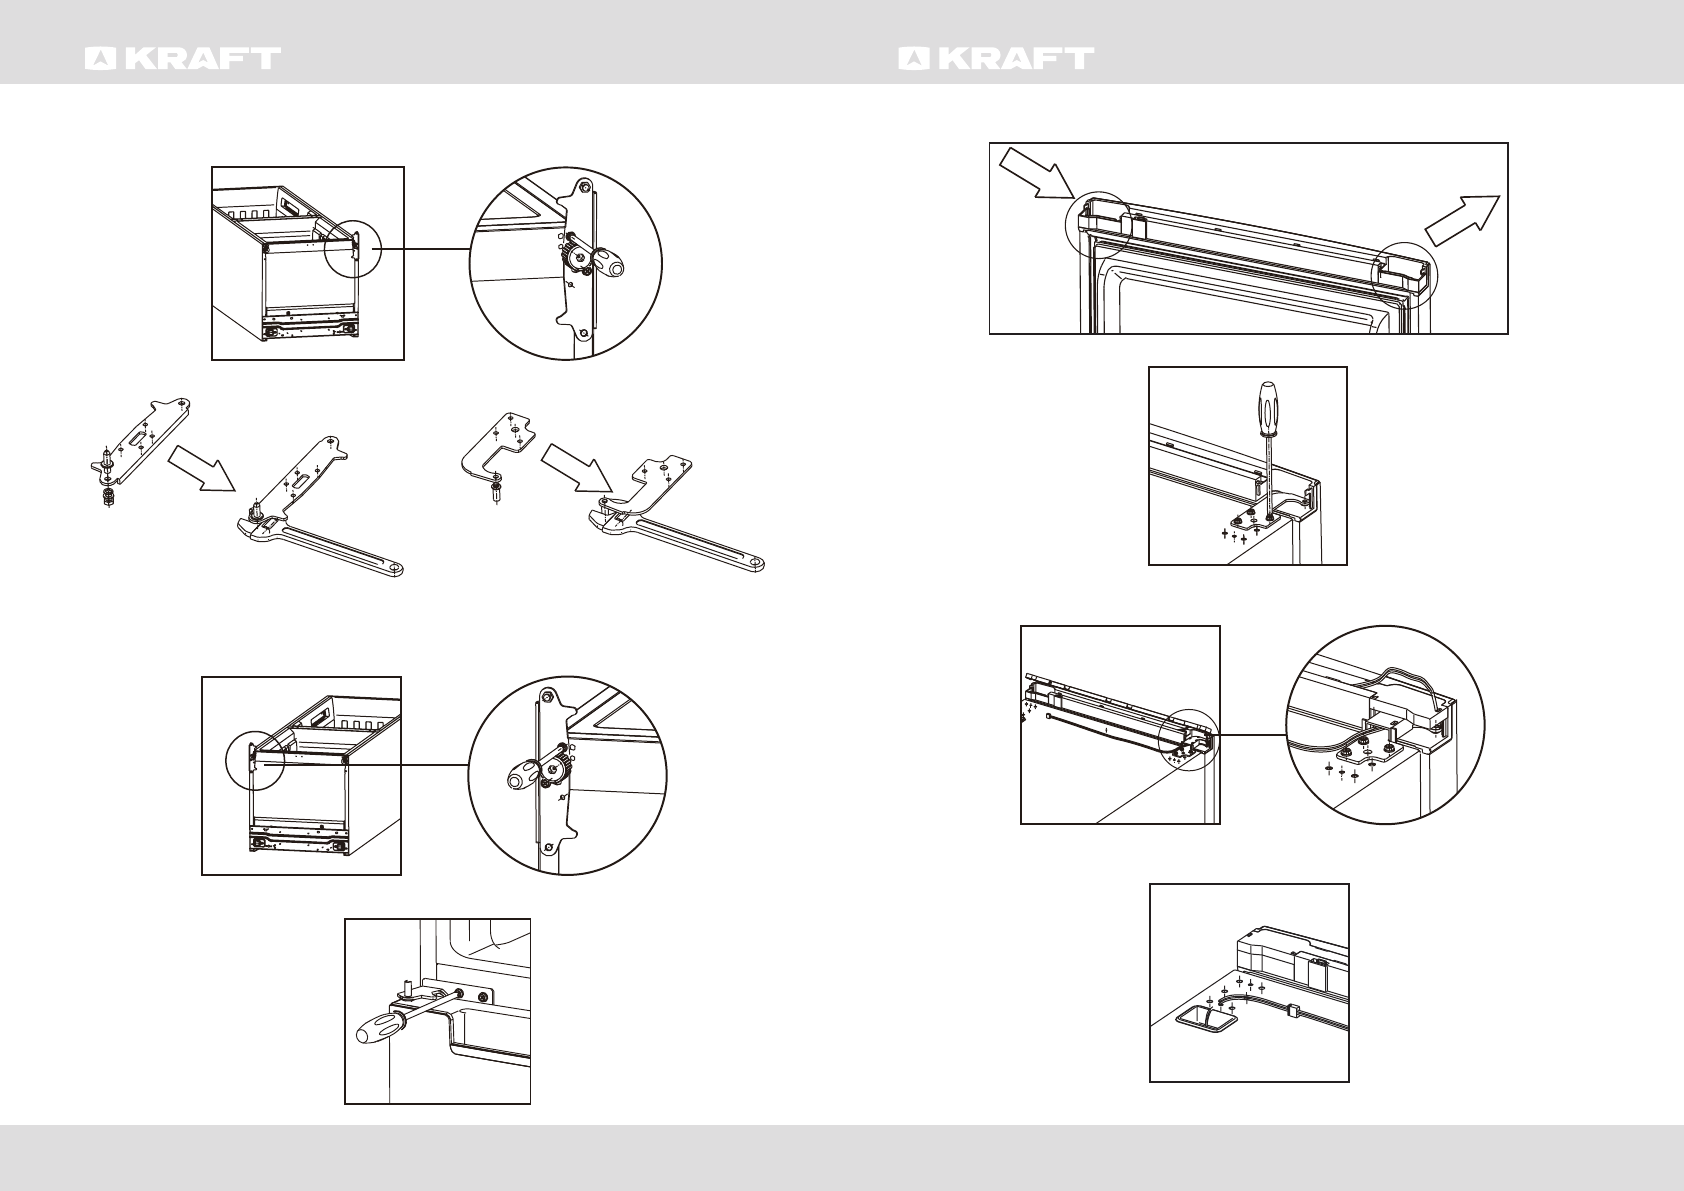
8. Установите декоративную крышку на дверь.
Installation
10. Install the plastic cover and Left Door Hinge Cover from poly bag onto the product, settle the
wire (see diagram)
8. Using the Decorative Cover of Right Door from poly bag to cover the insert and take out the other
side one accordingly.In the meanwhile change the wire to another side.
9. Install the upper door, then fix the upper door hinge onto the cabinet.
11.fix the plastic cover and connect the terminal.
10
9. Навесьте верхнюю дверь, затем зафиксируйте дверную петлю.
Installation
10. Install the plastic cover and Left Door Hinge Cover from poly bag onto the product, settle the
wire (see diagram)
8. Using the Decorative Cover of Right Door from poly bag to cover the insert and take out the other
side one accordingly.In the meanwhile change the wire to another side.
9. Install the upper door, then fix the upper door hinge onto the cabinet.
11.fix the plastic cover and connect the terminal.
10
10. Установите пластиковую крышку на дверь и колпачок на петлю, разместите
электропровод.
Installation
10. Install the plastic cover and Left Door Hinge Cover from poly bag onto the product, settle the
wire (see diagram)
8. Using the Decorative Cover of Right Door from poly bag to cover the insert and take out the other
side one accordingly.In the meanwhile change the wire to another side.
9. Install the upper door, then fix the upper door hinge onto the cabinet.
11.fix the plastic cover and connect the terminal.
10
11. Зафиксируйте последнюю пластиковую панель сверху и подключите электро-
питание.
Installation
10. Install the plastic cover and Left Door Hinge Cover from poly bag onto the product, settle the
wire (see diagram)
8. Using the Decorative Cover of Right Door from poly bag to cover the insert and take out the other
side one accordingly.In the meanwhile change the wire to another side.
9. Install the upper door, then fix the upper door hinge onto the cabinet.
11.fix the plastic cover and connect the terminal.
10
Содержание
- 2 Уважаемый покупатель!; Поздравляем Вас с приобретением изделия торговой марки; шем домашнем хозяйстве.; Содержание
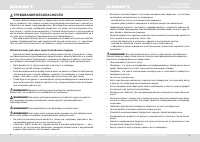
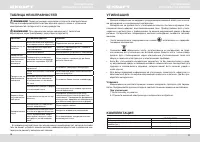
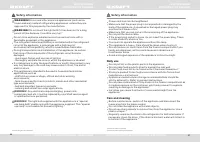
- 3 ТРЕБОВАНИЯ БЕЗОПАСНОСТИ; Использование детьми и недееспособными людьми
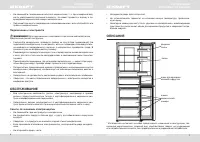
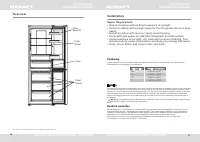
- 4 прямо из морозильника.; Подключение к электросети; Для подключения к электросети тщательно соблюдайте все; ОБСЛУЖИВАНИЕ; Советы по экономии электроэнергии; • Не открывайте дверь часто.; ОПИСАНИЕ; Overview; полки
- 5 УСТАНОВКА; Требования к пространству; Климатический класс; Электрическое соединение; Door Reversibility; Door Reversibility; Installation; Door Reversibility; Installation; Door Reversibility
- 6 Переместите верхнюю петлю — вниз, а нижнюю петлю — вверх.; Навесьте нижнюю дверь, прикрутите по центру дверную петлю.; Установите декоративную крышку на дверь.; fix the plastic cover and connect the terminal.
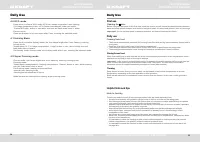
- 7 Прикрутите пластиковую панель шурупами.; При первом запуске или в случае, если прибор длительный; КОНТРОЛЬНАЯ ПАНЕЛЬ; Кнопки; - Температурный контроль холодильной камеры.; Дисплей; Daily Use; Using the Control Panel; OPERATING CONDITION; Условия эксплуатации; ТЕМПЕРАТУРНЫЙ КОНТРОЛЬ ХОЛОДИЛЬНОЙ КАМЕРЫ
- 8 ЕЖЕДНЕВНОЕ ИСПОЛЬЗОВАНИЕ; Замораживание свежих продуктов; ПОЛЕЗНЫЕ СОВЕТЫ; Замечания по заморозке; ОЧИСТКА И УХОД; Перед уборкой убедитесь, что электропитание отключено.
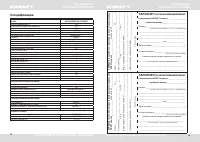
- 9 ТАБЛИЦА НЕИСПРАВНОСТЕЙ; Проблема; УТИЛИЗАЦИЯ; Упаковка; Модель; КОМПЛЕКТАЦИЯ
- 10 Спецификация; НА ГАРАНТИЙНЫЙ РЕМОНТ; холодильника KRAFT модель; НА ГАРАНТИЙНЫЙ РЕМОНТ
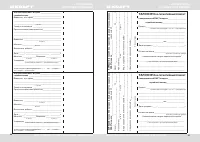
- 11 ТАЛОН No3; ТАЛОН No4
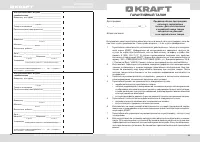
- 12 ские повреждения, возникшие в процессе эксплуатации.; Дата продажи; ГАРАНТИЙНЫЙ ТАЛОН
- 22 Specification; Model


