
Газонокосилки Gardena PowerMax 32 E 04033-20.000.00 - инструкция пользователя по применению, эксплуатации и установке на русском языке. Мы надеемся, она поможет вам решить возникшие у вас вопросы при эксплуатации техники.
Если остались вопросы, задайте их в комментариях после инструкции.
"Загружаем инструкцию", означает, что нужно подождать пока файл загрузится и можно будет его читать онлайн. Некоторые инструкции очень большие и время их появления зависит от вашей скорости интернета.


To ensure you have a secure connection between the
lawnmower and the extension cable we strongly recommend
you use the following method of attaching the cable:
1. Plug the short connection lead into the socket of the
extension cable.
(K)
.
2. Form a loop in the end of the extension cable near to
the socket and secure this in the strain relief feature at
the top of the switchbox
(L, M)
This will cause the
socket to hang in a downward direction.
ENGLISH - 2
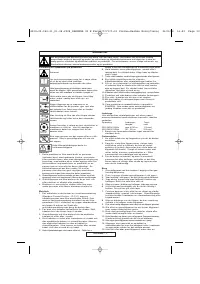
Safety
Maintenance and storage
1.
Keep all nuts, bolts and screws tight to be sure the
product is in safe working condition.
2.
Check the grassbox frequently for wear or deterioration.
3.
Replace worn or damaged parts for safety.
4.
Only use the replacement blade and blade bolt
specified for this product.
5.
Be careful during adjustment of the product to
prevent entrapment of the fingers between moving
blades and fixed parts of the machine.
6.
Store in a cool dry place and out of reach of
children. Do not store outdoors.
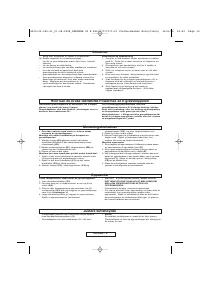
Where to Use Your GARDENA PowerMax 32 E Mower
The GARDENA mower is designed for cutting lawns
in and around the garden.
Do not use the mower on a slope steeper than 20°
maximum.
To prevent injury, the mower must not be used for
trimming bushes, hedges, shrubs, for cutting and
pruning of climbers or grass on roofs or in balcony
boxes. In addition, the mower must not be used for
chopping up branches, twigs or for levelling
irregularities in the soil.
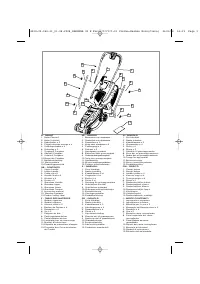
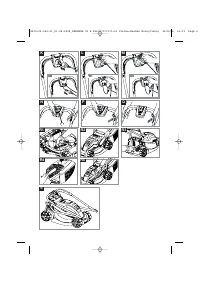
Assembly Instructions
• The Loose Parts Pack is packaged underneath
the deck.
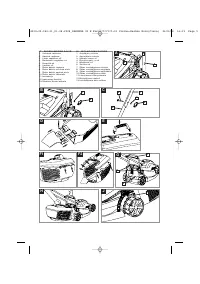
Assembly of Lower Handles to Deck
1. Place the bolt
(A2)
through the hole in the lower handle
(A1)
until the lower handle fits into the recess
(A3)
2. Place the washer
(B1)
and the wing knob
(B2)
on to
the bolt and tighten the wing knob.
3. Repeat on the other side.
Assembly of Upper Handle to Lower Handle.
1. Ensure the upper handle is located correctly with the
lock-off button on the switchbox uppermost.
2. Ensure the upper handle
(C1)
and the lower handle
(C2)
are aligned correctly.
3. Fit the bolt
(C3)
, washer
(C4)
and wing knob
(C5).
Tighten the wing knob.
4. Repeat on the other side.
5. Fit the cable to the handles with the clips provided.
Make sure the cable is not trapped between the
upper and lower handles.
Grassbox Assembly
1. Slide the grassbox tongue into the slots in the grassbox
lower until it clicks securely into position
(D)
2. Push the grassbox handle into the slots in the grassbox
upper until it clicks securely into position.
(E)
3. Starting at the rear of the grassbox, locate the
grassbox upper into the grassbox lower by aligning
the clips
(F1)
. Ensure all clips are correctly
located.
(F2)
before clicking into position.
4. Clip the two halves together, ensuring all clips are
securely connected.
Grassbox
Fitting Fully Assembled Grassbox to Lawnmower.
1.
Lift safety flap
(G1)
2.
Make sure the discharge chute is clean and free
from debris
(G2)
3.
Locate fully assembled grassbox onto 2 location
points
(G3)
at the rear of the deck as illustrated in
pic. H
4.
Locate safety flap onto the top of the grassbox.
Ensure the grassbox is securely located.
•
IMPORTANT ! AFTER FITTING ENSURE NO
GAP REMAINS BETWEEN THE SAFETY FLAP
AND THE GRASSBOX.
•
Removal is the reverse procedure.
•
For larger areas of grass where grass collection is not
required you can use your lawnmower without the
grassbox. Ensure the Safety Flap is fully closed. The
design of the safety flap permits the cut grass to be
discharged downward behind the machine.
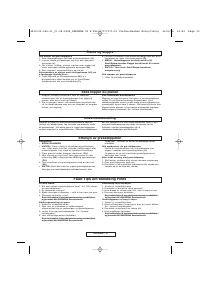
Cutting Height Adjustment
•
Height of cut is adjusted by raising or lowering the
wheels using the height adjustment lever
(J1)
•
There are five heights of cut on this product (20 - 60
mm).
• NOTE
A medium height of cut is recommended for most
lawns. The quality of your lawn will suffer and
collection will be poor if you cut too low.
Starting and Stopping
To Start your Lawnmower
1. Attach the extension cable to the back of the
switchbox.
(K)
2. Form a loop in the cable and push the loop through
the slot.
(L)
3. To secure, position the loop over the hook and pull
the cable back through the slot
(M)
.
4. Connect the plug to the mains and switch on.
The switchbox is provided with a lock-off button
(N1) to prevent accidental starting.
5. Press and hold the lock-off button
(N1)
on the
switchbox, then squeeze one of the Start/Stop levers
towards the upper handle
(P)
.
6. Continue to squeeze the start/stop lever towards the
upper handle and release the lock-off button
(Q)
.
• NOTE - There are two start/stop levers fitted. Either
one can be used for starting the lawnmower.
• IMPORTANT - Do not use the start/stop levers
intermittently
To Stop your Lawnmower
1. Release the pressure on the Start/Stop lever.
CH (Schweiz)
4033-20.960.01_01.08.2008_GARDENA 32 E Euro:???????-01 Visimo-Easimo Euro(Cleva) 26/8/08 16:20 Page 14


