Фрезеры Metabo FM 500-6 (601741000) - инструкция пользователя по применению, эксплуатации и установке на русском языке. Мы надеемся, она поможет вам решить возникшие у вас вопросы при эксплуатации техники.
Если остались вопросы, задайте их в комментариях после инструкции.
"Загружаем инструкцию", означает, что нужно подождать пока файл загрузится и можно будет его читать онлайн. Некоторые инструкции очень большие и время их появления зависит от вашей скорости интернета.


ENGLISH
en
11
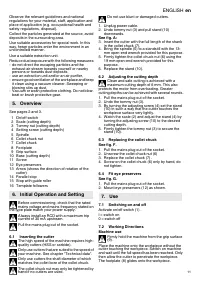
Observe the relevant guidelines and national
regulations for your material, staff, application and
place of application (e.g. occupational health and
safety regulations, disposal).
Collect the particles generated at the source, avoid
deposits in the surrounding area.
Use suitable accessories for special work. In this
way, fewer particles enter the environment in an
uncontrolled manner.
Use a suitable extraction unit.
Reduce dust exposure with the following measures:
- do not direct the escaping particles and the
exhaust air stream towards yourself or nearby
persons or towards dust deposits,
- use an extraction unit and/or an air purifier,
- ensure good ventilation of the workplace and keep
it clean using a vacuum cleaner. Sweeping or
blowing stirs up dust.
- Vacuum or wash protective clothing. Do not blow,
beat or brush protective gear.
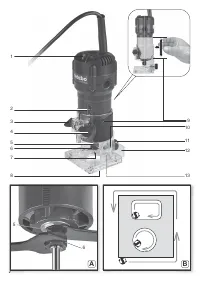
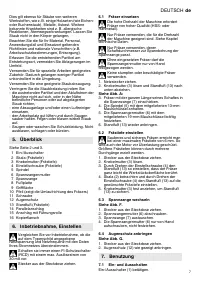
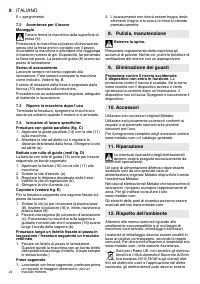
See pages 2 and 3.
1 On/off switch
2 Scale (cutting depth)
3 Tommy nut (cutting depth)
4 Setting screw (cutting depth)
5 Spindle
6 Collet chuck nut
7 Collet chuck
8 Footplate
9 Grip surface
10 Base (cutting depth)
11 Screw
12 Eye preservers
13 Arrow (shows the direction of rotation of the
cutter)
14 Parallel stop
15 Stop with guide roller
16 Template followers
Before commissioning, check that the rated
mains voltage and mains frequency stated on
the type plate match your power supply.
Always install an RCD with a maximum trip
current of 30 mA upstream.
Pull the mains plug out of the socket.
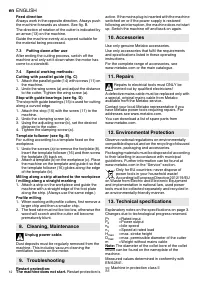
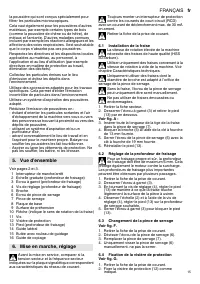
6.1 Inserting the cutter
The high speed of the machine requires high-
quality cutters (HSS or carbide).
Only use cutters that are suited to the speed of
your machine. See chapter “Technical data”.
Only use cutters the shaft diameter of which
matches the collet bore of the collet chuck.
The collet chuck nut may only be tightened by
hand if no cutters are used.
Do not use blunt or damaged cutters.
1. Unplug power cable.
2. Undo tommy nut (3) and pull stand (10)
downwards.
See fig. A:
3. Insert the cutter with the full length of the shank
in the collet chuck (7).
4. Bring the spindle (5) to a standstill with the 13-
mm open-end wrench provided for this purpose.
5. Firmly tighten the collet chuck nut (6) using the
19 mm open-end wrench provided for this
purpose.
6. Replace the stand (10).
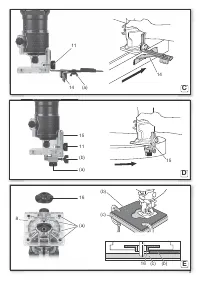
6.2 Adjusting the cutting depth
Clean and safe cutting is achieved with a
maximum cutting depth of 6 mm. This also
protects the motor from overloading. Greater
cutting depths can be achieved with several rounds.
1. Pull the mains plug out of the socket.
2. Undo the tommy nut (3).
3. By turning the adjusting screw (4) set the stand
(10) in such a way that the cutter touches the
workpiece surface very lightly.
4. Watch the scale (2) and adjust the stand (4) by
turning the adjusting screw (10) to the desired
cutting depth.
5. Firmly tighten the tommy nut (3) to secure the
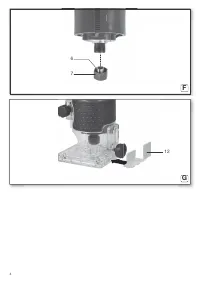
6.3 Replacing the collet chuck
See fig. F.
1. Pull the mains plug out of the socket.
2. Unscrew the collet chuck nut (6)
3. Replace the collet chuck (7) .
4. Screw on the collet chuck (6) only by hand, do
not tighten.
6.4 Fit eye preservers
See fig. G.
1. Pull the mains plug out of the socket.
2. Mount eye preservers (12) as shown.
7.1 Switching on and off
Activate on/off switch (1) .
I = switch on
0 = switch off
7.2 Working Directions
Machine use
Firmly hold the machine from the grip surface
(9).
Place the machine onto the workpiece without the
cutter touching the workpiece. Switch on machine
and wait until the full speed has been reached. Only
then allow the cutter to penetrate the workpiece.
The footplate (8) glides onto the workpiece.
5. Overview
6. Initial Operation and Setting
7. Use
Характеристики

Остались вопросы?Не нашли свой ответ в руководстве или возникли другие проблемы? Задайте свой вопрос в форме ниже с подробным описанием вашей ситуации, чтобы другие люди и специалисты смогли дать на него ответ. Если вы знаете как решить проблему другого человека, пожалуйста, подскажите ему :)

