
Фрезеры Makita RP0900 - инструкция пользователя по применению, эксплуатации и установке на русском языке. Мы надеемся, она поможет вам решить возникшие у вас вопросы при эксплуатации техники.
Если остались вопросы, задайте их в комментариях после инструкции.
"Загружаем инструкцию", означает, что нужно подождать пока файл загрузится и можно будет его читать онлайн. Некоторые инструкции очень большие и время их появления зависит от вашей скорости интернета.


5
are of series production and
Conforms to the following European Directives:
98/37/EC until 28th December 2009 and then with
2006/42/EC from 29th December 2009
And are manufactured in accordance with the following
standards or standardised documents:
EN60745
The technical documentation is kept by our authorised
representative in Europe who is:
Makita International Europe Ltd,
Michigan, Drive, Tongwell,
Milton Keynes, MK15 8JD, England
30th January 2009
000230
Tomoyasu Kato
Director
Makita Corporation
3-11-8, Sumiyoshi-cho,
Anjo, Aichi, JAPAN
GEA010-1
General Power Tool Safety
Warnings
WARNING Read all safety warnings and all
instructions.
Failure to follow the warnings and
instructions may result in electric shock, fire and/or
serious injury.
Save all warnings and instructions for
future reference.
GEB018-2
ROUTER SAFETY WARNINGS
1.
Hold power tools by insulated gripping
surfaces when performing an operation where
the cutting tool may contact hidden wiring or
its own cord.
Contact with a "live" wire will make
exposed metal parts of the tool "live" and shock
the operator.
2.
Use clamps or another practical way to secure
and support the workpiece to a stable platform.
Holding the work by hand or against your body
leaves it unstable and may lead to loss of control.
3.
Wear hearing protection during extended
period of operation.
4.
Handle the bits very carefully.
5.
Check the bit carefully for cracks or damage
before operation. Replace cracked or
damaged bit immediately.
6.
Avoid cutting nails. Inspect for and remove all
nails from the workpiece before operation.
7.
Hold the tool firmly with both hands.
8.
Keep hands away from rotating parts.
9.
Make sure the bit is not contacting the
workpiece before the switch is turned on.
10.
Before using the tool on an actual workpiece,
let it run for a while. Watch for vibration or
wobbling that could indicate improperly
installed bit.
11.
Be careful of the bit rotating direction and the
feed direction.
12.
Do not leave the tool running. Operate the tool
only when hand-held.
13.
Always switch off and wait for the bit to come
to a complete stop before removing the tool
from workpiece.
14.
Do not touch the bit immediately after
operation; it may be extremely hot and could
burn your skin.
15.
Do not smear the tool base carelessly with
thinner, gasoline, oil or the like. They may
cause cracks in the tool base.
16.
Draw attention to the need to use cutters of
the correct shank diameter and which are
suitable for the speed of the tool.
17.
Some material contains chemicals which may
be toxic. Take caution to prevent dust
inhalation and skin contact. Follow material
supplier safety data.
18.
Always use the correct dust mask/respirator
for the material and application you are
working with.
SAVE THESE INSTRUCTIONS.
WARNING:
DO NOT let comfort or familiarity with product
(gained from repeated use) replace strict adherence
to safety rules for the subject product. MISUSE or
failure to follow the safety rules stated in this
instruction manual may cause serious personal
injury.
FUNCTIONAL DESCRIPTION
CAUTION:
•
Always be sure that the tool is switched off and
unplugged before adjusting or checking function on
the tool.
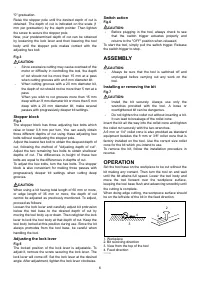
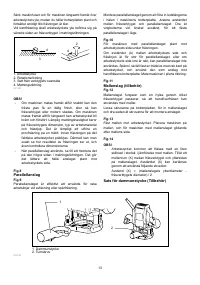
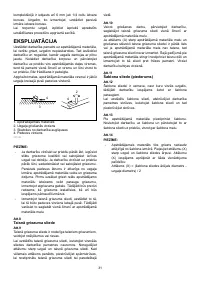
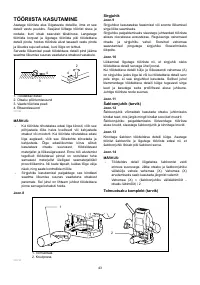
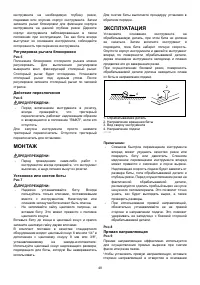
Adjusting the depth of cut
Fig.1
Place the tool on a flat surface. Loosen the screw
securing the stopper pole.
Loosen the lock lever and lower the tool body until the bit
just touches the flat surface. Tighten the lock lever to
lock the tool body.
Fig.2
Next, lower the stopper pole until it makes contact with
the adjusting hex bolt. Align the depth pointer with the
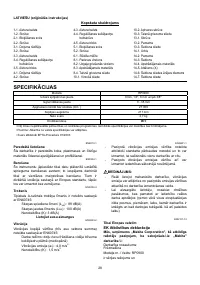
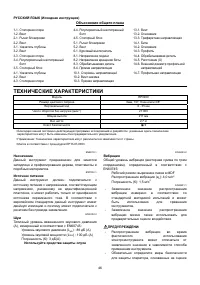
Характеристики

Остались вопросы?Не нашли свой ответ в руководстве или возникли другие проблемы? Задайте свой вопрос в форме ниже с подробным описанием вашей ситуации, чтобы другие люди и специалисты смогли дать на него ответ. Если вы знаете как решить проблему другого человека, пожалуйста, подскажите ему :)


