
Электрорубанки Makita KP312S - инструкция пользователя по применению, эксплуатации и установке на русском языке. Мы надеемся, она поможет вам решить возникшие у вас вопросы при эксплуатации техники.
Если остались вопросы, задайте их в комментариях после инструкции.
"Загружаем инструкцию", означает, что нужно подождать пока файл загрузится и можно будет его читать онлайн. Некоторые инструкции очень большие и время их появления зависит от вашей скорости интернета.


7
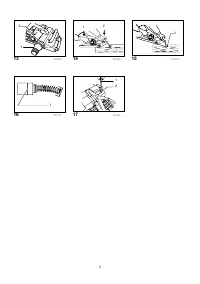
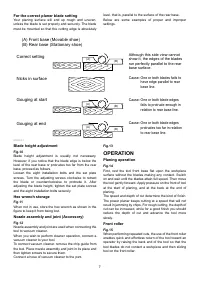
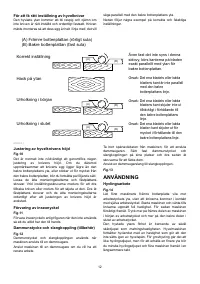
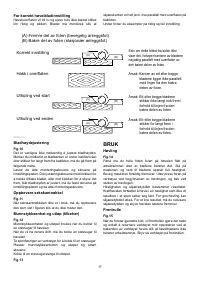
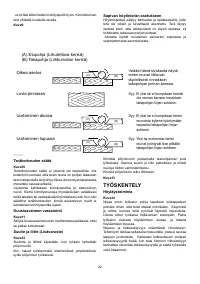
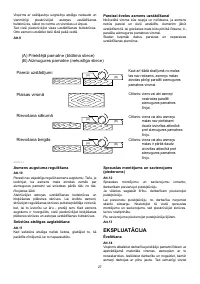
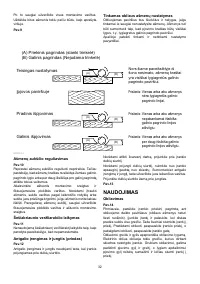
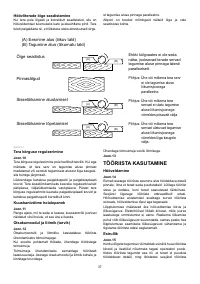
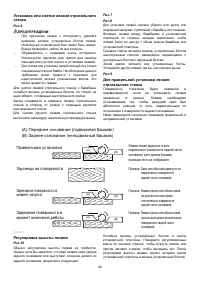
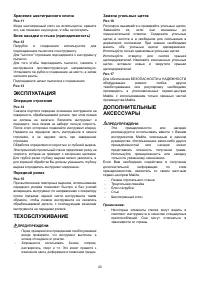
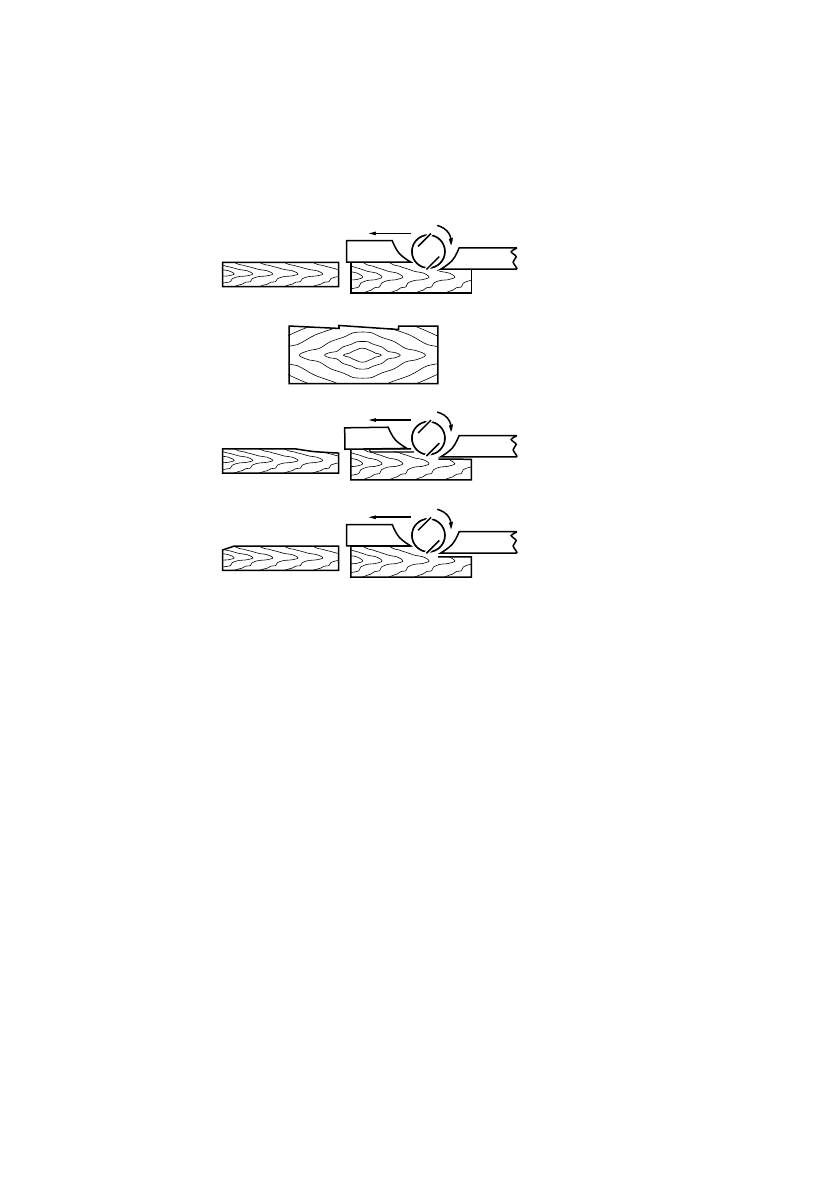
For the correct planer blade setting
Your planing surface will end up rough and uneven,
unless the blade is set properly and securely. The blade
must be mounted so that the cutting edge is absolutely
level, that is, parallel to the surface of the rear base.
Below are some examples of proper and improper
settings.
(A)
(B)
(B)
(A)
(B)
(A)
(A) Front base (Movable shoe)
(B) Rear base (Stationary shoe)
Correct setting
Nicks in surface
Gouging at start
Gouging at end
Although this side view cannot
show it, the edges of the blades
run perfectly parallel to the rear
base surface.
Cause: One or both blades fails to
have edge parallel to rear
base line.
Cause: One or both blade edges
fails to protrude enough in
relation to rear base line.
Cause: One or both blade edges
protrudes too far in relation
to rear base line.
EN0004-1
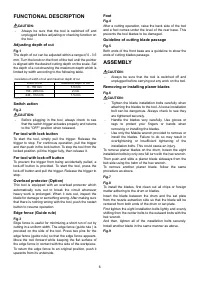
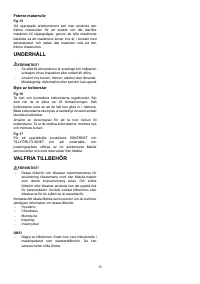
Blade height adjustment
Fig.10
Blade height adjustment is usually not necessary.
However, if you notice that the blade edge is below the
level of the rear base or protrudes too far from the rear
base, proceed as follows.
Loosen the eight installation bolts and the set plate
screws. Turn the adjusting screws clockwise to retract
the blade or counterclockwise to protrude it. After
adjusting the blade height, tighten the set plate screws
and the eight installation bolts securely.
Hex wrench storage
Fig.11
When not in use, store the hex wrench as shown in the
figure to keep it from being lost.
Nozzle assembly and joint (Accessory)
Fig.12
Nozzle assembly and joint are used when connecting the
tool to vacuum cleaner.
When you wish to perform cleaner operation, connect a
vacuum cleaner to your tool.
To connect vacuum cleaner, remove the chip guide from
the tool. Place nozzle assembly and joint in its place and
then tighten screws to secure them.
Connect a hose of vacuum cleaner to the joint.
Fig.13
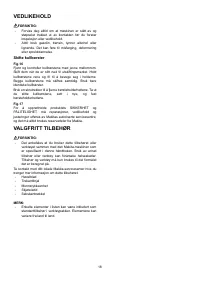
OPERATION
Planing operation
Fig.14
First, rest the tool front base flat upon the workpiece
surface without the blades making any contact. Switch
on and wait until the blades attain full speed. Then move
the tool gently forward. Apply pressure on the front of tool
at the start of planing, and at the back at the end of
planing.
The speed and depth of cut determine the kind of finish.
The power planer keeps cutting at a speed that will not
result in jamming by chips. For rough cutting, the depth of
cut can be increased, while for a good finish you should
reduce the depth of cut and advance the tool more
slowly.
Front roller
Fig.15
When performing repeated cuts, the use of the front roller
enables quick and effortless return of the tool toward an
operator by raising the back end of the tool so that the
tool blades do not contact a workpiece and then sliding
tool on the front roller.
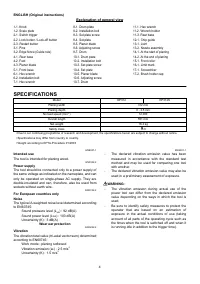
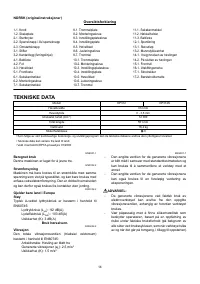
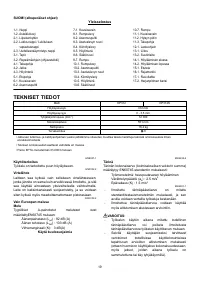
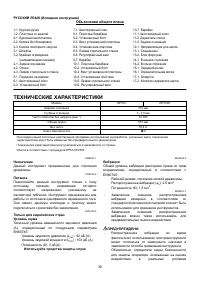
Характеристики

Остались вопросы?Не нашли свой ответ в руководстве или возникли другие проблемы? Задайте свой вопрос в форме ниже с подробным описанием вашей ситуации, чтобы другие люди и специалисты смогли дать на него ответ. Если вы знаете как решить проблему другого человека, пожалуйста, подскажите ему :)


