Блендеры VITEK VT-8513 G - инструкция пользователя по применению, эксплуатации и установке на русском языке. Мы надеемся, она поможет вам решить возникшие у вас вопросы при эксплуатации техники.
Если остались вопросы, задайте их в комментариях после инструкции.
"Загружаем инструкцию", означает, что нужно подождать пока файл загрузится и можно будет его читать онлайн. Некоторые инструкции очень большие и время их появления зависит от вашей скорости интернета.


4
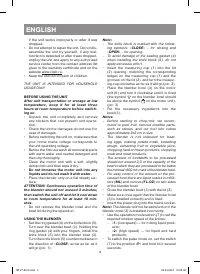
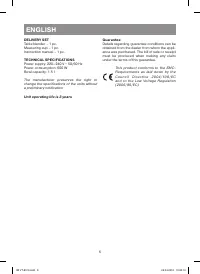
ENGLISH
if the unit works improperly or after it was
dropped.
•
Do not attempt to repair the unit. Do not dis-
assemble the unit by yourself, if any mal-
function is detected or after it was dropped,
unplug the unit and apply to any authorized
service center from the contact address list
given in the warranty certificate and on the
website www.vitek.ru.
•
Keep the unit out of reach of children.
THE UNIT IS INTENDED FOR HOUSEHOLD
USAGE ONLY
BEFORE USING THE UNIT
After unit transportation or storage at low
temperature, keep it for at least three
hours at room temperature before switch-
ing on.
•
Unpack the unit completely and remove
any stickers that can prevent unit opera-
tion.
•
Check the unit for damages; do not use it in
case of damages.
•
Before switching the unit on, make sure that
your home mains voltage corresponds to
the unit operating voltage.
•
Before the first use wash all removable parts
with warm water and neutral detergent and
then dry thoroughly.
•
Clean the motor unit with a soft, slightly
damp cloth and then wipe it dry.
•
Do not immerse the motor unit into any
liquids and do not wash it with water.
•
Place the blender only on a flat steady sur-
face.
AT TENTION! Continuous operation time of
the blender should not exceed 3 minutes;
then switch the unit off and let it cool down
to room temperature for at least 10 min-
utes.
•
Do not remove the blender bowl and the
bowl lid during the operation.
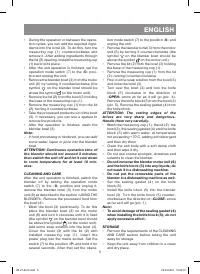
USING THE BLENDER
•
Set the ring gasket (4) on the knife block (5).
Turn over the blender bowl (3). Holding the
ring gasket (4) with your fingers, install the
knife block (5) into the blender bowl (3).
Turn the knife block (5) counterclockwise in
the direction of «
CLOSE
» arrow as far as it
will go (pic. 1).
Note:
–
The knife block is marked with the follow-
ing symbols: «CLOSE» – for closing and
«OPEN» – for opening.
–
To avoid damage of the sealing gasket (4)
when installing the knife block (5), do not
apply excessive effort.
•
Insert the measuring cup (1) into the lid
(2) opening, matching the corresponding
ledges on the measuring cup (1) and the
grooves on the lid (2), and turn the measur-
ing cup clockwise as far as it will go (pic. 2).
•
Place the blender bowl (3) on the motor
unit (6) and turn it clockwise until it is fixed
(the symbol
on the blender bowl should
be above the symbol
on the motor unit).
(pic. 3)
•
Put the necessary ingredients into the
bowl (3).
Notes
–
Before starting to chop/mix, we recom-
mend to peel fruit, remove inedible parts,
such as stones, and cut fruit into cubes
approximately 2х2 cm in size.
–
The blender is not intended for beat-
ing eggs, making potato mash, kneading
dough, extracting fruit or vegetable juice,
chopping hard or frozen products, chopping
meat and meat products.
–
The amount of foodstuffs to be processed
should not exceed 2/3 of the capacity of the
bowl in which they are processed or be below
the minimal «500 ml» mark of the blender bowl.
–
For easy control of the amount of the pro-
cessed food there are liquid scales in millili-
ters (
ML
) and ounces (
FL.OZ
) on two sides
of the blender bowl.
•
Close the blender bowl (3) with the lid (2).
•
Make sure once again that the blender bowl
(3) is installed correctly and is fixed.
•
Insert the power plug into the mains socket.
Note: The blender will not be switched on if the
blender bowl (3) is installed incorrectly.
•
Use the operation mode switch (7) to set the
required rotation speed of the knives:
–
«
1
» (low speed) — for mixing liquid prod-
ucts;
–
«
2
» (high speed) — for liquid and hard
products;
•
To switch the pulse mode on, set the switch
(7) to the position «
P
» and hold it for several
seconds.
IM VT-8513.indd 4
25.04.2016 10:02:09


