
Вытяжки Turboair Ares BL/A/60 - инструкция пользователя по применению, эксплуатации и установке на русском языке. Мы надеемся, она поможет вам решить возникшие у вас вопросы при эксплуатации техники.
Если остались вопросы, задайте их в комментариях после инструкции.
"Загружаем инструкцию", означает, что нужно подождать пока файл загрузится и можно будет его читать онлайн. Некоторые инструкции очень большие и время их появления зависит от вашей скорости интернета.


14
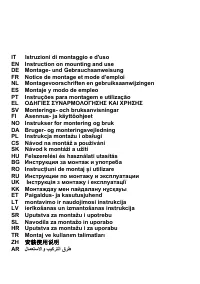
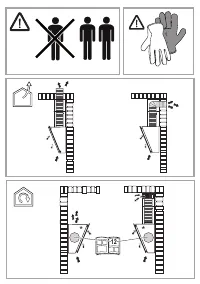
Before beginning installation:
•
Check that the product purchased is of a suitable size for the
chosen installation area.
•
Remove the charcoal (*) filter/s if supplied (see also relative
paragraph). This/these is/are to be mounted only if you want
lo use the hood in the filtering version.
•
Check (for transport reasons) that there is no other supplied
material inside the hood (e.g. packets with screws (*),
guarantees (*), etc.), eventually removing them and keeping
them.
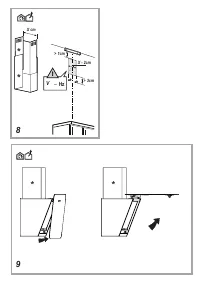
Expansion wall plugs are provided to secure the hood to most
types of walls/ceilings. However, a qualified technician must verify
suitability of the materials in accordance with the type of
wall/ceiling. The wall/ceiling must be strong enough to take the
weight of the hood.
Do not tile, grout or silicone this appliance to the wall. Surface
mounting only.
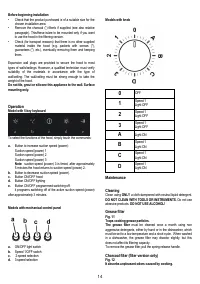
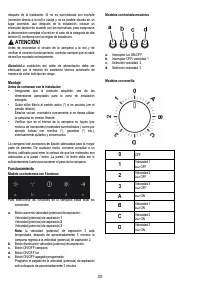
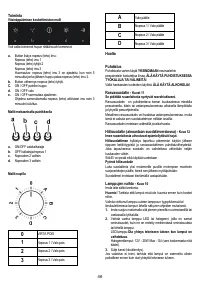
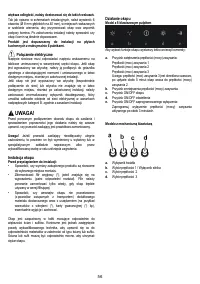
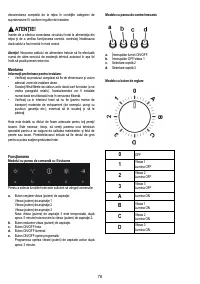
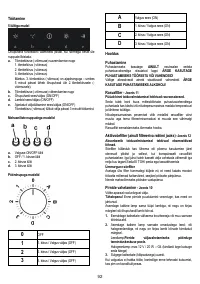
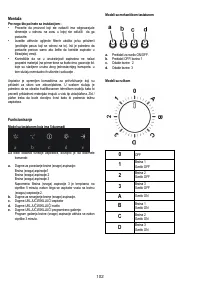
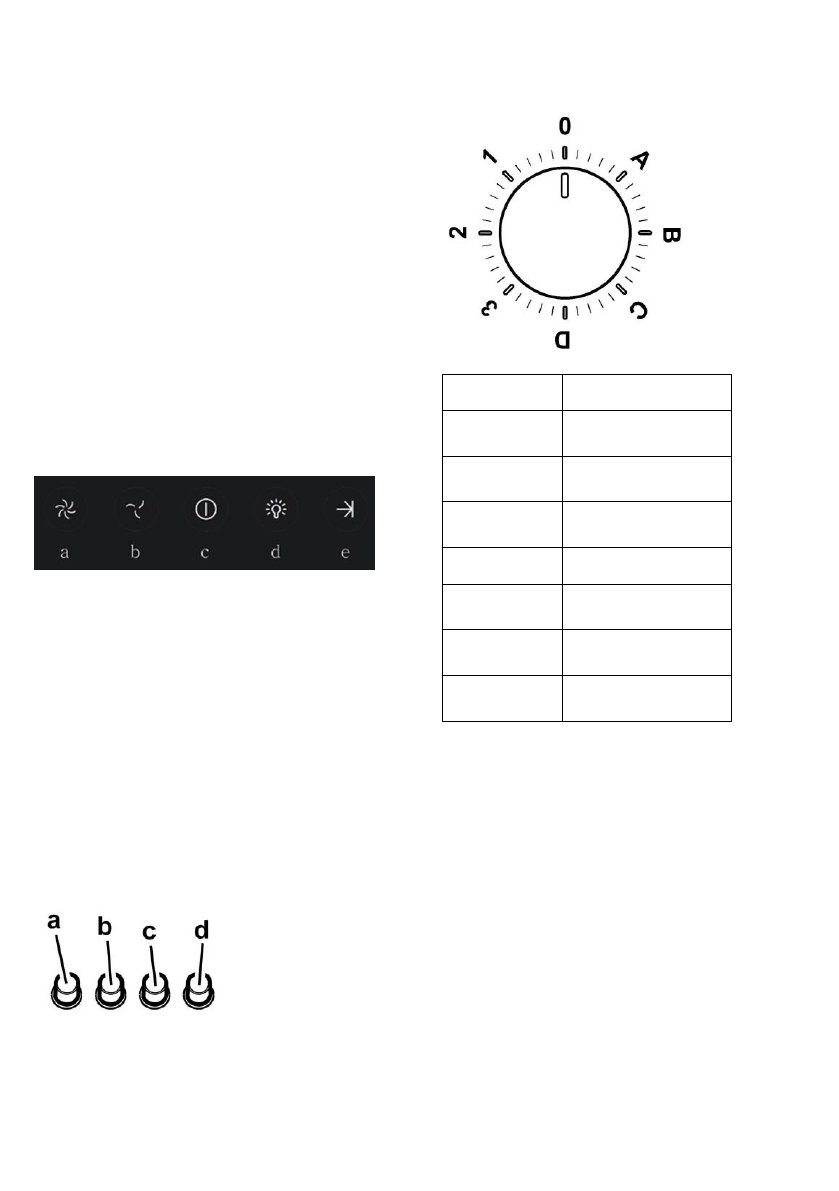
Operation
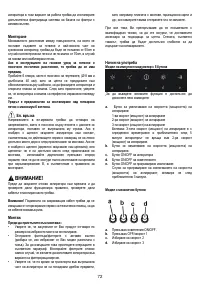
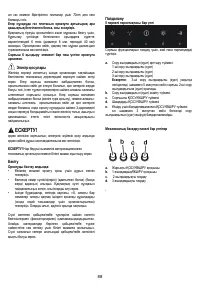
Model with 5-key keyboard
To select the functions of the hood, simply touch the commands:
a.
Button to increase suction speed (power):
Suction speed (power) 1
Suction speed (power) 2
Suction speed (power) 3
Note:
suction speed (power) 3 is timed, after approximately
5 minutes the hood returns to suction speed (power) 2.
b.
Button to decrease suction speed (power).
c.
Button ON/OFF hood
d.
Button ON/OFF lighting
e.
Button ON/OFF programmed switching off:
it programs switching off of the active suction speed (power)
after approximately 3 minutes.
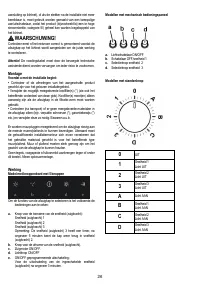
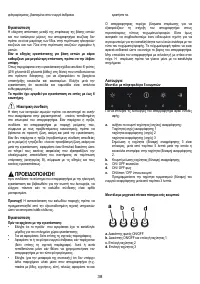
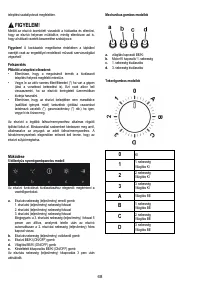
Models with mechanical control panel
a.
ON/OFF light switch
b.
Speed 1/OFF switch
c.
2-speed selection
d.
3-speed selection
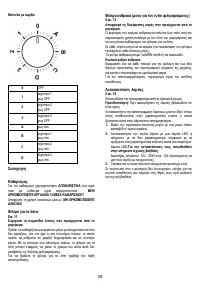
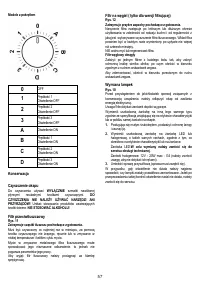
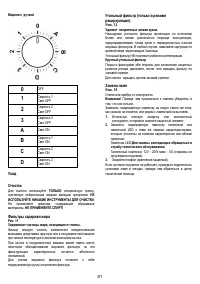
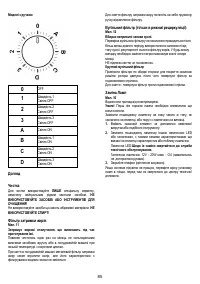
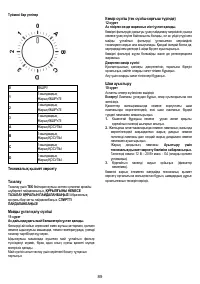
Models with knob
0
OFF
1
Speed 1
Light OFF
2
Speed 1
Light OFF
3
Speed 1
Light OFF
A
Light ON
B
Speed 1
Light ON
C
Speed 1
Light ON
D
Speed 1
Light ON
Maintenance
Cleaning
Clean using
ONLY
a cloth dampened with neutral liquid detergent.
DO NOT CLEAN WITH TOOLS OR INSTRUMENTS
. Do not use
abrasive products.
DO NOT USE ALCOHOL!
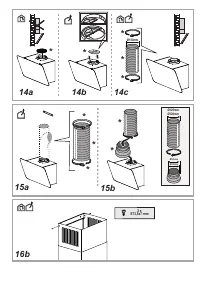
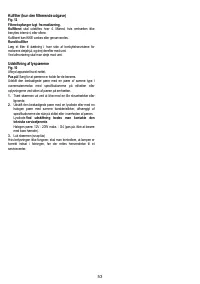
Grease filter
Fig. 11
Traps cooking grease particles.
The grease filter
must be cleaned once a month using non
aggressive detergents, either by hand or in the dishwasher, which
must be set to a low temperature and a short cycle. When washed
in a dishwasher, the grease filter may discolor slightly, but this
does not affect its filtering capacity.
To remove the grease filter, pull the spring release handle.
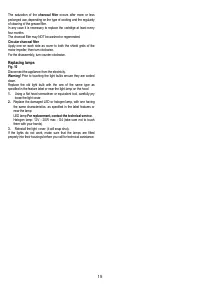
Charcoal filter (filter version only)
Fig. 12
It absorbs unpleasant odors caused by cooking.


