
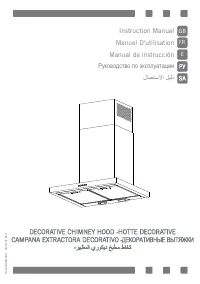
Вытяжки Simfer 8560 SM - инструкция пользователя по применению, эксплуатации и установке на русском языке. Мы надеемся, она поможет вам решить возникшие у вас вопросы при эксплуатации техники.
Если остались вопросы, задайте их в комментариях после инструкции.
"Загружаем инструкцию", означает, что нужно подождать пока файл загрузится и можно будет его читать онлайн. Некоторые инструкции очень большие и время их появления зависит от вашей скорости интернета.


6
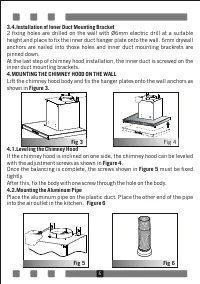
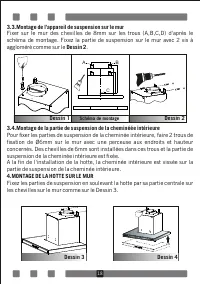
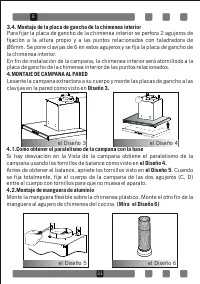
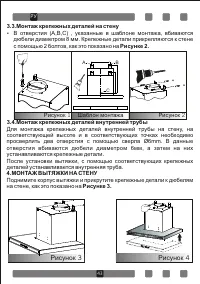
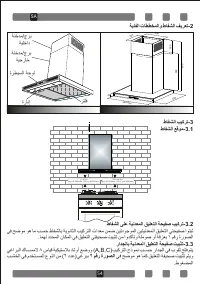
3.4.Installation of Inner Duct Mounting Bracket
2 fixing holes are drilled on the wall with Ø6mm electric drill at a suitable
height and place to fix the inner duct hanger plate onto the wall. 6mm drywall
anchors are nailed into those holes and inner duct mounting brackrets are
pinned down.
At the last step of chimney hood installation, the inner duct is screwed on the
inner duct mounting brackets.
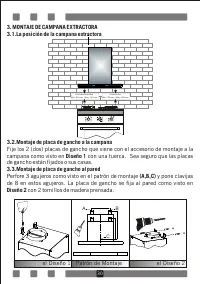
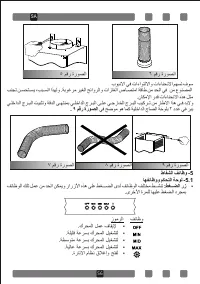
4.MOUNTING THE CHIMNEY HOOD ON THE WALL
Lift the chimney hood body and fix the hanger plates onto the wall anchors as
shown in
Figure 3.
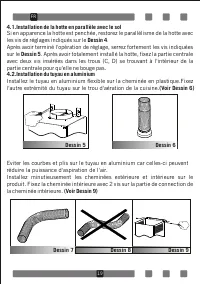
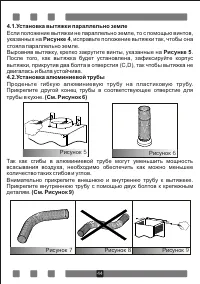
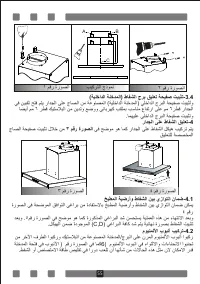
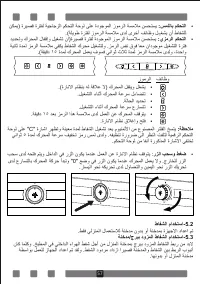
4.1.Leveling the Chimney Hood
If the chimney hood is inclined on one side, the chimney hood can be leveled
with the adjustment screws as shown in
Figure 4
.
Once the balancing is complete, the screws shown in
Figure 5
must be fixed
tightly.
After this, fix the body with one screw through the hole on the body.
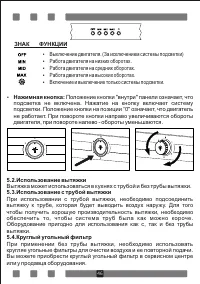
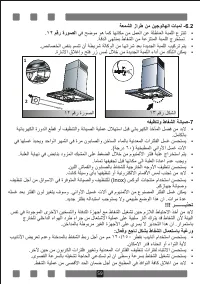
4.2.Mounting the Aluminum Pipe
Place the aluminum pipe on the plastic duct. Place the other end of the pipe
into the air outlet in the kitchen.
Figure 6
Fig 5
Fig 6
Fig 3
Fig 4
Характеристики

Остались вопросы?Не нашли свой ответ в руководстве или возникли другие проблемы? Задайте свой вопрос в форме ниже с подробным описанием вашей ситуации, чтобы другие люди и специалисты смогли дать на него ответ. Если вы знаете как решить проблему другого человека, пожалуйста, подскажите ему :)


