
Вытяжки Kuppersberg Slimlux S 90 GW - инструкция пользователя по применению, эксплуатации и установке на русском языке. Мы надеемся, она поможет вам решить возникшие у вас вопросы при эксплуатации техники.
Если остались вопросы, задайте их в комментариях после инструкции.
"Загружаем инструкцию", означает, что нужно подождать пока файл загрузится и можно будет его читать онлайн. Некоторые инструкции очень большие и время их появления зависит от вашей скорости интернета.


6
ENGLISH
Cooker hood
TECHNICAL PASSPORT
6. EXTRACTOR HOOD
INSTALLATION INSTRUCTIONS
6.1
This model of the cooker hood
is installed (mounted) on the bottom of
the kitchen closet.
6.2
Remove a cooker hood from the
packing box.
6.3
Check the work of the cooker
hood, connect to the electric mains and
check all its functions.
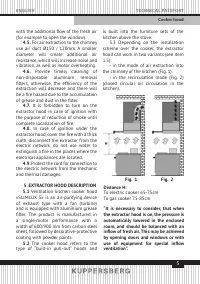
We remind that the height of
installation of a cooker hood over the
electric cookers should be at least
650mm, and above the gas one – not
less than 750mm (Fig. 1).
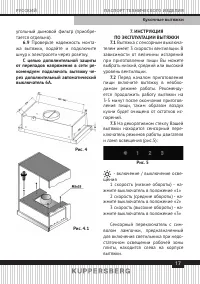
6.4
For mounting, an opening for
air outlet and exhaust pipe connection
must be installed and equipped.
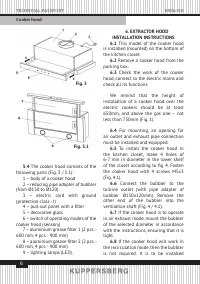
6.5
To install the cooker hood in
the kitchen closet, make 4 holes of
6-7 mm in diameter in the lower shelf
of the closet according to fig. 4. Fasten
the cooker hood with 4 screws M5х3
(Fig. 4.1).
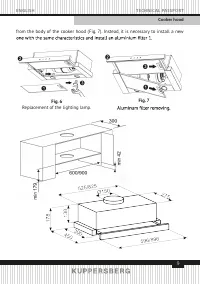
6.6
Connect the bubbler to the
turbine outlet (with pipe adapter of
bubbler Ø150x120mm). Remove the
other end of the bubbler into the
ventilation shaft (Fig. 4 / 4.1).
6.7
If the cooker hood is to operate
in air exhaust mode, mount the bubbler
of the selected diameter in accordance
with the instructions, ensuring that it is
tight.
6.8
If the cooker hood will work in
the recirculation mode, then the bubbler
is not required. It is to be installed
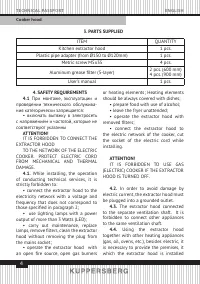
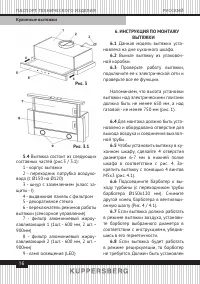
5.4
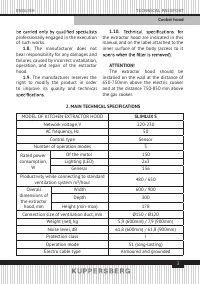
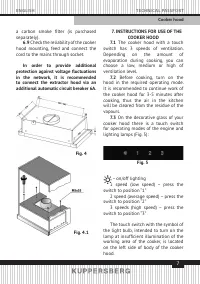
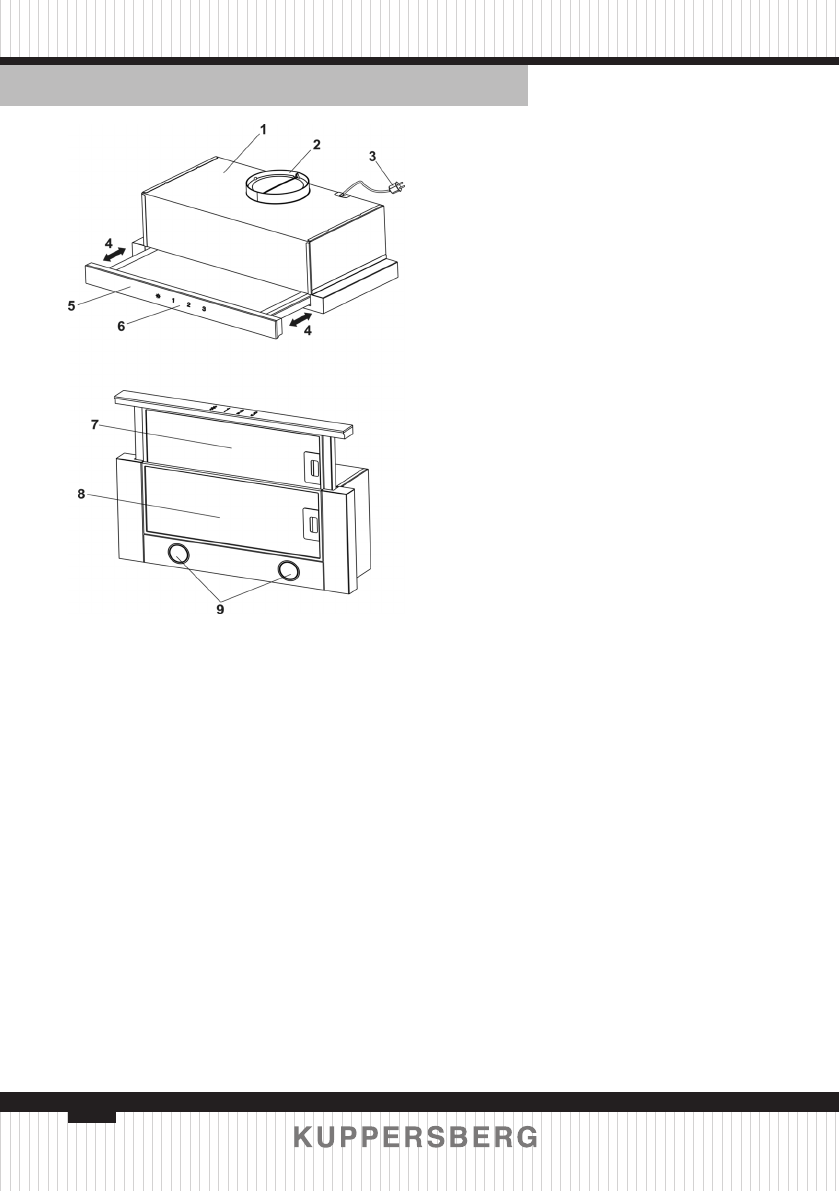
The cooker hood consists of the
following parts (Fig. 3 / 3.1):
1 – body of a cooker hood
2 – reducing pipe adapter of bubbler
(from Ø150 to Ø120)
3 – electric cord with ground
(protection class - I)
4 – pull-out panel with a filter
5 – decorative glass
6 – switch of operating modes of the
cooker hood (sensory)
7 – aluminium grease filter 1 (2 pcs. -
600 mm, 4 pcs. - 900 mm)
8 – aluminium grease filter 2 (2 pcs. -
600 mm, 4 pcs. - 900 mm)
9 – lighting lamps (LED).
Fig. 3
Fig. 3.1
Содержание
- 12 «KUPPERSBERG»; EN
- 13 ОСНОВНЫЕ
- 14 ТРЕБОВАНИЯ БЕЗОПАСНОСТИ
- 16 ИНСТРУКЦИЯ ПО МОНТАЖУ
- 17 С целью дополнительной защиты
- 18 ИНСТРУКЦИИ ПО УХОДУ
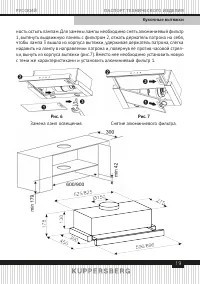
- 19 Рис
- 20 Производители; Сделано в Европе; Импортер; ООО «Эм
- 22 О О О; УС ТА Н О В КА, ГА РА Н Т И Й Н О Е И П О С Т ГА РА Н Т И Й Н О Е О Б С Л УЖ И В А Н И Е; Телефон горячей линии Kuppersberg:; Полный список авторизованных сервисных центров Kuppersberg; УСЛОВИЯ ГАРАНТИИ


