
Вытяжки Kuppersberg Slimlux II 60 C - инструкция пользователя по применению, эксплуатации и установке на русском языке. Мы надеемся, она поможет вам решить возникшие у вас вопросы при эксплуатации техники.
Если остались вопросы, задайте их в комментариях после инструкции.
"Загружаем инструкцию", означает, что нужно подождать пока файл загрузится и можно будет его читать онлайн. Некоторые инструкции очень большие и время их появления зависит от вашей скорости интернета.
5
ENGLISH
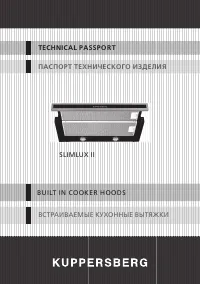
TECHNICAL PASSPORT
Integrated extractor hood SLIMLUX II
potential harm to human health and the
environment. The symbol of a rubbish
container superimposed by a diagonal
cross should be put on all such products
to remind people of their obligation to
have such items collected separately.
Consumers should contact their local
authorities and request information on
the appropriate places to leave their old
home electrical appliances.
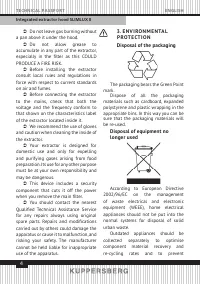
Before disposing of your appliance,
render it non-usable by pulling out the
power cable, cutting this and disposing
of it.
4. B R I E F D E S C R I P T I O N
This device is designed for purifying
the air from smoke, combustion gases,
vapors, odors and other undesirable
impurities which are formed during the
cooking process and accumulate in the
kitchen.
5. M A I N T E N A N C E A N D
I N S TA L L AT I O N M A N U A L
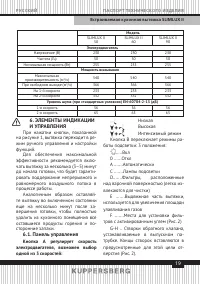
5.1. Safety Installation
The lower part of the extractor
must be located at a minimum height
of 60 cm above the hob for electric
cookers and 70 cm for gas cookers. If
the instructions of a gas cooker indicate
a greater distance these must be
observed.
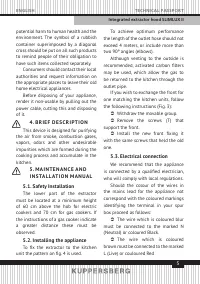
5.2. Installing the appliance
To fi x the extractor to the kitchen
unit the pattern on fi g. 4 is used.
To achieve optimum performance
the length of the outlet hose should not
exceed 4 meters, or include more than
two 90º angles (elbows).
Although venting to the outside is
recommended, activated carbon fi lters
may be used, which allow the gas to
be returned to the kitchen through the
outlet pipe.
If you wish to exchange the front for
one matching the kitchen units, follow
the following instructions (Fig. 3):
Withdraw the movable group.
Remove the screws (T) that
support the front.
Install the new front fi xing it
with the same screws that held the old
one.
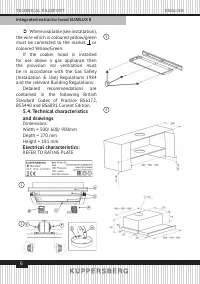
5.3. Electrical connection
We recommend that the appliance
is connected by a qualifi ed electrician,
who will comply with local regulations.
Should the colour of the wires in
the mains lead for the appliance not
correspond with the coloured markings
identifying the terminal in your spur
box proceed as follows:
The wire which is coloured blur
must be connected to the marked N
(Neutral) or coloured Black.
The wire which is coloured
brown must be connected to the marked
L (Live) or couloured Red
Содержание
- 15 ОКРУЖАЮЩЕЙ СРЕДЫ
- 16 К РАТ КО Е О П И СА Н И Е
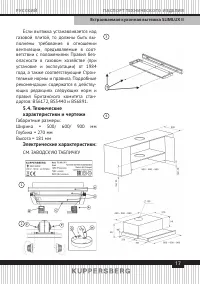
- 17 характеристики и чертежи
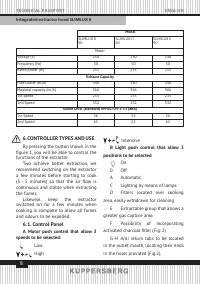
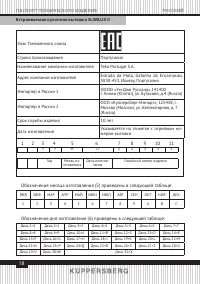
- 18 Обозначения дня изготовления (6) приведены в следующей таблице:
- 19 ЭЛЕМЕНТЫ ИНДИКАЦИИ; Кнопка А регулирует скорость
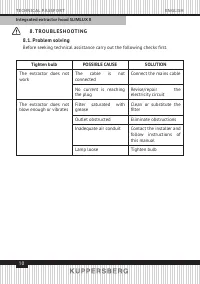
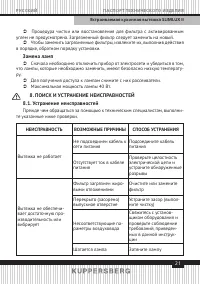
- 21 ПОИСК И УСТРАНЕНИЕ НЕИСПРАВНОСТЕЙ; те указанные ниже проверки.; Замена ламп; Для получения доступа к лампам снимите с них рассеиватели.
- 22 УС ТА Н О В КА, ГА РА Н Т И Й Н О Е И П О С Т ГА РА Н Т И Й Н О Е О Б С Л УЖ И В А Н И Е; Телефон горячей линии Kuppersberg:; Полный список авторизованных сервисных центров Kuppersberg; УСЛОВИЯ ГАРАНТИИ


